BEST RECIPE for Strawberry Crunch Cheesecake Tacos – Sweet, Crunchy & Creamy Dessert
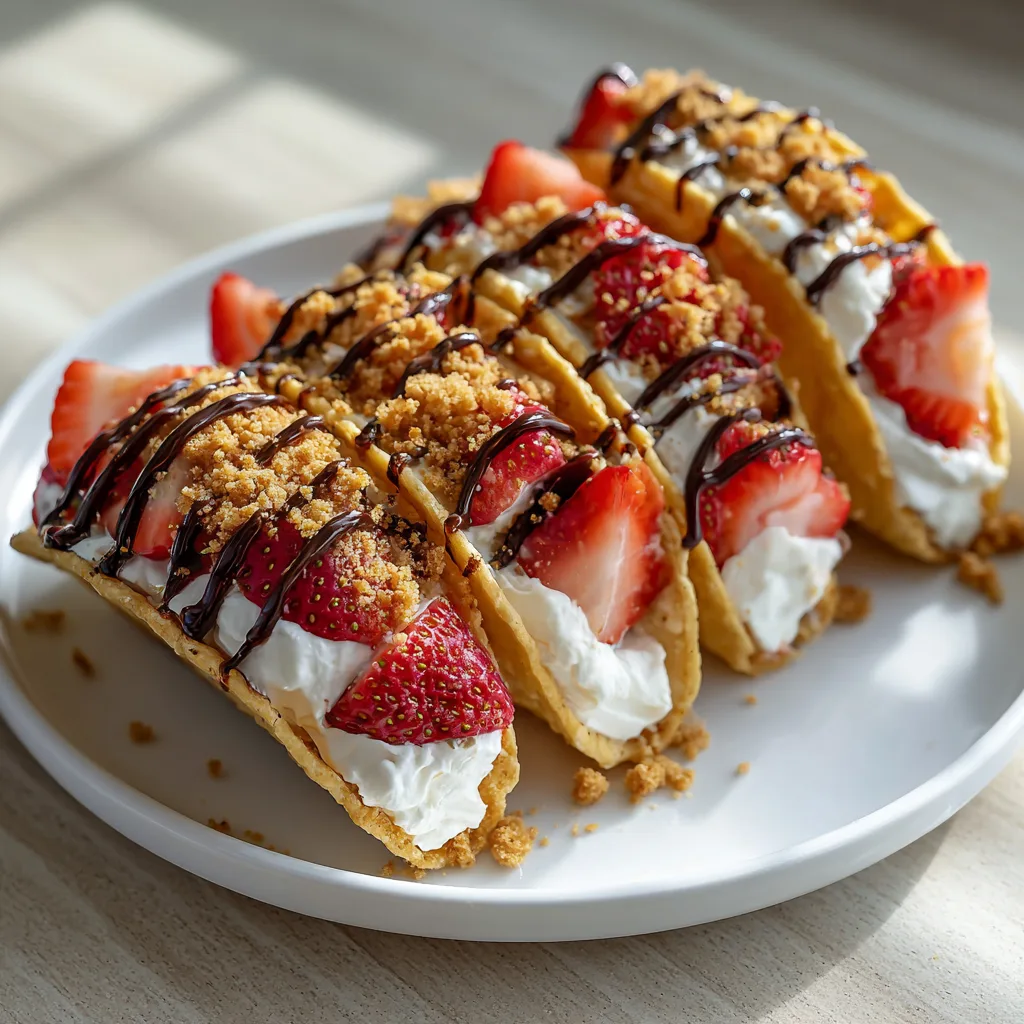
Who says tacos have to be savory? Enter Strawberry Crunch Cheesecake Tacos — a playful twist on classic cheesecake that transforms it into a crunchy, handheld dessert. These dessert tacos combine buttery, crisp taco shells with creamy cheesecake filling, juicy fresh strawberries, and a delightful crunch topping for a dessert that’s fun to make, irresistible to eat, and perfect for any occasion — from birthday parties to summer gatherings.
This recipe is designed to balance textures and flavors: the crunchy taco shell provides a satisfying bite, the cheesecake filling is rich yet light, and the fresh strawberries add natural sweetness and a burst of freshness. With easy-to-follow steps and simple ingredients, you can whip up a dessert that looks impressive but takes surprisingly little effort.
Whether you’re hosting a backyard party, planning a festive dessert table, or just craving a decadent treat, Strawberry Crunch Cheesecake Tacos will impress family, friends, and even your inner dessert enthusiast.
Ingredients
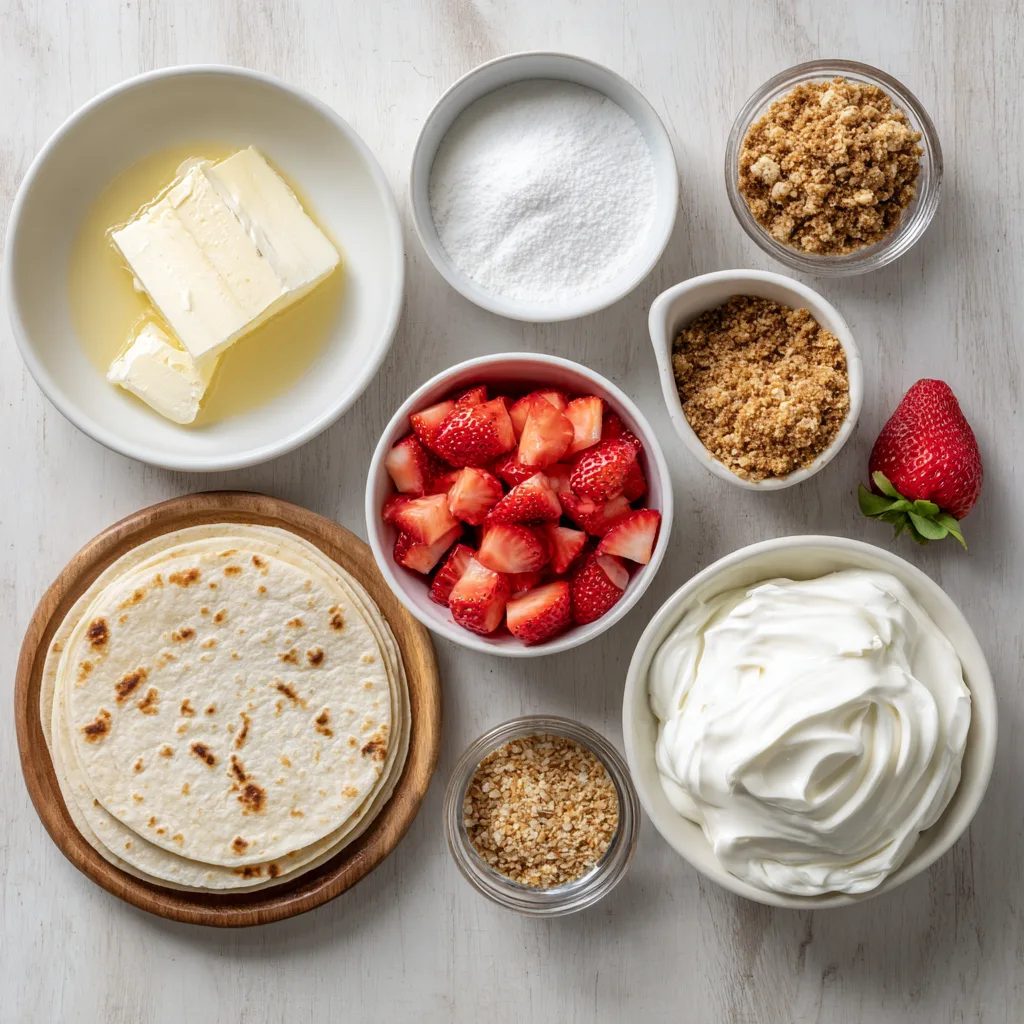
- Taco Shells
- 8 small flour tortillas
- 2 tbsp unsalted butter, melted
- 2 tbsp granulated sugar
- 1 tsp ground cinnamon
- Cheesecake Filling
- 8 oz cream cheese, softened
- 1/2 cup powdered sugar
- 1 tsp vanilla extract
- 1/2 cup heavy cream, whipped to soft peaks
- Toppings
- 1 cup fresh strawberries, diced
- 1/2 cup graham cracker crumbs
- 1/4 cup chopped nuts (optional)
- Chocolate drizzle (optional)
- Whipped cream for garnish
Instructions
- Prepare the taco shells.
Preheat oven to 350°F (175°C). Brush each tortilla with melted butter, then sprinkle with sugar and cinnamon. Place on a baking sheet and bake for 8–10 minutes until lightly golden and crisp. Allow to cool, shaping gently into taco shells using an inverted muffin tin or taco mold. - Make the cheesecake filling.
In a medium bowl, beat the softened cream cheese with powdered sugar and vanilla extract until smooth and creamy. In a separate bowl, whip the heavy cream until soft peaks form, then fold it gently into the cream cheese mixture until fully combined and fluffy. - Assemble the tacos.
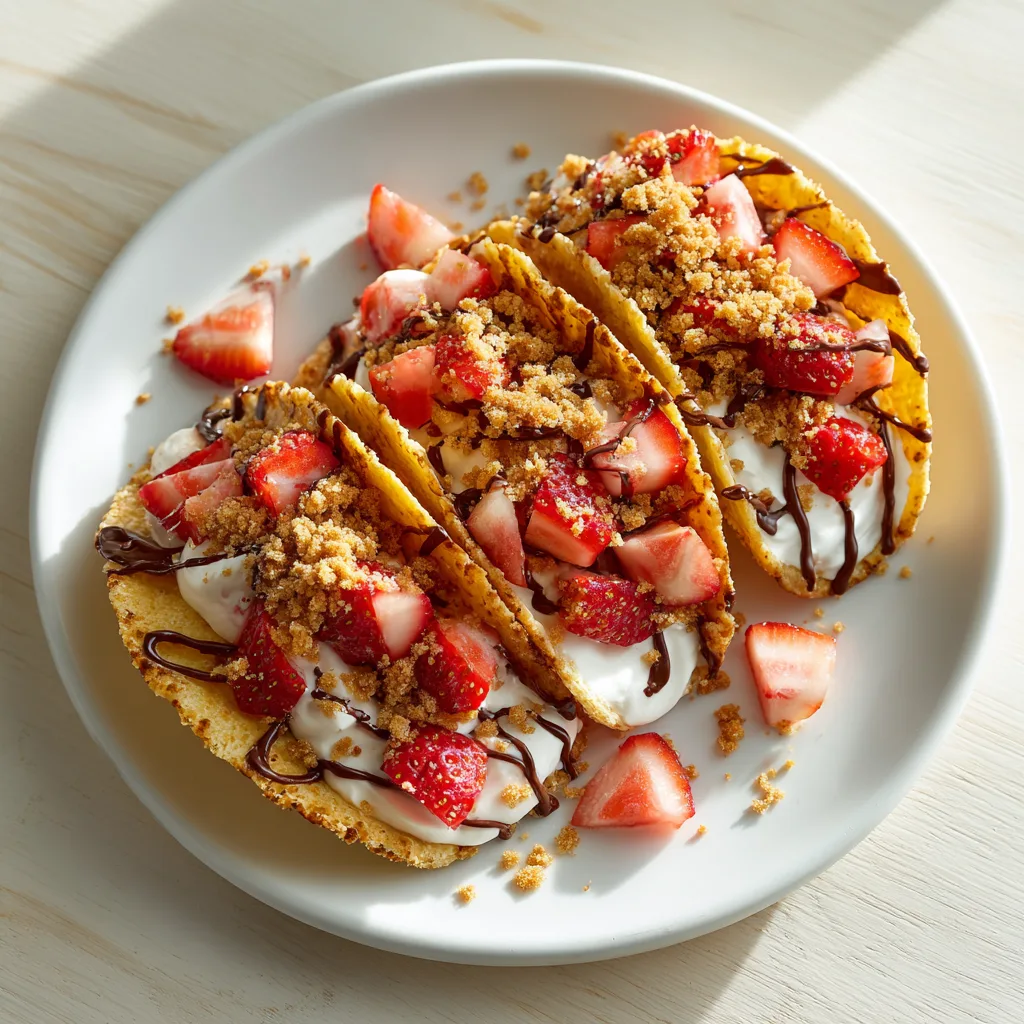
Spoon the cheesecake filling into each cooled taco shell. Fill generously, leaving a little space at the top for toppings. - Add strawberries and crunch.
Sprinkle diced strawberries on top of the filling. Add graham cracker crumbs for crunch and chopped nuts if desired. Drizzle with chocolate if using. - Chill before serving.
Place the assembled cheesecake tacos in the refrigerator for at least 30 minutes to set slightly. This ensures the filling holds its shape when served. - Garnish and serve.
Just before serving, top with a dollop of whipped cream and an extra sprinkle of graham cracker crumbs or chocolate drizzle for presentation.
Tips for Perfect Dessert Tacos
- Crispier shells: Bake a few minutes longer for extra crunch, but watch carefully to prevent burning.
- Cheesecake consistency: Ensure cream cheese is fully softened for a smooth filling.
- Fruity variations: Replace strawberries with raspberries, blueberries, or diced peaches for seasonal twists.
- Make ahead: Shells can be baked in advance and stored in an airtight container for up to 2 days. Assemble just before serving to keep shells crisp.
Serving Suggestions
- Serve individually on small dessert plates.
- Pair with a scoop of vanilla ice cream for an indulgent treat.
- Great for summer parties, bridal showers, or kids’ birthday parties.
- Mini version: Use smaller tortillas for bite-sized taco desserts.
Storage
- Refrigerator: Store unassembled shells separately. Cheesecake filling can be kept in a sealed container for up to 3 days.
- Freezer: Filling can be frozen, but best served fresh. Avoid freezing assembled tacos as shells may become soggy.
Variations
- Chocolate Strawberry Crunch Tacos: Add chocolate cheesecake filling and cocoa powder to the cream cheese mixture.
- Nutty Caramel Tacos: Mix caramel sauce and chopped pecans into the filling before assembling.
- Tropical Twist: Replace strawberries with mango and pineapple for a tropical cheesecake taco.

Strawberry Crunch Cheesecake Tacos
Ingredients
Equipment
Method
- Preheat oven to 350°F (175°C). Brush tortillas with melted butter and sprinkle with sugar and cinnamon.
- Place tortillas on a baking sheet and bake 8–10 minutes until lightly golden and crisp. Shape into taco shells using an inverted muffin tin or taco mold.
- In a bowl, beat cream cheese with powdered sugar and vanilla until smooth. Fold in whipped cream gently to form the cheesecake filling.
- Spoon cheesecake filling into cooled taco shells, filling generously but leaving space for toppings.
- Top with diced strawberries, graham cracker crumbs, and chopped nuts if using. Drizzle with chocolate if desired.
- Chill assembled tacos in refrigerator for at least 30 minutes to set slightly.
- Garnish with whipped cream and extra toppings just before serving.