
Burnt Basque Cheesecake in a Loaf Pan That’s Rustic: A Perfectly Indulgent Dessert
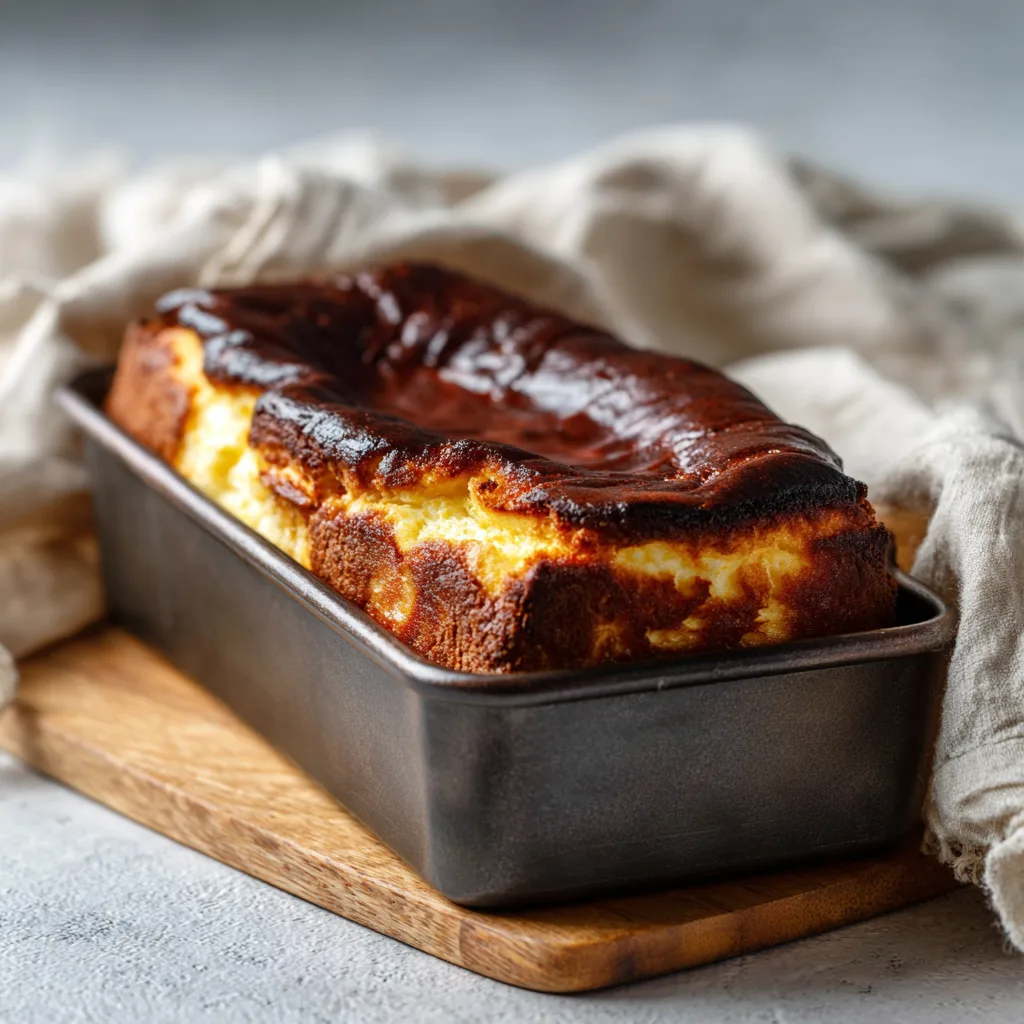
Few desserts have captured the hearts of dessert lovers around the world quite like the Burnt Basque cheesecake. Known for its creamy interior and caramelized, slightly charred top, this dessert is deceptively simple yet stunningly flavorful. Traditionally baked in a round pan, today we’re taking it to a rustic, approachable level by baking it in a loaf pan. Not only does this create a charmingly rustic shape, but it also gives you convenient slices perfect for serving, gifting, or simply indulging yourself.
Whether you’re a seasoned baker or a beginner craving a foolproof, decadent dessert, this loaf-style Basque cheesecake will deliver on all fronts—luxurious texture, rich flavor, and a visually stunning rustic appearance.
The Allure of Basque Cheesecake
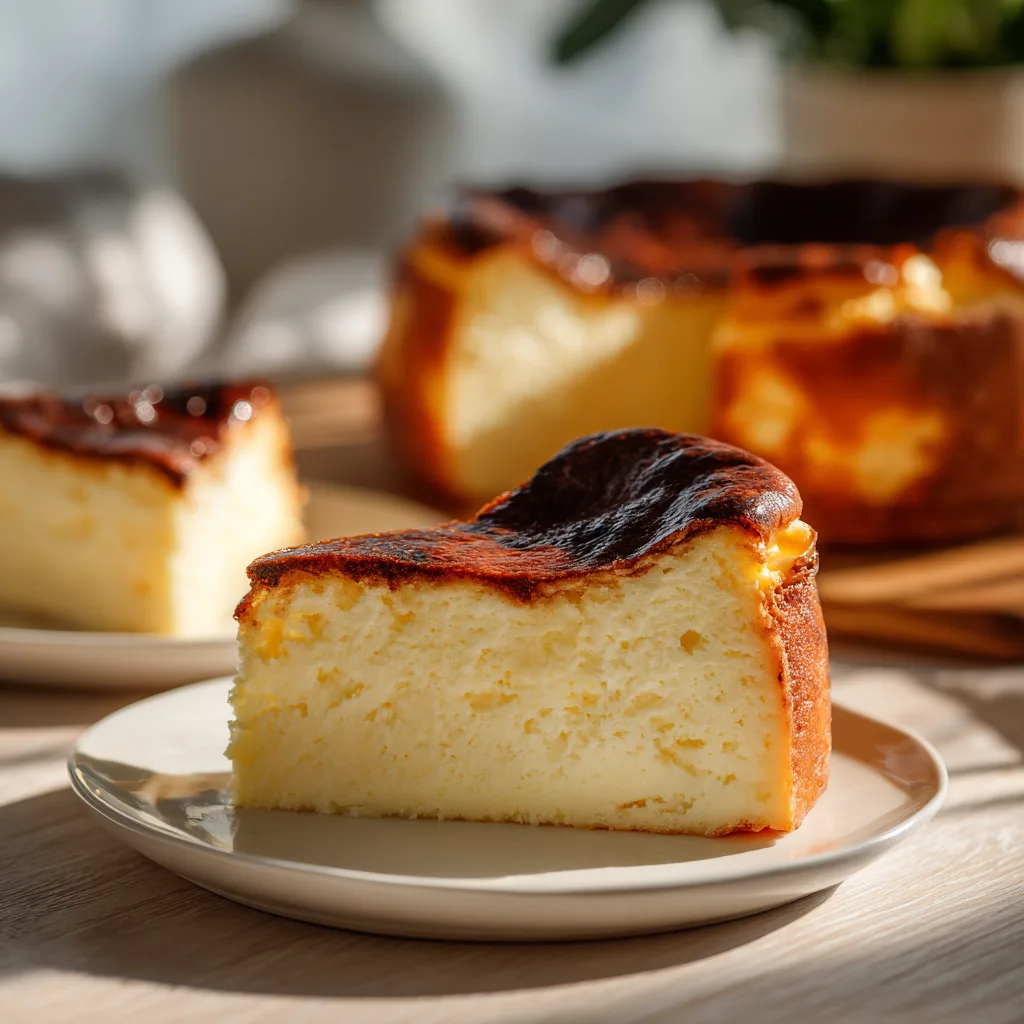
The Burnt Basque cheesecake originated in San Sebastián, a city in the Basque region of Spain. Unlike traditional cheesecakes, this version is intentionally baked at a high temperature, creating a deeply caramelized exterior that almost appears burned. The inside, however, remains soft, creamy, and custard-like, creating a beautiful contrast of textures.
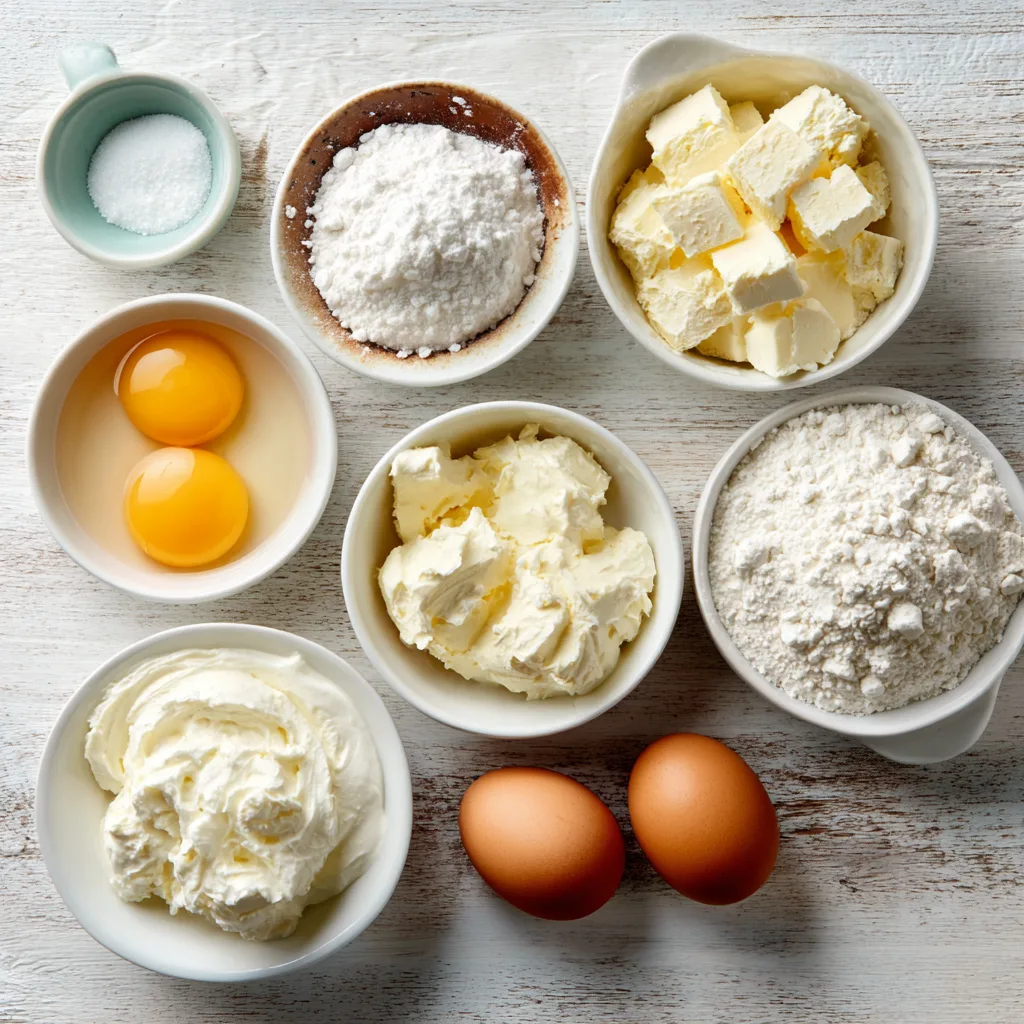
What sets the Basque cheesecake apart is its simplicity and sophistication. With just a few quality ingredients—cream cheese, sugar, eggs, cream, and a touch of flour—you get a dessert that looks complex but is straightforward to prepare. The rustic loaf version takes this simplicity and transforms it into something more accessible for home bakers who may not have a round springform pan.
Ingredients: Quality Matters
For the perfect rustic burnt Basque cheesecake, ingredient quality is crucial:
- Cream Cheese: Use full-fat cream cheese at room temperature. This ensures a smooth, creamy texture and rich flavor. Avoid low-fat versions, which can make the cheesecake less creamy and slightly tangy.
- Heavy Cream: Adds luxurious richness to the filling. Full-fat cream is essential for the classic creamy interior.
- Granulated Sugar: Sweetens the cheesecake while helping it brown beautifully during baking.
- Eggs: Eggs provide structure and creaminess. Use fresh, large eggs at room temperature to prevent curdling.
- Flour: A small amount of all-purpose flour stabilizes the filling without altering the creamy texture.
- Vanilla Extract: Enhances flavor and adds warmth.
- Salt: Just a pinch balances sweetness and intensifies the creamy flavors.
Optional ingredients like lemon zest or a splash of liqueur (such as Grand Marnier) can add a sophisticated twist, but even the classic version is divine on its own.
Why Bake in a Loaf Pan?
Baking this cheesecake in a loaf pan has several advantages:
- Rustic Presentation: The loaf pan gives the cheesecake a cozy, homemade appearance. The slightly sloped, caramelized top and imperfect edges make it visually charming and inviting.
- Convenient Slicing: Unlike round cakes, slices from a loaf pan are uniform and easy to serve. Perfect for brunch, afternoon tea, or gifting.
- Even Baking: The straight sides of the loaf pan help with consistent baking, minimizing risk of undercooked centers while maintaining a beautifully creamy interior.
Additionally, lining the loaf pan with parchment paper ensures the cheesecake releases easily and adds to the rustic, artisanal look.
Preparing the Cheesecake: Step by Step
1. Preparing the Loaf Pan
Begin by preheating your oven to a high temperature, typically around 425°F (220°C). While the oven heats, line a 9×5-inch loaf pan with parchment paper, leaving some overhang on the sides. This will make it easy to lift the cheesecake out once baked. Don’t skimp on parchment—it’s essential for preventing sticking and giving your cheesecake its rustic edges.
2. Creaming the Cheese and Sugar
In a large mixing bowl, combine the room-temperature cream cheese and sugar. Use a hand mixer or stand mixer to beat until smooth and creamy. Scrape down the sides of the bowl frequently to ensure there are no lumps. This step is key to a silky texture. Overbeating is not necessary; just mix until smooth and incorporated.
3. Adding Eggs and Cream
Next, beat in the eggs one at a time. This gradual incorporation prevents the batter from curdling and ensures even texture. Once the eggs are combined, mix in the heavy cream. The mixture should be velvety, slightly thick, and pourable. Finally, fold in a small amount of flour, a pinch of salt, and vanilla extract to stabilize the batter and enhance flavor.
4. Pouring and Baking
Pour the batter into the prepared loaf pan, smoothing the top gently with a spatula. Don’t worry about air bubbles—they will settle as it bakes. Bake the cheesecake at high heat for approximately 45–55 minutes. The top should turn a deep golden brown with darker spots, reminiscent of the traditional “burnt” Basque cheesecake. The center should still jiggle slightly when shaken—it will continue to set as it cools.
Achieving the Perfect Burnt Top
The signature feature of this cheesecake is its caramelized, slightly burnt top. The key to achieving this without overbaking the interior is high heat and careful timing.
- High Temperature: 425–450°F (220–230°C) encourages browning.
- Pan Placement: Bake in the center rack for even heat distribution.
- Monitoring: Keep a close eye in the final 10 minutes to ensure the top doesn’t become overly charred. A few dark spots are desirable and give that rustic appearance.
Remember, the caramelization adds depth and flavor, creating a contrast to the creamy interior.
Cooling and Serving
Once baked, remove the cheesecake from the oven and let it cool in the pan for 15–20 minutes. Then, lift it out using the parchment overhang and transfer it to a wire rack. Cool to room temperature before slicing. For best results, chill in the refrigerator for 2–3 hours; this firms up the cheesecake and makes slicing easier while preserving that creamy texture.
Serve slices as-is, or for extra indulgence, top with:
- Whipped cream or mascarpone
- Fresh berries or berry compote
- A drizzle of caramel or chocolate sauce
- Toasted nuts for added texture
Variations to Elevate Your Cheesecake
While the classic rustic Basque flavor is incredible, here are a few variations to try:
- Chocolate Swirl Basque Cheesecake: Swirl in melted dark chocolate or Nutella before baking for a rich, marbled effect.
- Coffee-Infused Cheesecake: Add a tablespoon of espresso powder to the batter for a subtle coffee flavor that pairs beautifully with the caramelized top.
- Citrus Zest Cheesecake: Fold in lemon or orange zest for a bright, aromatic twist.
- Nutty Rustic Cheesecake: Sprinkle toasted almonds, hazelnuts, or pecans on top after baking for added crunch and flavor.
- Spiced Basque Cheesecake: Incorporate cinnamon, cardamom, or nutmeg for a cozy, autumnal version.
These variations allow for creativity while maintaining the rustic loaf shape and creamy texture that make this dessert so special.
Pairing Suggestions
Burnt Basque cheesecake is indulgent on its own, but pairing it with complementary flavors elevates the experience:
- Coffee or Espresso: The bitterness balances the rich sweetness.
- Dessert Wine: A late-harvest Riesling or Sauternes complements the caramel notes beautifully.
- Tea: Earl Grey or chai adds aromatic complexity.
- Fruit Compote: Raspberry, cherry, or blueberry compotes add a tangy contrast that highlights the cheesecake’s creamy richness.
Serving your cheesecake with these pairings makes it perfect for a brunch spread, dessert table, or special occasion.

Burnt Basque Cheesecake in a Loaf Pan
Ingredients
Equipment
Method
- Preheat oven to 425°F (220°C). Line a 9×5-inch loaf pan with parchment paper, leaving overhang on sides.
- In a large bowl, beat cream cheese and sugar until smooth and creamy.
- Add eggs one at a time, mixing gently until fully incorporated.
- Mix in heavy cream, vanilla extract, flour, and salt until smooth and pourable.
- Pour batter into prepared loaf pan and smooth the top.
- Bake for 45–55 minutes until the top is deeply caramelized and the center slightly jiggles.
- Allow cheesecake to cool in the pan for 15–20 minutes, then lift out using parchment overhang.
- Cool to room temperature, then refrigerate for 2–3 hours before slicing.
- Serve as-is or with optional toppings like whipped cream, berries, or caramel drizzle.
Notes
Common Mistakes and How to Avoid Them
Even though this recipe is simple, a few pitfalls can affect the final result:
- Curdling Batter: Ensure eggs and cream are at room temperature and incorporate gradually.
- Undercooked Interior: High heat is key, but monitor closely. The center should jiggle slightly, not be liquid.
- Overbaked Top: A few dark spots are desirable, but too much browning can make the top taste bitter. Rotate the pan if your oven has hot spots.
- Difficulty Slicing: Chill for at least 2 hours before slicing to avoid crumbling.
Following these tips ensures a perfect rustic cheesecake every time.
Storing and Freezing
Burnt Basque cheesecake stores beautifully:
- Refrigerator: Store in an airtight container for up to 4–5 days. Slices can be individually wrapped for easy serving.
- Freezing: Wrap tightly in parchment and aluminum foil, then freeze for up to 2 months. Thaw overnight in the refrigerator before serving.
Freezing is a great option if you want to prepare the cheesecake in advance for events or holidays.
Why This Cheesecake Feels Special
What makes the Burnt Basque cheesecake so universally loved is the contrast of textures and flavors. The caramelized exterior provides a slightly bitter, toasty flavor that balances the ultra-creamy, rich interior. The rustic loaf shape gives it a homemade, artisanal appearance that makes serving feel personal and intimate. Every slice feels indulgent without being overly fussy—this is the perfect dessert for both casual and elegant occasions.
Serving Ideas for Gatherings
Because it’s made in a loaf pan, this cheesecake is ideal for sharing:
- Brunch Gatherings: Pair with coffee, pastries, and fresh fruit for a sophisticated spread.
- Holiday Dessert Tables: Sliced portions are easy for guests to serve themselves.
- Gift Giving: Wrap slices in parchment and tie with twine for edible gifts.
- Special Occasions: Birthdays, anniversaries, or casual dinner parties can all be elevated with this rustic dessert.
Its simplicity and elegance make it versatile for any setting.
Conclusion: Rustic, Creamy, and Memorable
The Burnt Basque Cheesecake in a Loaf Pan is a testament to the beauty of simplicity. With minimal ingredients, straightforward steps, and a rustic, imperfect charm, it delivers extraordinary flavor and creamy decadence in every bite. From its caramelized top to its custardy interior, this cheesecake is perfect for indulgent evenings, special occasions, or simply satisfying a sweet craving.
Whether you stick to the classic recipe or experiment with chocolate, coffee, citrus, or nuts, this cheesecake is a crowd-pleaser that’s sure to impress. Its rustic loaf shape makes serving easy, and the slightly burnt exterior adds a dramatic, gourmet flair to an otherwise simple dessert.
So grab a loaf pan, preheat your oven, and get ready to bake a cheesecake that’s creamy, indulgent, and unforgettable—your rustic Burnt Basque masterpiece awaits.