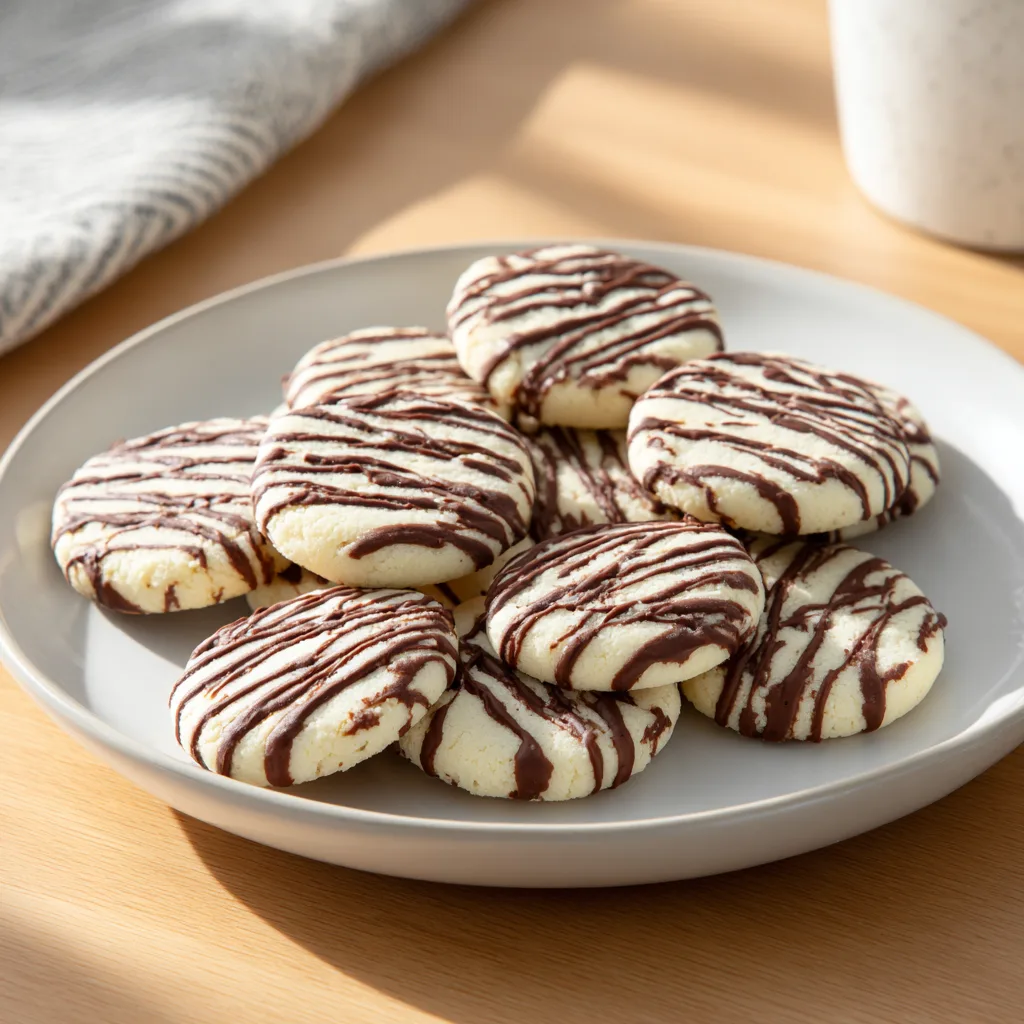
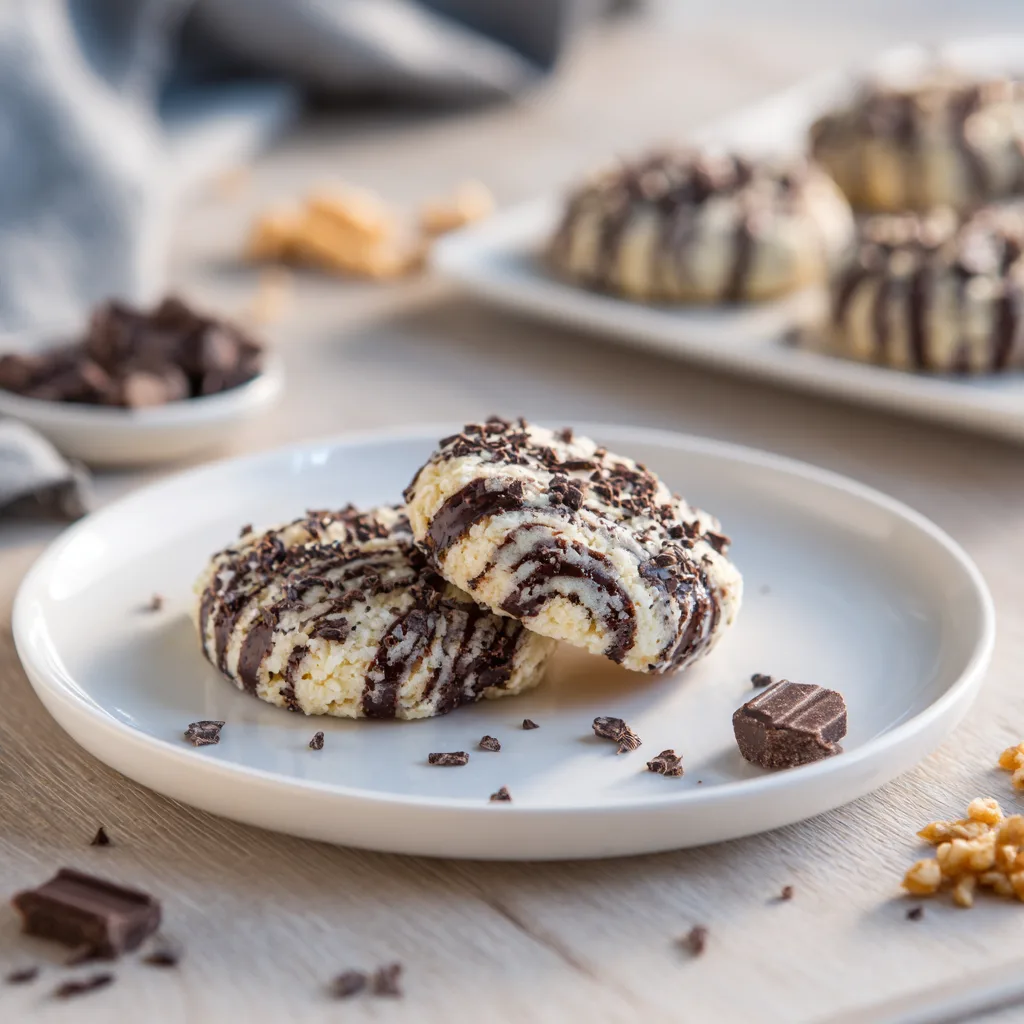
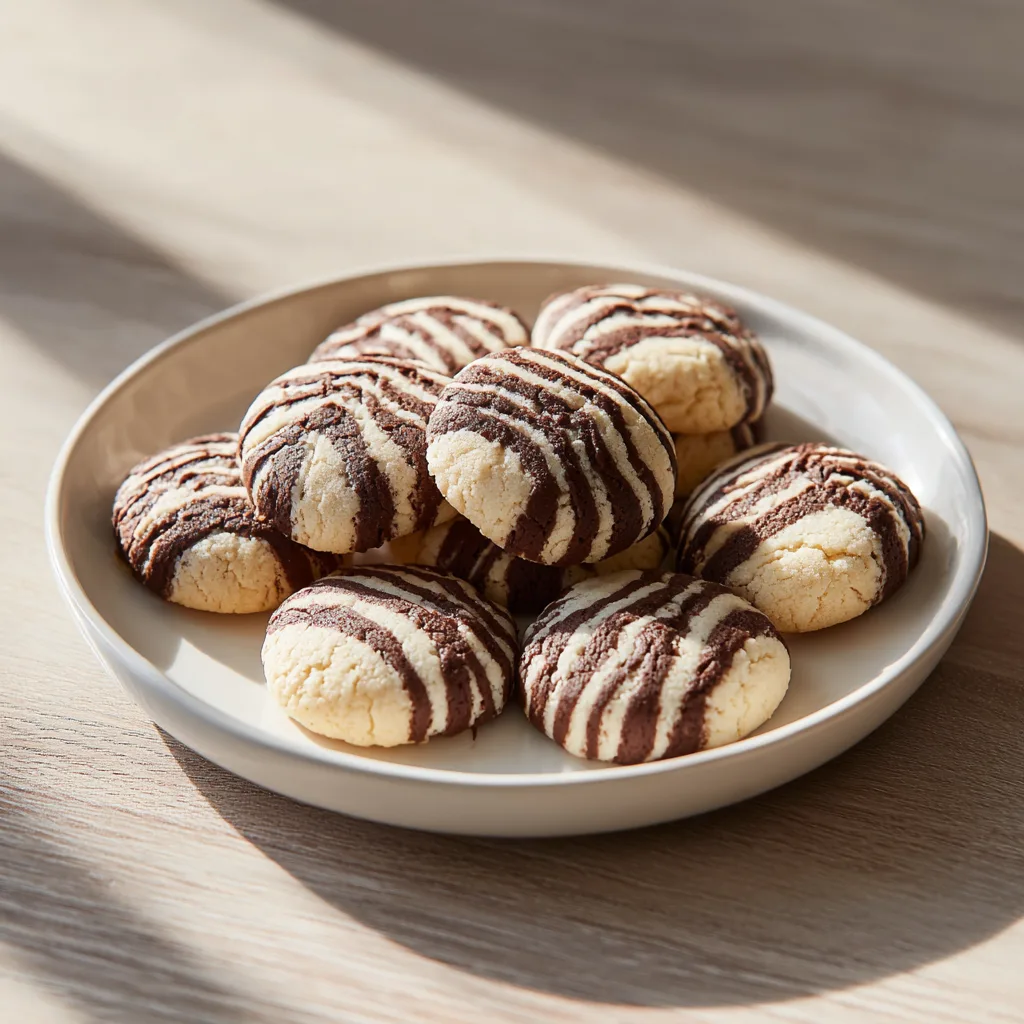
Irresistible Zebra Cookies – A Fun & Chewy Chocolate-Vanilla Delight
Zebra Cookies are one of those treats that are impossible not to love. Their stunning black-and-white marbled stripes immediately catch your eye, while their soft, chewy texture and rich chocolate-vanilla flavor win over taste buds. These cookies are perfect for kids’ parties, holidays, or a fun weekend baking project, bringing creativity and joy to your dessert table.
While simple in ingredients, their visual appeal makes them look bakery-level professional, even if you’re a beginner baker. The combination of chocolate and vanilla dough creates a fun, marbled pattern reminiscent of a zebra’s stripes — hence the name.
The History and Fun Facts of Zebra Cookies
Marbled desserts have a long tradition in baking, particularly in cakes and cookies. The zebra effect was popularized in European and American home baking in the mid-20th century, often used in cakes, pound cakes, and sweet breads. These cookies take that concept to a bite-sized, portable, and kid-friendly version, making them ideal for modern parties or dessert platters.
Interestingly, the art of marbling isn’t just aesthetic; it creates different flavor layers. Chocolate provides a deep, slightly bitter note, while vanilla adds warmth and sweetness. Together, they balance each other perfectly.
Why You’ll Love These Cookies
- Visually Stunning: The black-and-white pattern is eye-catching and looks professional.
- Chewy & Soft: They’re soft on the inside with slightly crisp edges.
- Fun for All Ages: Kids love them, adults appreciate the classic chocolate-vanilla combo.
- Versatile: Great for dessert tables, gifting, or just an afternoon snack.
- Customizable: You can swirl in a hint of coffee, orange zest, or even add chocolate chips.
Ingredients Breakdown and Tips
Butter
Use unsalted butter, softened to room temperature. Butter adds richness and helps the cookie spread slightly while baking, creating chewy edges.
Sugar
- Granulated sugar helps create structure and chewiness.
- Optional: Use half brown sugar for a deeper flavor and slightly softer texture.
Eggs
Eggs bind the dough together, contribute moisture, and add richness. Using large eggs at room temperature is best for smooth mixing.
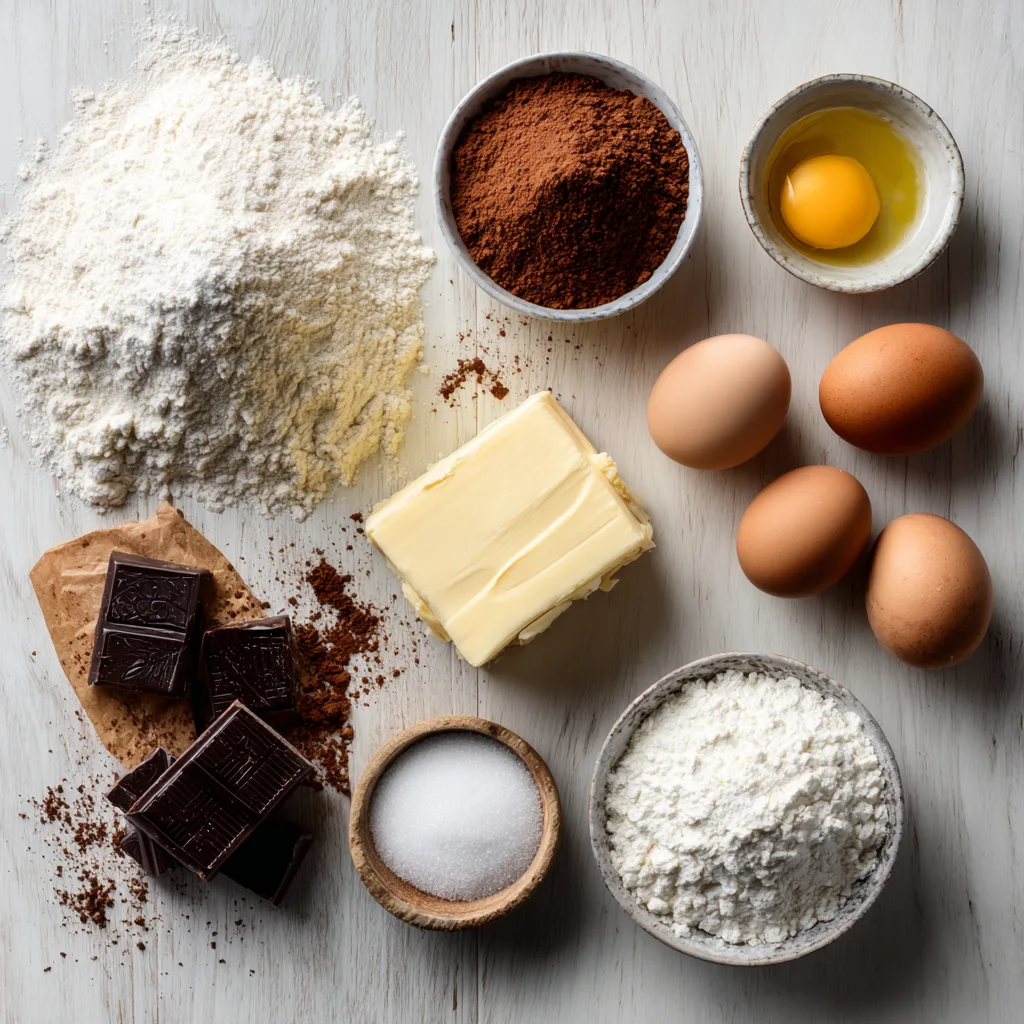
Vanilla Extract
Vanilla enhances the flavor of the vanilla dough and complements chocolate perfectly. Always use pure vanilla extract for best results.
Flour
All-purpose flour is ideal. Sifting it before mixing helps avoid clumps and makes a smoother dough.
Cocoa Powder
Use unsweetened cocoa powder for the chocolate dough. It provides depth of flavor without adding extra sweetness.
Baking Powder & Salt
Baking powder adds lightness, while salt balances sweetness and enhances overall flavor.
Step-By-Step Instructions
Step 1: Preheat & Prep
Preheat your oven to 350°F (175°C). Line baking sheets with parchment paper to prevent sticking.
Step 2: Cream Butter & Sugar
In a large bowl, cream butter and sugar until light and fluffy. This may take 3–5 minutes with a hand or stand mixer. The texture will be pale, airy, and smooth.
Step 3: Add Eggs & Vanilla
Beat in the eggs one at a time, followed by vanilla extract. Mixing slowly ensures a uniform dough.
Step 4: Mix Dry Ingredients
In a separate bowl, whisk together flour, cocoa powder (for chocolate dough), baking powder, and salt.
Step 5: Divide Dough
Split dough into two equal parts. Mix cocoa powder into one half for chocolate dough; leave the other half plain for vanilla dough.
Step 6: Form Dough Logs
Roll chocolate and vanilla dough into equal-sized logs. Each log should be about 1–1.5 inches thick.
Step 7: Twist & Slice
Twist the chocolate and vanilla logs together gently, then slice into ½-inch thick cookies. Each slice should reveal a marbled pattern.
Step 8: Arrange on Baking Sheet
Place slices on the baking sheet 2 inches apart. Cookies will spread slightly while baking.
Step 9: Bake
Bake for 10–12 minutes, until edges are set but centers remain soft. Avoid overbaking to keep the chewy texture.
Step 10: Cool
Transfer cookies to a wire rack to cool completely before serving. Cooling helps maintain their structure and brings out flavor.
Variations & Substitutions
- Chocolate Chips: Add mini chocolate chips for extra chocolatey bites.
- Flavor Twists: Add coffee powder, orange zest, or peppermint extract for themed flavors.
- Nutty Addition: Mix in finely chopped nuts like pecans or walnuts for crunch.
- Gluten-Free: Substitute all-purpose flour with a 1:1 gluten-free flour blend.
- Vegan: Use vegan butter and flax eggs for a plant-based version.
Serving Ideas
- Serve with milk, hot cocoa, or coffee.
- Add to dessert platters with other marbled treats.
- Wrap a few cookies in cellophane bags for gifts.
- Arrange in a tiered cookie stand for parties.
Irresistible Zebra Cookies
Ingredients
Equipment
Method
- Preheat oven to 350°F (175°C) and line baking sheets with parchment paper.
- Cream butter and sugar until light and fluffy.
- Add eggs one at a time, then vanilla extract. Mix until combined.
- Whisk together flour, cocoa powder, baking powder, and salt.
- Divide dough in half. Add cocoa powder to one half.
- Roll chocolate and vanilla doughs into logs of equal size.
- Twist the two logs together and cut into ½-inch slices.
- Place slices on prepared baking sheet, spacing 2 inches apart.
- Bake 10–12 minutes until edges are set but center is soft.
- Cool on wire rack before serving.
Storage & Shelf Life
- Room Temperature: Store in an airtight container for up to 5 days.
- Refrigerator: Lasts up to 10 days.
- Freezer: Wrap in parchment and freeze up to 2 months. Thaw at room temperature before serving.
Troubleshooting & FAQ
Q: Why didn’t the cookies spread?
A: The butter may not have been softened enough or dough may have been too cold.
Q: Cookies are flat, not chewy?
A: Bake just until edges are set; remove from oven when centers still look soft.
Q: Chocolate and vanilla didn’t twist properly?
A: Slightly warm dough is easier to twist. Chill if too sticky, then proceed.