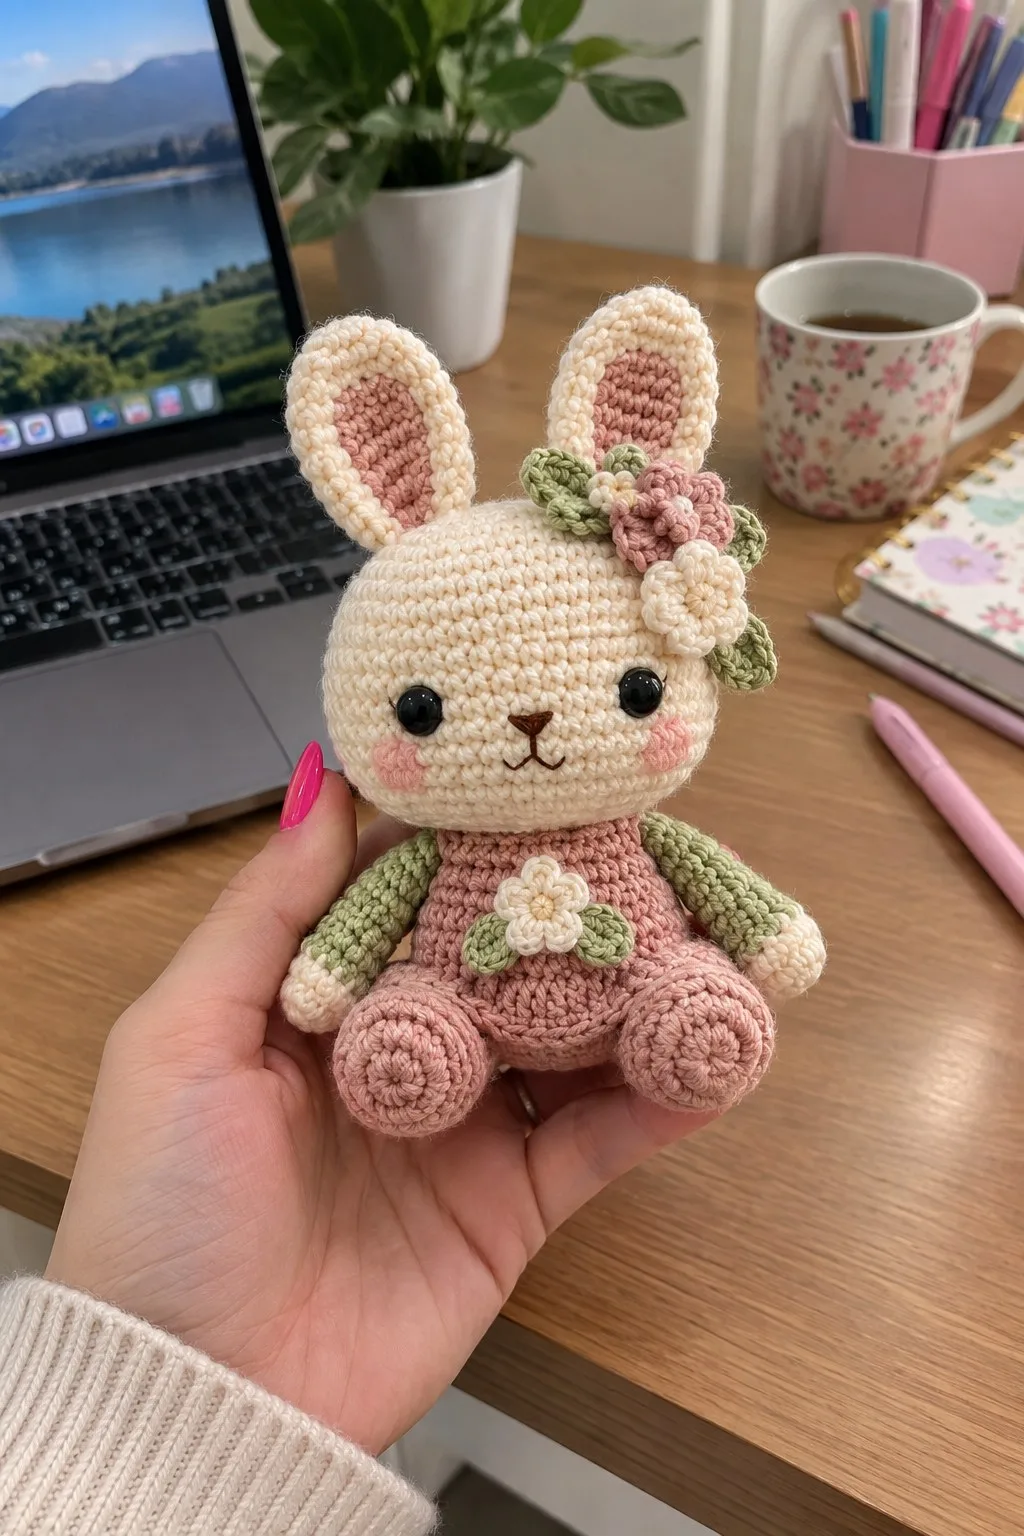
Bring a touch of vintage charm to your home with Flora, a sweet table bunny amigurumi dressed in a dusty-rose dress with sage green accents and tiny floral appliques. This pattern recreates the cuddly round head, long ears with contrast inner, little arms and legs, and layered crochet flowers and leaves. Detailed step-by-step rounds, assembly notes and helpful tips make this a satisfying weekend project.
About This Flora the Table Bunny Amigurumi Pattern
This pattern recreates Flora the Table Bunny in soft cream, dusty rose and sage green – a petite amigurumi with a round head, long inner-contrasted ears, tiny sewn-on flowers and leaf appliques. The bunny sits upright and wears a scalloped dress hem with a tiny flower at the chest. Facial features are embroidered for a sweet expression and soft blush is added to the cheeks.
The pattern includes individual pieces for head, body, arms, legs, ears, tail, leaves and layered flowers plus step-by-step assembly and placement guidance. Colors in the photos use Cream (natural ecru), Dusty Rose, Sage Green and Pale Pink accents.
Why You'll Love This Flora the Table Bunny Amigurumi Pattern
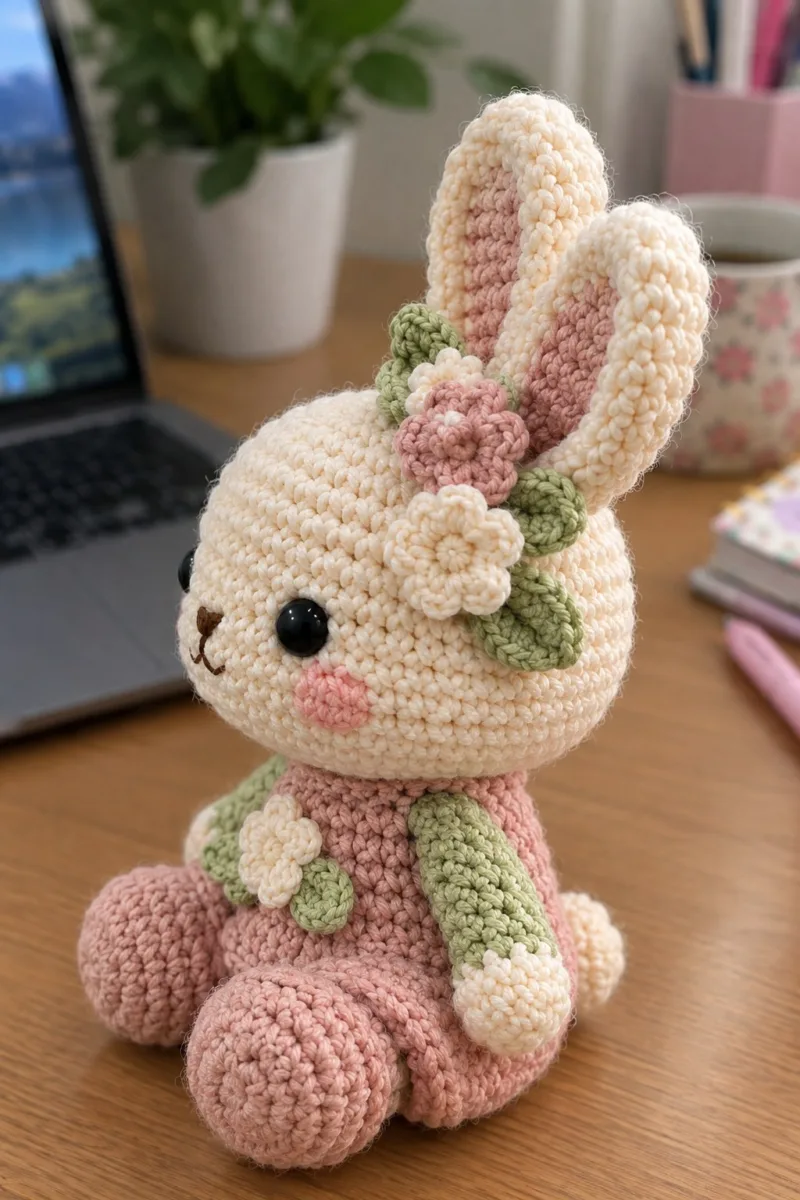
I love this pattern because every part is designed to be charming and compact — from the scalloped dress hem to the tiny layered flowers tucked behind one ear. I also appreciate the clear round-by-round shaping and the gentle color palette which makes Flora feel nostalgic and handmade. Sewing the little leaves and flowers into place is always the most satisfying finishing touch for me.
- Whimsical Buddy – Playful characters full of personality, designed to spark imagination and become cherished playtime favorites.
Switch Things Up
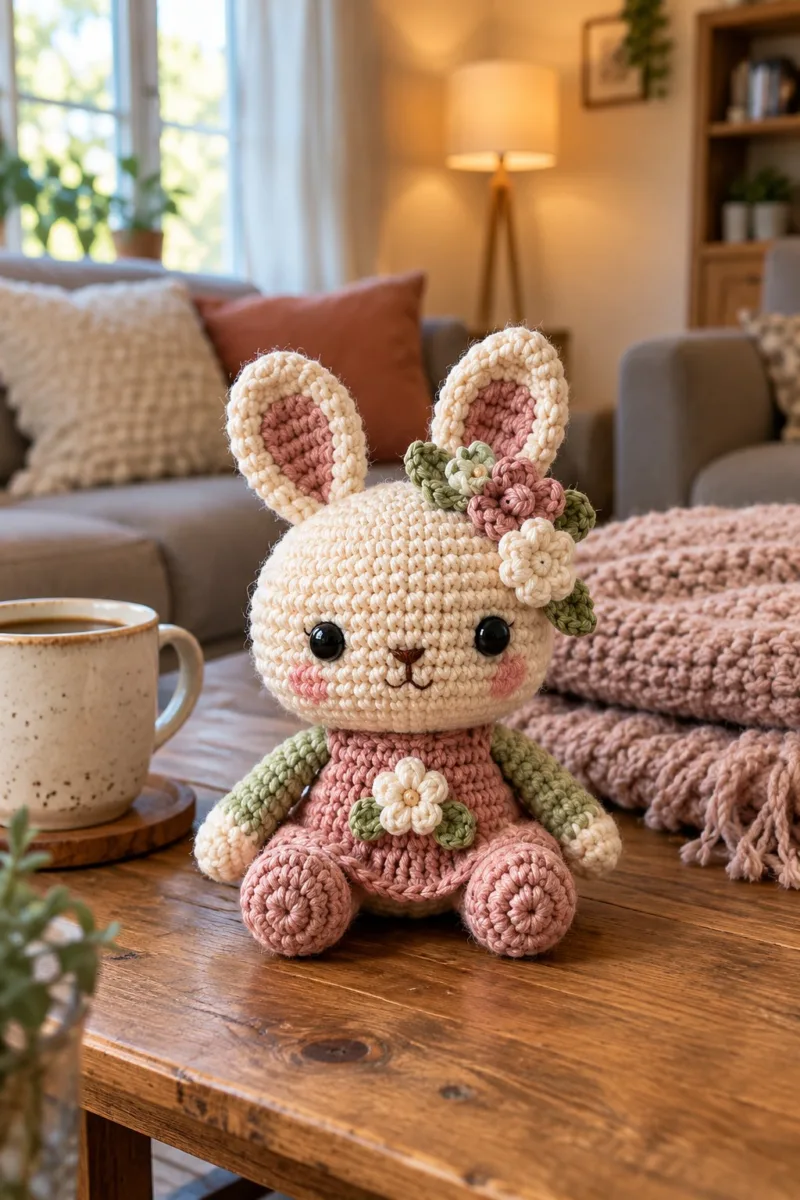
I absolutely loved designing this pattern because it offers so many ways to customize while keeping the sweet, compact structure intact. The basic shapes are approachable but the added flowers and leaves make each doll feel unique.
I often change the palette — using pastel blues and creams for a baby shower gift, or warm autumn tones for a fall display. Try swapping the dress color or making the ears solid for a simpler look. You could also enlarge the pattern by using a chunkier yarn and a larger hook to make a bigger table companion.
For extra personality try embroidering small freckles or changing eye spacing for different expressions. The construction is forgiving: move the ears, flowers or arms slightly until the pose looks right, then sew securely. Have fun making Flora your own!
Materials Needed
Main Fabric
- Worsted weight yarn (#4), approximately 120g in Cream (Natural Ecru) for head, inner hands/feet and small flower centers
- 120g in Dusty Rose (Vintage Rose) for dress, lower legs and feet
- 60g in Sage Green (Soft Moss) for arms, leaves, and accents
- 30-40g Pale Pink (Blush) for inner ear panels and subtle cheek blush
- Small amounts (10-15g each) in Dark Brown (Chocolate) embroidery thread for nose and mouth
Tools Required
- 3.25mm (D) crochet hook for main work
- 2.75mm (C) crochet hook for tighter detail or if you crochet loosely (optional)
- 6 mm safety eyes (x2)
- Polyester fiberfill stuffing
- Yarn needle for sewing and embroidery
- Stitch markers (at least 3-4)
- Scissors
- Pins for assembly
- Optional: thin floral wire for poseable limbs (pre-thread into arms before stuffing)
- Optional: fabric-safe blush or pale pink embroidery thread for cheek color
The Free Pattern
0% complete
Notes
- This pattern uses continuous rounds (spiral) for most pieces unless specified. Use a stitch marker to mark the first stitch of every round and move it up as you go. Tension should be firm to prevent stuffing showing. Colors used in the example photos: Cream, Dusty Rose, Sage Green, Pale Pink; adjust colors as desired.
Head
- Round 1: 6 sc in mr (6)
- Round 2: inc x6 (12)
- Round 3: (1 sc, inc) x6 (18)
- Round 4: (2 sc, inc) x6 (24)
- Round 5: (3 sc, inc) x6 (30)
- Round 6: (4 sc, inc) x6 (36)
- Round 7: (5 sc, inc) x6 (42)
- Round 8: (6 sc, inc) x6 (48)
- Round 9-16: 1 sc in each st (48)
- Place safety eyes between rounds 8 and 9, approximately 6 stitches apart for the sweet, wide-eyed look. If using 6 mm eyes place them so the bottom of the eye is roughly at the middle of round 9; adjust spacing 6 stitches apart as shown.
- Round 17: (6 sc, dec) x6 (42)
- Round 18: (5 sc, dec) x6 (36)
- Round 19: (4 sc, dec) x6 (30)
- Round 20: (3 sc, dec) x6 (24)
- Start stuffing the head firmly now, especially around the brow and eye area to maintain a rounded face. Add small amounts of stuffing between rounds so the head remains even and soft but not overfilled.
- Round 21: (2 sc, dec) x6 (18)
- Round 22: (1 sc, dec) x6 (12)
- Round 23: dec x6 (6)
- Fasten off leaving a long tail for sewing. Finish stuffing fully and close the remaining hole by weaving the tail through the remaining sts and pulling tight. Leave a neat long tail to sew head to body later.
Head Finishing & Face Details
- Place eyes between R8 and R9, 6 sts apart. Embroider nose with dark brown thread: stitch a small triangular nose two rounds below the eyes, then embroider a small “v” shaped mouth of 3 stitches below the nose. Add blush by dabbing pale pink embroidery thread to cheeks or use fabric-safe blush gently with a cotton swab.
- Lock safety eyes with washers before sewing head to body. Embroider features with short, even stitches for a neat look. Weave in all ends inside the head to avoid lumps.
Body (Make 1)
- Body is worked in Dusty Rose to create a dress-shaped torso. This body starts as an oval base so the bunny can sit upright. Use chain-based oval start as follows.
- Round 1: ch 8, work around both sides of chain: sc in 2nd ch from hook, sc x5, 3 sc in last ch, continue on opposite side of chain sc x5, sc in last ch (stitch counts along chain and ends) — total 16 sts forming oval base (16)
- Round 2: inc in each end stitch (those 3-sc groups) to expand: sc in each st across, 2 sc in each of the 3-st end groups; overall increase to 21 sts (21)
- Round 3: (sc, inc) around following the oval curvature to reach 26 sts (26)
- Round 4: 1 sc in each st (26)
- Round 5: (2 sc, inc) x6 around longer edges to shape (32)
- Round 6-9: 1 sc in each st (32)
- At round 10 we will shape the top of the dress (neck opening). If you prefer a slightly larger body make rounds 6-9 one or two rounds longer before the neck shaping. Work in joined rounds or spiral as you prefer; keep stitches tidy for seaming later.
- Round 10: (3 sc, dec) x6 (26)
- Round 11: (2 sc, dec) x6 (20)
- Round 12: (1 sc, dec) x6 (14)
- Change to cream for the little scalloped hem edge if desired, but in the photos the dress is Dusty Rose and the hem uses a small scallop worked in the same color. For a visible scallop change color now if you want contrast.
- Round 13: 1 sc in each st (14)
- Round 14: Work a scalloped hem: *skip next st, 5 dc in next st, skip next st, sl st in next st* around to create 7 small scallops (14 stitches should contain 7 scallops). Adjust pattern to match your stitch counts; join and FO leaving long tail for sewing to legs and head.
- Stuff body lightly but firmly—leave the top a bit hollow so the head neck area can be sewn in. When sewing head to body ensure the dress hem sits forward so the body looks dress-shaped from front view.
Arms (Make 2)
- Round 1: 5 sc in mr (5)
- Round 2: inc x5 (10)
- Round 3: (sc, inc) x5 (15)
- Round 4-5: 1 sc in each st (15)
- Change to Sage Green at round 6 for the arm color if you're making the two-toned look. If you prefer single-color arms, skip the color change. Leave long tails for sewing if you plan to sew the wrists inside the hand later.
- Round 6: Change to Sage Green. 1 sc in each st (15)
- Round 7-10: 1 sc in each st (15)
- Round 11: (3 sc, dec) x3 (12)
- Round 12-14: 1 sc in each st (12)
- Round 15: (2 sc, dec) x3 (9)
- Round 16: 1 sc in each st (9)
- Stuff the hand area (the rounder end) firmly while the opening is wide. Stuff the arm lightly toward the shoulder so the arm remains flexible for sewing. Fasten off leaving a long tail for sewing the arm to the body at R5-R9 of the torso for natural placement.
- Round 17: sl st to close small opening if desired, FO leaving long tail for sewing (9)
Hands (Optional shaping)
- If you would like a cream-colored hand tip (as in photos), change to Cream for last 2 rounds and sc around creating a subtle cuff. Finish off and hide ends. Make 2 arms identical.
Legs (Make 2)
- Round 1: 7 sc in mr (7)
- Round 2: inc x7 (14)
- Round 3: (sc, inc) x7 (21)
- Round 4-6: 1 sc in each st (21)
- Round 7: (3 sc, dec) x4, sc x1 (17)
- Round 8-10: 1 sc in each st (17)
- Legs are worked in Dusty Rose to match the dress. The foot is the rounder section; stuff the foot firmly to create a solid base so your bunny can sit. Leave the top opening unstuffed until joining to the body for a flatter seam.
- Round 11: (2 sc, dec) x4, sc x1 (13)
- Round 12-14: 1 sc in each st (13)
- Round 15: (1 sc, dec) x4, sc x1 (9)
- Round 16: 1 sc in each st (9)
- Round 17: Work base circle for foot underside: 6 sc in mr (6). FO leaving long tail for sewing the foot circle to the foot bottom. Alternatively, continue working a spiral to close bottom if you prefer no separate circle.
- Sew legs to the base of the body spaced about 5 sts apart (see assembly). For a neat seat, flatten the top of each leg slightly before sewing and attach with ladder or whip stitch through both leg and body stitches.
Ears (Make 2 outer and 2 inner panels)
- Each ear has an inner contrasted panel (Pale Pink) and an outer cream panel worked together later. Start inner panel first in Pale Pink for a neat inset.
- Inner Ear Round 1: 4 sc in mr (4)
- Inner Ear Round 2: (sc, inc) x2 (6)
- Inner Ear Round 3: (2 sc, inc) x2 (8)
- Inner Ear Round 4-5: 1 sc in each st (8)
- Fasten off leaving long tails used to stitch the inner panel into the outer ear later. Make two inner panels identical.
- Outer Ear Round 1: 6 sc in mr (6)
- Outer Ear Round 2: inc x6 (12)
- Outer Ear Round 3: (1 sc, inc) x6 (18)
- Outer Ear Round 4-6: 1 sc in each st (18)
- Outer Ear Round 7: Join inner ear by laying inner panel inside outer ear and sl st through both loops around the inner panel edge to secure – work neat even stitches following inner panel edge to create inset look, continue around to secure inner panel (18)
- Outer Ear Round 8: 1 sc in each st around to tidy edge (18)
- Leave a long tail for sewing the ears to head. In the photos ears are sewn between head rounds 4-6 and slightly angled outward. Pin ears to head first and adjust before sewing for symmetrical placement.
Tail (Make 1)
- Round 1: 3 sc in mr (3)
- Round 2: inc x3 (6)
- Round 3: 1 sc in each st (6)
- Round 4: (1 sc, dec) x2 (4)
- Round 5: dec x2 (2)
- Stuff lightly and FO leaving long tail for sewing. Attach tail centered on back of body around R10 area for a small bobtail look.
Leaf Applique (Make 6)
- Round 1: 5 sc in mr (5)
- Round 2: inc x5 (10)
- Round 3: Work shaping: sc x2, hdc x2, sc x2, sl st to finish (10)
- Make 6 leaves in Sage Green for placement around ear cluster and bodice flower. Leaves are flat and not stuffed. FO leaving long tails for sewing.
Flower Petal (Make 6 for big flower)
- Round 1: 6 sc in mr (6)
- Round 2: sl st to next st, ch3, dc x3 in same st, sl st to next st to form a petal. Repeat around to make 6 petals (you will create petals in each of the 6 base stitches)
- Round 3: When all petals are formed FO leaving long tail for sewing. Make 6 petals but assemble them by sewing them concentrically into a small clustered flower: stack 3 petals then the other 3 on top, sew center together and add bead.
- Make a few flower sizes: big flower uses 6 petals, small flower uses 5 smaller petals made on 5 base stitches. Use Dusty Rose for the big flower, Cream for the small flower and Pale Pink for centers if desired.
Beads / Tiny Flower Centers (Make 3)
- Round 1: 4 sc in mr (4)
- Round 2: sc around (4). FO leaving tail for sewing or use small bead or a small wooden bead sewn into center instead of crocheted bead.
- Attach bead centers to the center of the larger or smaller flowers for depth. In photos cream centers are used to create contrast on dusty rose petals.
Small Flower (Make 1)
- Round 1: 4 sc in mr (4)
- Round 2: (sc, inc) x2 (6)
- Round 3: For petals: in each stitch make (sl st, ch 2, 3 dc, ch 2, sl st) around to form 6 small petals. FO leaving long tail to sew.
- Sew small flower centered on dress chest at Round 4 of body for correct positioning (see assembly reference). Add a cream bead or small crocheted bead to the center for a finished look.
Assembly Preparation
- Before sewing, pin all parts in place to check symmetry. Use the assembly reference photo to place eyes between R8-R9 of head (6 sts apart), ears sewn between R4-R6 on top of head, and arms sewn between R5-R9 of body. Legs are attached at the base of the body spaced approximately 5 sts apart.
Assembly Steps
- Step 1: Attach head to body: align head center to body opening and sew through 12 stitches around using the long tail from the head. Use evenly spaced stitches and pull tight enough to secure but not distort the neck shape.
- Step 2: Sew arms to body: position arms on the sides between R5-R9 of body. Sew through both the arm opening and body stitches using a ladder stitch for a tidy, secure finish. Make sure arms are mirrored.
- Step 3: Attach legs: sew legs to the base of the body spaced about 5 sts apart. For extra stability, stitch through the leg top and into the internal base of the body several times. Legs should be able to support the bunny sitting upright.
- Step 4: Sew ears to top of head: attach ears between R4-R6, angle slightly outward and forward so they frame the face. Use small, neat stitches and hide tails inside the head.
- Step 5: Sew leaf appliques and flowers: place three leaves and both flowers behind one ear as in the photos (cluster of one big dusty-rose flower, one small cream flower and 2-3 leaves). Use small whip stitches to anchor each piece to the head and to the dress chest flower location at body R4.
- Step 6: Embroider nose and mouth using dark brown thread: nose is two small diagonal stitches forming a tiny triangle slightly below the eyes; the mouth is a small "v" of 3 stitches. Make sure the mouth is centered and proportional to the eyes.
- Weave in any remaining tails and secure knots inside the body. If desired, add a small dot of fabric glue to the back of safety eye washers for extra security on gifts. Trim excess yarn and brush surface if using a soft fiber yarn for a slightly fuzzy finish.
Final Finishing Touches
- Add blush with pale pink embroidery thread or fabric-safe brush on each cheek to create the soft rosy look shown. Use a cotton bud or soft brush and add little by little until you achieve desired intensity. Step back and compare both cheeks for symmetry.
- Pin the little dress flower at body R4 and tack in place. Make sure sewn flowers lie flat and faces outward. Add bead centers to flowers and tuck leaves under petals to create a tidy cluster. Your Flora bunny is complete — take time to admire the tiny flowers!
Assembly Instructions
- Attach head to body by inserting the neck portion into the body opening. Pin in place first, then sew securely using whip stitch all around, ensuring even attachment across 12 stitches.
- Position arms on sides of body between rounds 5-9 for natural look. Sew through both arm and body using ladder stitch for invisible seam and even matching placement.
- Attach legs to bottom of body at base, spacing them evenly approximately 5 stitches apart. Sew securely through several times for stability so the bunny sits upright.
- Sew inner ear panels into outer ears and then sew ears to top of head between rounds 4-6, angling slightly outward for a natural pose.
- Sew leaf appliques and layered flowers to the head cluster behind one ear; position the small chest flower at round 4 of the body and sew through both flower and body for stability.
- Embroider nose and mouth using brown embroidery thread centered two rounds below the eyes; check symmetry and stitch gently to avoid puckering.
- Weave in and secure all loose tails inside body and head, trimming close to the fabric. Add a dab of fabric glue under safety eye washers for extra security if gifting to small children.
- Final check: adjust stuffing if needed and smooth crochet joins. Add blush to cheeks and any final shaping with pins before presenting your finished Flora bunny.
Common Mistakes & How to Fix Them
- Skipping stitch markers at round starts can cause misaligned features and uneven shaping; always mark your first stitch of each round
- Inconsistent tension between rounds creates lumpy or uneven surfaces; practice maintaining steady, even tension throughout the entire project
- Not stuffing gradually as you work causes difficulty reaching inside later; stuff sections as you complete them for best results
- Changing color without securing ends can lead to loose tails; fasten off and weave tails securely when switching color for small motifs
- Placing safety eyes after heavy stuffing makes repositioning impossible; attach and secure eyes before fully stuffing the head
- Sewing pieces without pins first may result in asymmetry; always pin parts in position and check from multiple angles before stitching
- Using too large a hook with amigurumi yarn leaves gaps where stuffing shows; use a hook size slightly smaller than yarn label recommends
Important Notes
- Use stitch markers consistently at the beginning of each round to avoid counting errors and maintain proper shaping
- Stuff body parts gradually as you work rather than waiting until the end, especially for narrow openings like arms and legs
- For safety eyes, position and secure before stuffing head fully – they cannot be repositioned once locked in place
- Maintain consistent tension throughout the project; too tight creates stiff, small pieces, too loose creates floppy, holey fabric
- When sewing pieces together, use yarn slightly thinner than working yarn for neater, less visible seams
- Pin all pieces in position before final sewing to ensure proper placement and symmetry
- For amigurumi, work tightly enough that stuffing doesn't show through stitches; use smaller hook if necessary
- Keep a row counter or notepad to track rounds, especially during long even-stitch sections to avoid losing your place
This little Flora bunny brings timeless charm and delicate detail to your home — a perfect handmade gift or shelf companion. Each round and stitch builds the sweet face, tiny floral crown, and scalloped dress that make Flora feel special. Enjoy the relaxing process and the gratifying moment when all pieces come together. 🧶🌸 Happy stitching and don’t forget to share your finished Flora with friends! 😊
Crochet Abbreviations
- mr
- magic ring
- ch
- chain
- sc
- single crochet
- inc
- increase (2 sc in one st)
- dec
- invisible decrease (sc2tog)
- sl st
- slip stitch
- hdc
- half double crochet
- dc
- double crochet
- BLO
- back loop only
- FLO
- front loop only
- st(s)
- stitch(es)
- FO
- fasten off
- rep
- repeat
- ( )
- work instructions in brackets as directed
- x
- times
You Ask, We Answer
What is the finished size of this amigurumi?
Based on the specified materials and 3.25mm hook with worsted yarn, the finished bunny measures approximately 18 cm (7 in) tall from base to ear tip. Using different yarn weights or hooks will change the size proportionally.
Can I use different yarn weights for this pattern?
Yes. You can use any yarn weight but adjust your hook size accordingly (generally 1-2 sizes smaller than yarn recommendation for a tight amigurumi fabric). Thicker yarn will make a larger bunny and thinner yarn will make a smaller one.
Do I need to use safety eyes or can I embroider them?
Both work well. Safety eyes give a glossy, professional look; embroidered eyes are ideal for toys for very young children, and they allow more expression customization.
How much stuffing will I need?
For this size project, approximately 50-80 grams of polyester fiberfill should be sufficient. Stuff firmly but not overly tight to preserve shape while remaining cuddly.
Can I make the arms and legs poseable?
Absolutely. Insert thin floral wire or bendable pipe cleaners before stuffing limbs completely. Wrap wire ends or fold them down and hide inside stuffing to avoid sharp points.
What if my stitch count is off?
If you notice a counting error, unravel back to where the count was correct. Trying to compensate later often creates visible distortions. Using stitch markers at round starts helps prevent counting mistakes.
How do I prevent holes when stuffing?
Use a hook slightly smaller than the yarn recommendation and keep stitches tight. Add stuffing in small amounts and firm up gradually to avoid gaps where stuffing shows through.
Can I customize colors and details?
Yes! Swap the palette to seasonal colors, personalize facial expressions, or add accessories like tiny bows or baskets. The construction is forgiving and easy to adapt.