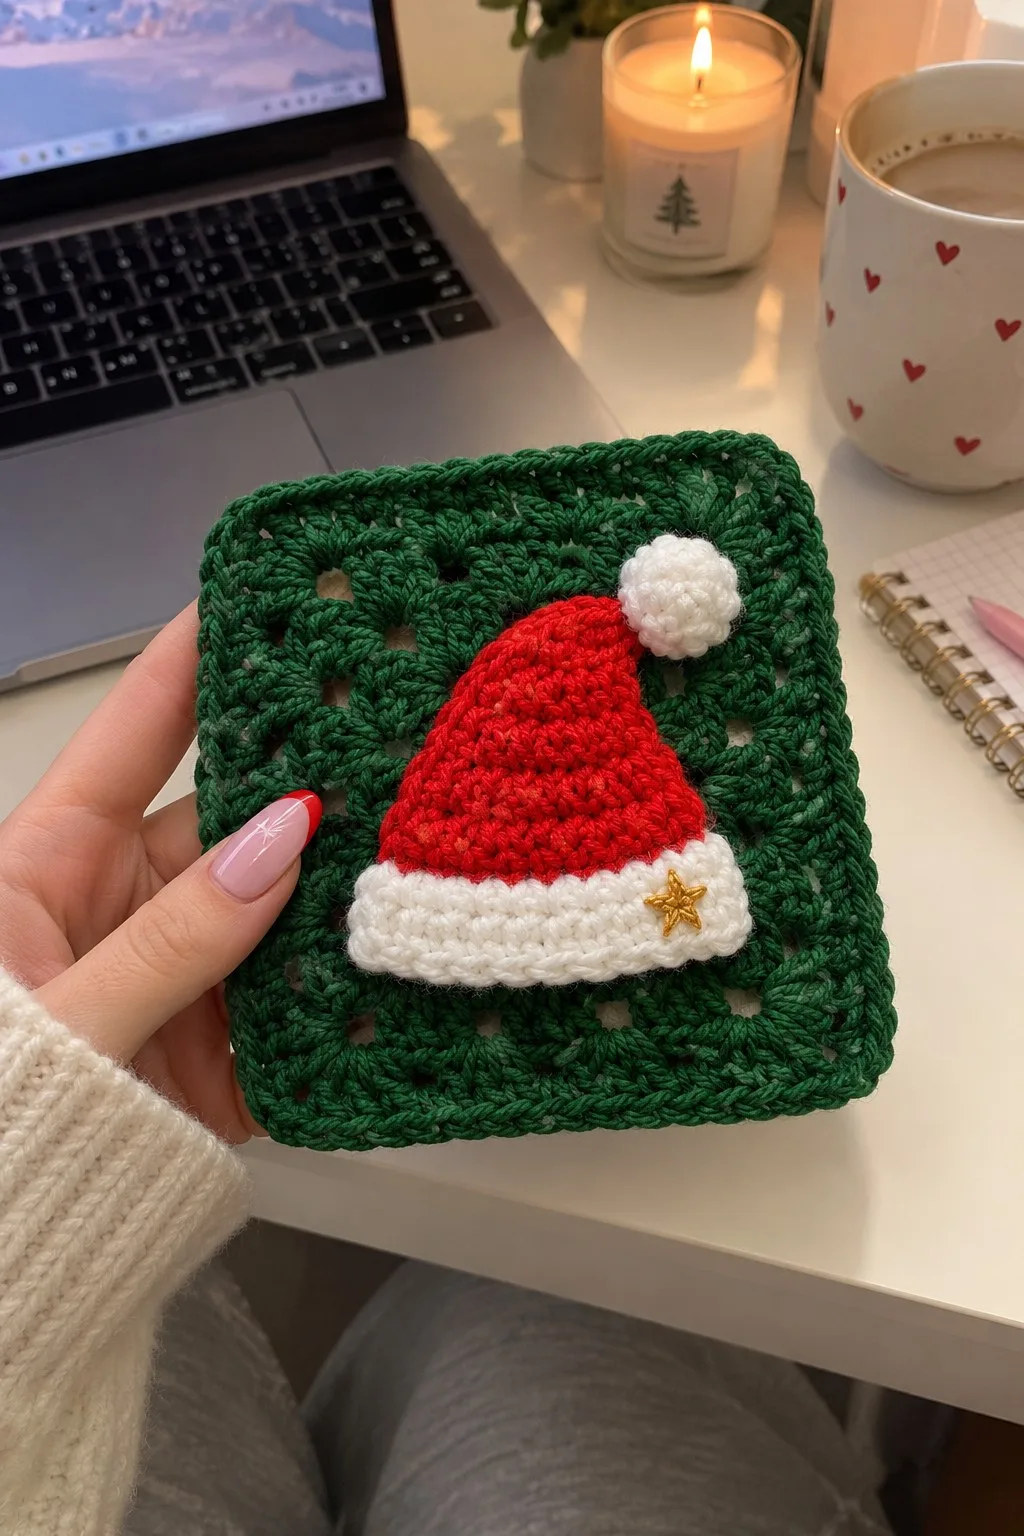
Create a festive Santa hat applique mounted on a classic granny square — a cheerful holiday motif perfect for ornaments, coasters, or blanket squares. This pattern includes step-by-step instructions for the green granny square background, the red hat cone, the white brim and pom, and a tiny star embellishment. Clear stitch counts, photos, and helpful tips make the project easy to follow and quick to assemble.
About This Santa Hat Granny Square Pattern
This pattern recreates a small Santa hat applique sewn onto a classic granny square background. The finished square measures approximately 12 cm (4.7 in) with the hat applique around 6.5 cm (2.6 in) tall. The hat is crocheted in rounds in Santa red with a folded white brim and a small white pom attached to the tip. A tiny star accent is optional and adds a polished, festive touch.
The pattern uses worsted weight yarn and a small hook to produce a dense fabric ideal for coasters, appliques, or a holiday blanket of matching squares. Step-by-step rounds, spacing guidance for placement and assembly notes are included for a fuss-free finish.
Why You'll Love This Santa Hat Granny Square Pattern
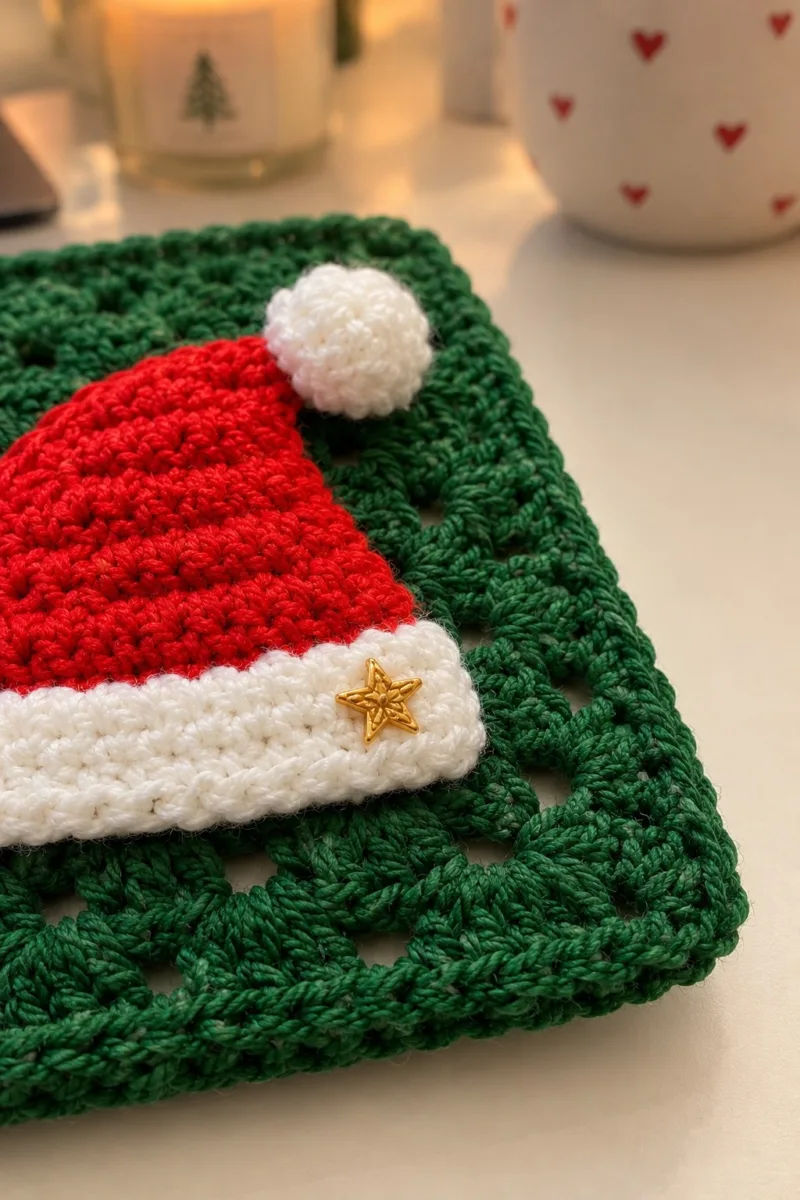
I love this pattern because it turns simple shapes into an instantly recognizable holiday icon — the tiny curled hat and fluffy pom are so cheerful. The classic granny square backdrop gives it a handmade, cozy look while the petite star accent adds a lovely finishing touch. I also appreciate that the hat appliqué is sewn on so you can mix and match colors and placements for a whole set of seasonal squares.
- Holiday Cheer 🎄 – Festive fun for the season, bringing handmade magic to celebrations and creating new family traditions.
Switch Things Up
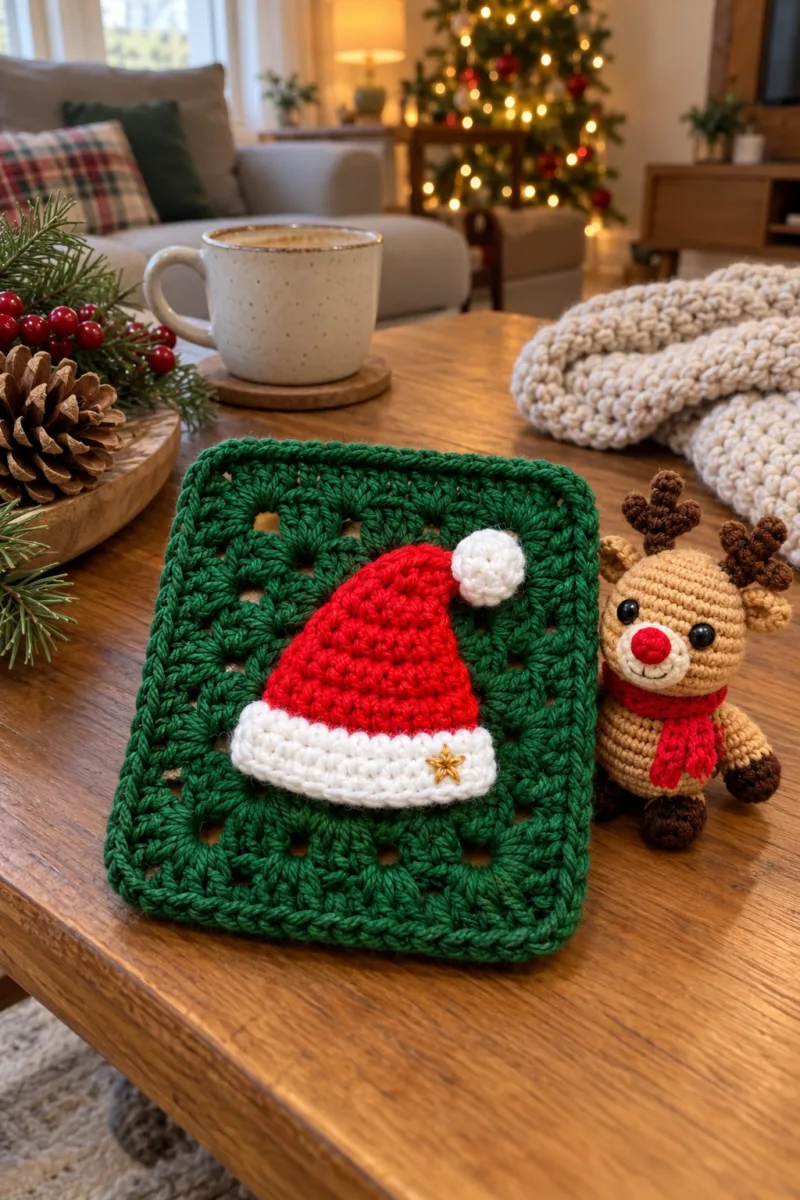
I absolutely love how this simple motif can be customized — change the granny square color, make the hat pastel for a playful twist, or use sparkly yarn for New Years flair. Swapping the green background for navy or teal makes the little hat really pop.
I often experiment with the brim width and the height of the hat cone to create miniature variations (shorter hats look cute as tags; taller hats read well on larger panels). You can replace the pom with a tiny bell, a button, or a cluster of beads for a different finish.
If making a blanket, I like to alternate granny square colors and use two-tone brims; sewing the hat slightly off-center adds visual interest when viewing a grid of squares. Don’t be afraid to mix textures — velvet-type yarn or a boucle makes a very cozy, unique square.
Materials Needed
Main Fabric
- Worsted weight yarn (#4), approximately 120g in Christmas Green (primary granny square color)
- 50-60g in Santa Red (hat body)
- 30-40g in Snow White (hat brim and pom)
- Small amounts (5-10g) in Antique Gold or metallic thread for tiny star accent
Tools Required
- 2.5-4.0 mm crochet hook (use 3.5 mm or 3.75 mm recommended for worsted weight and tight fabric)
- 2.75-3.25 mm hook for smaller details (optional)
- yarn needle for sewing and weaving in ends
- stitch markers (at least 3-4)
- scissors
- polyester fiberfill stuffing for pom (very small amount)
- pins for assembly and positioning
- optional: small button, star charm or metallic embroidery thread for accent
The Free Pattern
0% complete
Materials & Gauge
- Use worsted weight yarn and a 3.5mm (E) or 3.75mm (F) hook for a sturdy fabric and approx finished square 12 cm x 12 cm. Keep tension slightly firm so the pom and hat brim look full and tidy.
Size Guide
- Finished square ≈ 12 cm x 12 cm (4.7 in x 4.7 in); hat applique ≈ 6.5 cm tall (2.6 in) when made with suggested yarn and hook. Adjust hook for scale.
Hat (Main Cone)
- Round 1: 7 sc in MR (7)
- Round 2: inc x7 (14)
- Round 3: (1 sc, inc) x7 (21)
- Round 4: (2 sc, inc) x7 (28)
- Round 5: (3 sc, inc) x7 (35)
- Round 6: (4 sc, inc) x7 (42)
- These increase rounds form the tapered cone of the hat. Keep stitches neat and consistent to create a smooth curve. Place a marker in the first stitch of each round to track round starts.
- Round 7: 1 sc in each st (42)
- Round 8: 1 sc in each st (42)
- Round 9: 1 sc in each st (42)
- Round 10: 1 sc in each st (42)
- Work rounds 7-10 even to build height for the hat body. If you prefer a taller or shorter hat, work extra even rounds here in single crochet. Keep tension consistent; this area will be visible once sewn to the square.
- Round 11: (4 sc, dec) x7 (35)
- Round 12: (3 sc, dec) x7 (28)
- Begin tapering the tip slightly — performing seven decreases evenly spaced reduces circumference evenly. Use invisible decrease for a neat finish.
- Round 13: (2 sc, dec) x7 (21)
- Round 14: (1 sc, dec) x7 (14)
- Round 15: dec x7 (7)
- Fasten off, leave a long tail of approximately 20–25 cm for sewing to the brim or square. Press lightly with your fingers to shape the cone. The small opening at the tip can be used to attach the pom or to weave in the end if you prefer a closed cone.
Brim (Folded Band)
- The brim is worked in Snow White and is shaped as a short tube that is folded and joined to make a thick, folded cuff. Work to the exact width noted to allow the brim to overlap slightly when sewn to the square for a raised edge.
- Round 1: 4 sc in MR (4)
- Round 2: inc x4 (8)
- Round 3: (sc, inc) x4 (12)
- Round 4: (2 sc, inc) x4 (16)
- Round 5: Join to work in rows: ch 1, sc across 16, turn — work 2 rows of sc to create a folded brim band (work 2 rows, 16 sts)
- Round 6: sc 16 (16)
- Round 7: sc 16 (16) — fold the small rectangle in half (short edge to short edge) and join edges with sl st to form the brim band; trim and fasten off leaving a long tail for sewing
- When you fold the band and sl st the short seam closed, press gently so the brim sits flat and forms a neat cuff. The folded band should match the base width of the hat cone and will be sewn so it slightly overlaps the square for a raised edge look.
Pom
- Round 1: 5 sc in MR (5)
- Round 2: inc x5 (10)
- Round 3: sc 10 (10)
- Round 4: (sc, dec) x3, sc 1 (7)
- Round 5: dec x3 (3)
- Stuff the pom lightly as you close — very small amount of fiberfill is sufficient. Use the long tail to sew the pom securely to the hat tip. For a fluffier pom, wind yarn around your fingers or a small pom maker and trim to a round shape before sewing.
Flower / Star Embellishment
- Round 1: ch 6, join to ring with sl st (or make a small MR and ch 1 to begin)
- Round 2: (ch 3, dc, ch 3, sl st) x5 to make 5 petals (work 5 small petals)
- Round 3: work sc around the center to tidy; fasten off leaving a long tail for sewing
- If you would rather use a tiny gold star or button, place it on the brim offset to the right edge; if embroidering a star use metallic thread and sew in 6 small stitches forming a star shape centered about 6 stitches in from the right brim edge.
Granny Square (Background)
- The granny square shown is a classic cluster-style square worked flat in rounds with an even border. Use Christmas Green yarn. This set of rounds builds a square approximately 12 cm wide with the given yarn and hook.
- Round 1: ch 4, join with sl st to form a ring; ch3 (counts as dc), 2 dc in ring, ch2, (3 dc in ring, ch2) — repeat for 4 corners total — finish sl st to top of ch3 (4 corner groups; 12 dc total arranged as 3-dc clusters)
- Round 2: join green in any corner ch-2 space, (3 dc, ch2, 3 dc) in corner, ch1, in next corner space (3 dc, ch2, 3 dc), ch1 — repeat for all 4 corners; sl st to join (4 corner clusters; with ch1 spacers between clusters on the sides)
- Round 3: in each corner ch-2 space work (3 dc, ch2, 3 dc), between corners work (3 dc, ch1) across each side space (work 3-dc clusters in side spaces) — sl st to join
- Round 4: repeat round 3, placing (3 dc, ch2, 3 dc) in each corner ch-2; add 3-dc clusters along each side in the ch-1 spaces to widen square
- Round 5: repeat round 3 — after this round begin building additional height by adding extra even cluster rounds as required to reach size
- Round 6: repeat: corners (3 dc, ch2, 3 dc), sides 3-dc clusters in side spaces. At the end of this round you should see a recognizable granny square grid of holes.
- Round 7: repeat pattern; if you need a larger square, continue repeating corner clusters and side clusters until square measures approximately 12 cm
- Round 8: work 1 even granny-cluster round to build height and align the holes for appliqué placement
- Round 9: work 1 even granny-cluster round; check gauge and width against size guide — adjust by adding or removing rounds
- Round 10: work a final standard granny-cluster round; finish and prepare for edging
- When counting clusters, each corner contributes a ch-2 space; typical small squares use 5–8 rounds of clusters for this size. The hole pattern helps position the hat tip and pom — place the hat tip near the top-right quadrant of the square so the pom can sit in a hole if desired.
Granny Square Edging & Raised Border (Decorative Finishing Rounds)
- Round 11: Join green, ch1, sc across each st/space around to tidy the edge and create a stable base for the final border (work even single crochet around; count depends on previous rounds)
- Round 12: 1 sc in each st around (work even) — this creates a neat frame for the hat applique
- Round 13: 1 sc in each st BLO around to form a ridge for stronger edge (work even)
- Round 14: 1 sc in each st around (work even) — if your square needs to be slightly larger, add extra rounds of sc here
- Round 15: ch 2, skip 1 st, (dc, ch1, dc) into next space to create a picot-like ornamental round along the outer edge — repeat decorative clusters evenly around
- Round 16: 1 sc around to tidy decorative clusters and reduce bulk (work even)
- Round 17: 1 sc in each st BLO to accentuate the edge with a rope-like ridge (work even)
- Round 18: work a final round of sc evenly for a clean finish; fasten off and weave in ends. Block lightly if desired for a square finish.
- The edging rounds 11–18 are intentionally modular: use as many or as few rounds as you need to get the finished square to 12 cm. Decorative rounds (15) add charm but increase width slightly — account for this when matching multiple squares for a blanket.
Optional Extra Texture Rounds (Make the square thicker or create a raised mat)
- Round 19: Join yarn and work 1 sc in each st around (work even)
- Round 20: 1 sc in each st BLO around for ridge (work even)
- Round 21: 1 sc in each st around (work even)
- Round 22: 1 sc in each st FLO around for a subtle raised ridge on the outside edge (work even)
- Round 23: 1 sc in each st around (work even)
- Round 24: 1 sc in each st around (work even)
- Round 25: 1 sc in each st around (work even)
- Round 26: 1 sc in each st around (work even) — fasten off, weave in ends
- These rounds are optional and intended to thicken the square so the hat applique sits with a raised appearance. They also provide extra stitches to anchor the brim when sewing.
Finishing Touches & Assembly Preparation
- Before sewing, lay the square flat and position the hat to check spacing. The sample places the hat centered horizontally and slightly above the square center so the brim overlaps the lower rows of holes; the pom is positioned at the top-right quadrant. Pin the hat, brim, and pom in place prior to sewing to ensure symmetry.
Assembly (Sewing Applique to Square)
- Round 1: Info: Use the long tail left on the brim and a yarn needle to sew the hat to the square with invisible whip stitches. Sew through the folded brim band and into the granny square fabric every 4th stitch to mimic the sample raised edge and keep the brim slightly overlapping the square for dimension.
- Round 2: Info: Center the hat cone on the square, then tack the cone to the square at 3–4 evenly spaced stitches through the body of the hat. Pull only slightly — too tight will distort the cone curve.
- Round 3: Info: Attach the pom to the hat tip by sewing through the small hole left at the cone or using the long tail of the pom. Run multiple passing stitches through the pom center and into the hat tip, knot inside the pom and weave the tail into the cone to secure.
- Round 4: Info: Sew the optional flower or star accent to the brim offset about 6 stitches from the right edge of the brim. Use metallic embroidery thread for a secure, shiny finish or a small gold button sewn through the brim for a subtle charm.
- Round 5: Info: Weave in all ends and block lightly if desired. Press with a damp cloth on low heat if using plant-based yarns, or use steam blocking for acrylic to flatten gently.
Detailed Sewing & Placement Tips
- 1) Pin the hat in place and photograph from above to confirm placement before sewing. 2) Use small backstitches or invisible whip-stitch to attach, catching a few loops of the granny square hole pattern so the hat stays secure. 3) For toy-safe options, replace any metal or button embellishments with embroidered stars or crocheted flowers.
Optional Variations (Color Ideas & Conversions)
- Classic Christmas: green granny / red hat / white brim. Frosty Candy: mint granny / pastel red hat / snow white brim. Woodland Noel: forest green granny / deep burgundy hat / cream brim. Retro Tinsel: teal granny / cherry red hat / ivory brim. Try different color combos and yarn textures for seasonal flair.
Final Notes
- Keep stitches tight for neat appliques. The pattern's rounds include modular edging rounds so you can tailor the final square width. If making multiple squares for a throw or garland, ensure consistent hook and tension to match sizing across pieces.
Assembly Instructions
- Center the Santa hat on the finished granny square and pin in place. Use the long tail from the brim to sew the brim band to the square with invisible whip stitches around the base, securing every 4th stitch for a raised edge.
- Using the long tail from the hat cone, tack the cone body to the square at three evenly spaced points (left, center, right) through the hat body and granny square holes; keep stitches small so they do not show.
- Sew the pom to the tip of the hat with the pom long tail. Pass the needle through the pom center several times and into the tip of the hat, knot inside the pom and bury ends to prevent loosening.
- Attach the flower or star embellishment to the brim off-center (approx 6 stitches from the right edge) using embroidery thread or the remaining yarn tail. Sew through the brim band into the square for extra stability.
- Weave in all loose ends on the wrong side of the square. Use small, tight weaving strokes to hide tails and trim close to the fabric.
- Block the square lightly to even out edges. Pin to size on a blocking mat and mist lightly; allow to dry fully before finishing.
- If attaching multiple squares together for a blanket, use a slip-stitch or whip-stitch join, aligning decorative ridges and edges for a continuous look.
- For toy-friendly pieces, embroider the star instead of using metal charms and ensure all small parts are sewn securely.
Common Mistakes & How to Fix Them
- Skipping stitch markers at round starts can cause misaligned corners and an off-square granny; always mark the first stitch of each round.
- Working too loosely for amigurumi-like appliques creates gaps that show stuffing or the background; use a slightly smaller hook than recommended for tight, neat stitches.
- Not stuffing the pom lightly while closing makes it look flattened; add small amounts of fiberfill gradually and shape before final stitches.
- Sewing the hat with long, loose stitches can cause it to sit away from the square; sew with small, even invisible whip stitches for a neat attachment.
- Changing colors without fastening off can cause color runs into the wrong rounds; weave in ends neatly or use carried yarn inside if you prefer seamless color changes.
- Ignoring the gauge for the granny square will produce mismatched sizing; check the finished square measurement before making multiple squares for a blanket.
Important Notes
- Use stitch markers consistently at the beginning of each round to avoid counting errors and maintain proper shaping.
- Stuff pom lightly as you work rather than leaving final stuffing for last; this yields a neatly rounded pom.
- For safety and longevity, sew embellishments securely with multiple passes and knot inside the brim or pom to conceal ends.
- Maintain consistent tension – slightly tighter than usual produces a neat applique whose stuffing and seams won't show.
- When changing colors, finish the old color with a slip stitch and join the new color at the start of the next round for a clean color join.
- Pin all parts in position before final sewing to ensure proper placement and symmetry across multiple projects.
- If planning a blanket, make a sample square and block it to confirm gauge before making many squares.
- Use yarn slightly thinner than the working yarn for sewing to reduce visible seams and create a neater finish.
This little Santa hat granny square is a tiny joy to stitch — perfect for making festive coasters, ornaments, or a patchwork holiday throw. Each small piece comes together quickly: the cone, the folded brim, the fluffy pom, and the cheerful star. I enjoyed seeing the simple shapes create such a delightful finished piece. 🎁🧶 Add a tassel or join a string to make a garland and spread the holiday spirit!
Crochet Abbreviations
- mr
- magic ring
- ch
- chain
- sc
- single crochet
- inc
- increase (2 sc in one st)
- dec
- invisible decrease / sc2tog
- sl st
- slip stitch
- hdc
- half double crochet
- dc
- double crochet
- BLO
- back loops only
- FLO
- front loops only
- st(s)
- stitch(es)
- rep
- repeat
- ( )
- work instructions in brackets as directed
- x
- times
You Ask, We Answer
What is the finished size of this square?
With worsted weight yarn and a 3.5–3.75 mm hook, the finished square measures approximately 12 cm (4.7 in) square; the hat applique is about 6.5 cm (2.6 in) tall.
Can I use different yarn weights for this pattern?
Yes — lighter yarn will make a smaller square and hat, heavier yarn will enlarge it. Adjust your hook size slightly and make a gauge test square if matching multiple pieces.
Do I need to use a magic ring for the hat?
A magic ring gives a tidy starting center and lets you pull the center closed, but you can also start with ch2 and work into the ring if you prefer.
How much stuffing is needed for the pom?
Only a very small pinch (a few grams) of polyester fiberfill is required. Stuff until the pom is lightly rounded; overstuffing makes it look dense and bulky.
Can I embroider the star instead of attaching a button?
Absolutely. Use metallic embroidery thread or a spare scrap of yarn to stitch a small star directly onto the brim for a toy-safe and elegant finish.
How do I sew the hat so it won't come loose?
Use the long tail and whip stitch through the folded brim and into the granny square on the underside, making small even stitches and finishing with multiple passes through each anchor point.
Can I make the hat reversible or add a lining?
Yes — crochet a slightly larger brim and sew a contrasting fabric or a folded crocheted lining inside the cuff before attaching to the square for a reversible look.
What if my square is not perfectly rectangular after blocking?
Re-block carefully by pinning to the desired square measurements and suspending to dry. For stubborn distortion, steam-block lightly or add a final single-crochet border to straighten edges.