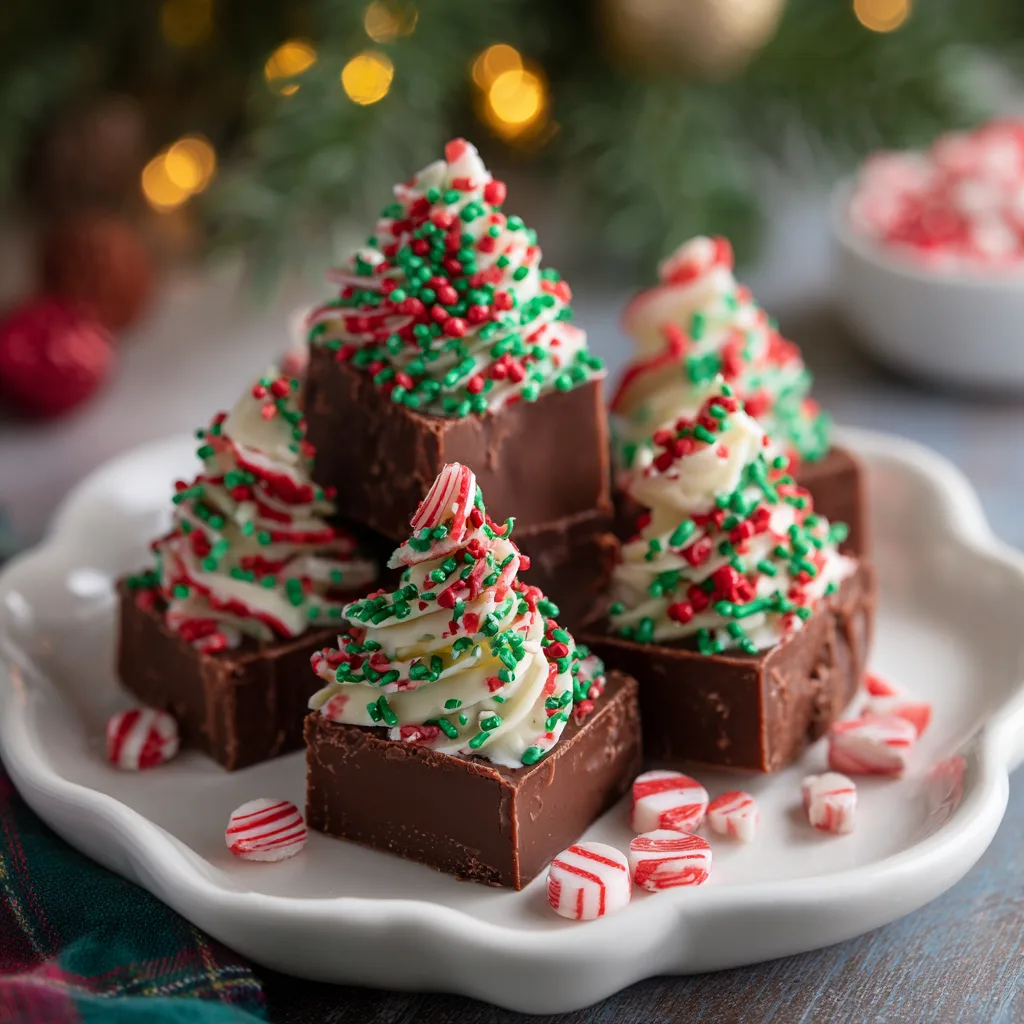
Cozy Fudge Christmas Trees – Festive and Delicious Holiday Treats
Nothing says holiday cheer quite like Cozy Fudge Christmas Trees. These bite-sized chocolate treats combine rich, creamy fudge with festive decoration to create an irresistible dessert for Christmas parties, family gatherings, or holiday gift boxes.
While fudge itself is a classic dessert, shaping it into mini Christmas trees adds a fun and creative twist. Kids love helping with the decorating, and adults will appreciate the decadent chocolate flavor. These treats are perfect for the holiday dessert table, gifting, or even as a cozy treat during a quiet night by the fireplace.
In this article, we’ll cover everything from ingredients, step-by-step instructions, creative decorating ideas, storage tips, variations, and serving suggestions to make your holiday baking stress-free and delightful.

Why These Fudge Trees Are a Must-Have
- Festive and Fun: Christmas tree shapes make them perfect for holiday gatherings.
- Kid-Friendly: Easy to shape and decorate with sprinkles, edible glitter, or icing.
- Giftable: Pack in small boxes or bags for a thoughtful homemade gift.
- Rich & Creamy: Made with chocolate fudge base that melts in your mouth.
- Versatile: Customize colors, flavors, and toppings to match your holiday theme.
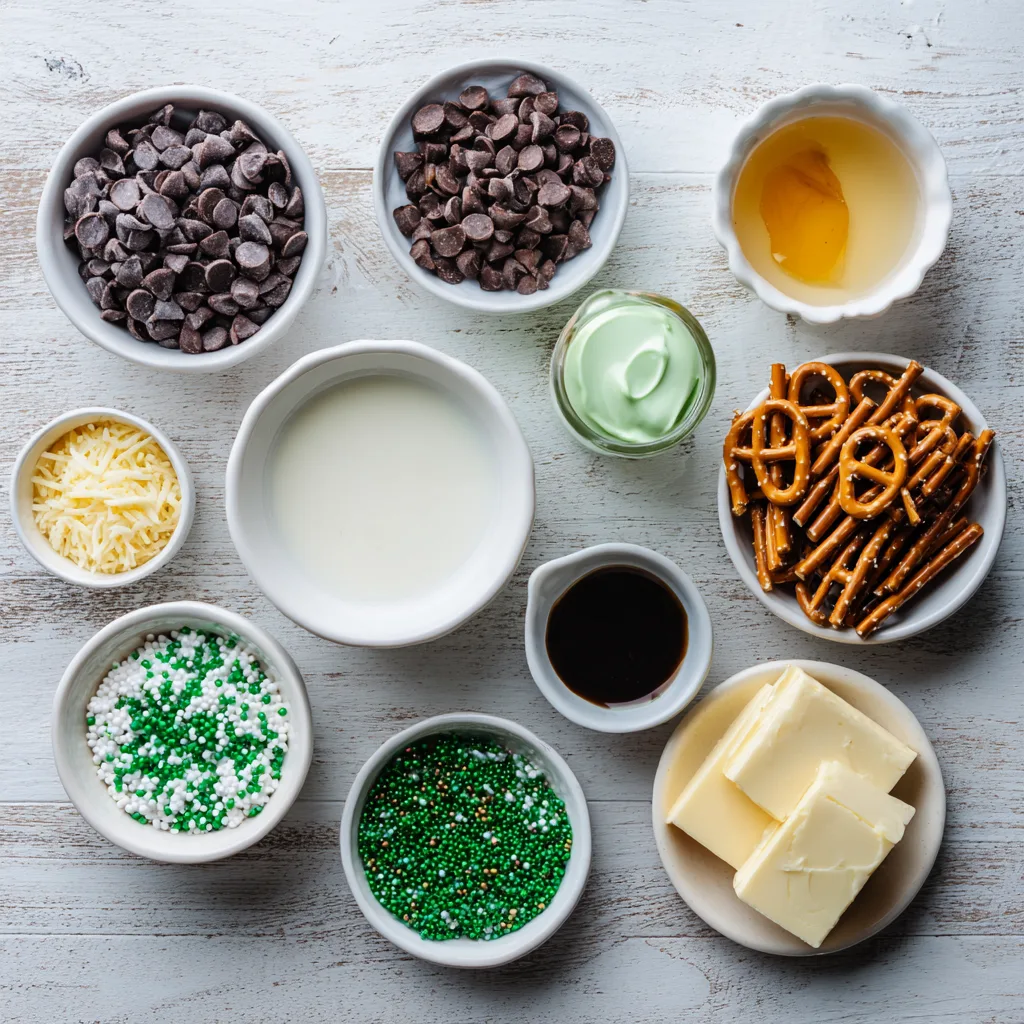
Ingredients
- 2 cups semisweet chocolate chips
- 1 (14 oz) can sweetened condensed milk
- 1/4 cup unsalted butter
- 1 tsp vanilla extract
- Pinch of salt
- Green food coloring (optional, for green trees)
- Mini star sprinkles or edible glitter for decoration
- Pretzel sticks or candy canes for tree trunks (optional)
Step-by-Step Instructions
Step 1: Prepare the Fudge Base
In a medium saucepan over low heat, combine chocolate chips, sweetened condensed milk, and butter. Stir constantly until melted and smooth. Remove from heat and stir in vanilla extract and pinch of salt.
Step 2: Color the Fudge (Optional)
If desired, divide fudge and add green food coloring for the Christmas tree layer. Stir well until the color is evenly incorporated.
Step 3: Pour and Set
Line a baking dish with parchment paper. Pour the fudge into the dish and spread evenly. Chill in the refrigerator for at least 2 hours until firm.
Step 4: Shape the Trees
Once set, use a small knife or cookie cutter to cut fudge into triangle shapes resembling Christmas trees. Add a pretzel stick or candy cane as the tree trunk, if desired.
Step 5: Decorate
Decorate with mini star sprinkles, edible glitter, or drizzle with white chocolate to mimic snow. Let decorations set for 10–15 minutes.
Step 6: Serve or Package
Serve on a holiday platter or package in festive boxes for gifting.
Pro Tips
- Smooth Fudge: Stir constantly while melting chocolate to prevent burning.
- Uniform Trees: Use a ruler or template for even triangle shapes.
- Decorating Fun: Let kids create their own decorations with sprinkles or icing.
- Make Ahead: Fudge can be made up to a week in advance and stored in the fridge.
- Variation: Try dark chocolate, milk chocolate, or white chocolate fudge layers for visual variety.

Serving Ideas
- Holiday Dessert Table: Arrange trees with mini candy canes and edible snow.
- Gift Boxes: Pack 3–5 trees per small festive box for neighbors or friends.
- Dessert Platter: Combine with cookies, truffles, and peppermint bark for a holiday dessert spread.
Storage Tips
- Store in an airtight container in the refrigerator for up to 7 days.
- Freeze for longer storage (up to 1 month). Thaw in the fridge before serving.
- Keep decorations intact by layering parchment between fudge layers if stacking.
FAQ & Troubleshooting
Q: Can I use milk chocolate instead of semisweet?
A: Yes! Milk chocolate creates a sweeter fudge. Dark chocolate gives richer flavor.
Q: My fudge is too soft. What went wrong?
A: Chill longer in the refrigerator. Ensure sweetened condensed milk and chocolate are measured correctly.
Q: Can I make different colors?
A: Absolutely! Divide fudge into portions and add food coloring to each portion before chilling.
Q: How do I make them portable for gifts?
A: Place in mini cupcake liners or wrap in parchment paper and tie with festive ribbon.
Cozy Fudge Christmas Trees
Ingredients
Equipment
Method
- Combine chocolate chips, sweetened condensed milk, and butter in a saucepan over low heat. Stir until melted and smooth.
- Remove from heat and stir in vanilla extract and pinch of salt.
- Add green food coloring if desired and mix until even.
- Pour fudge into a parchment-lined baking dish and chill for at least 2 hours until firm.
- Cut chilled fudge into triangle shapes resembling Christmas trees. Add pretzel sticks or candy canes as trunks if desired.
- Decorate with mini star sprinkles, edible glitter, or white chocolate drizzle.
- Serve on holiday platter or package for gifts.