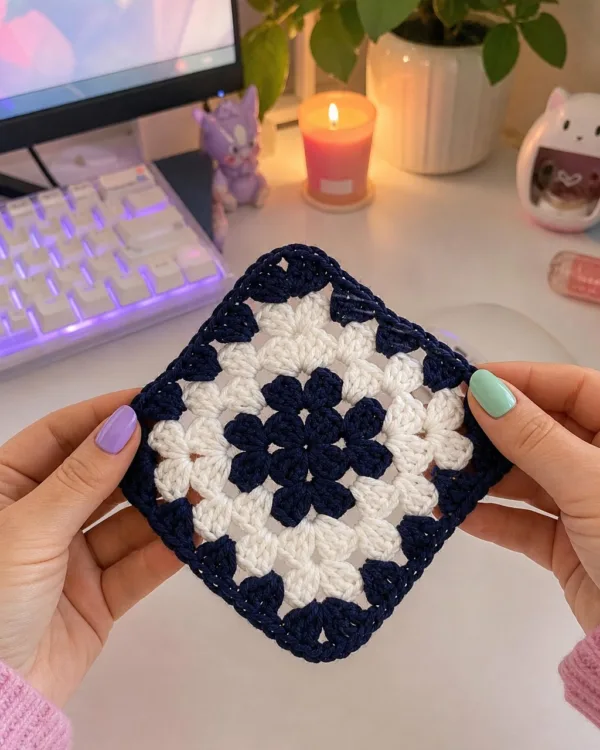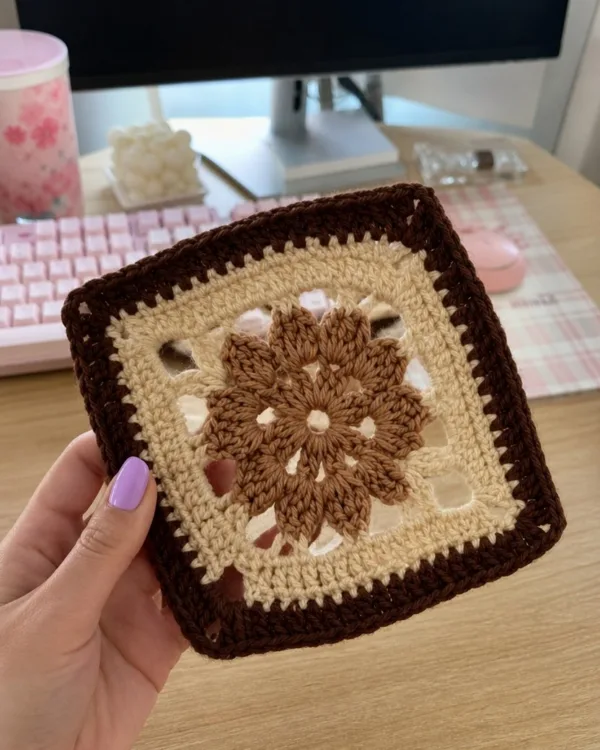
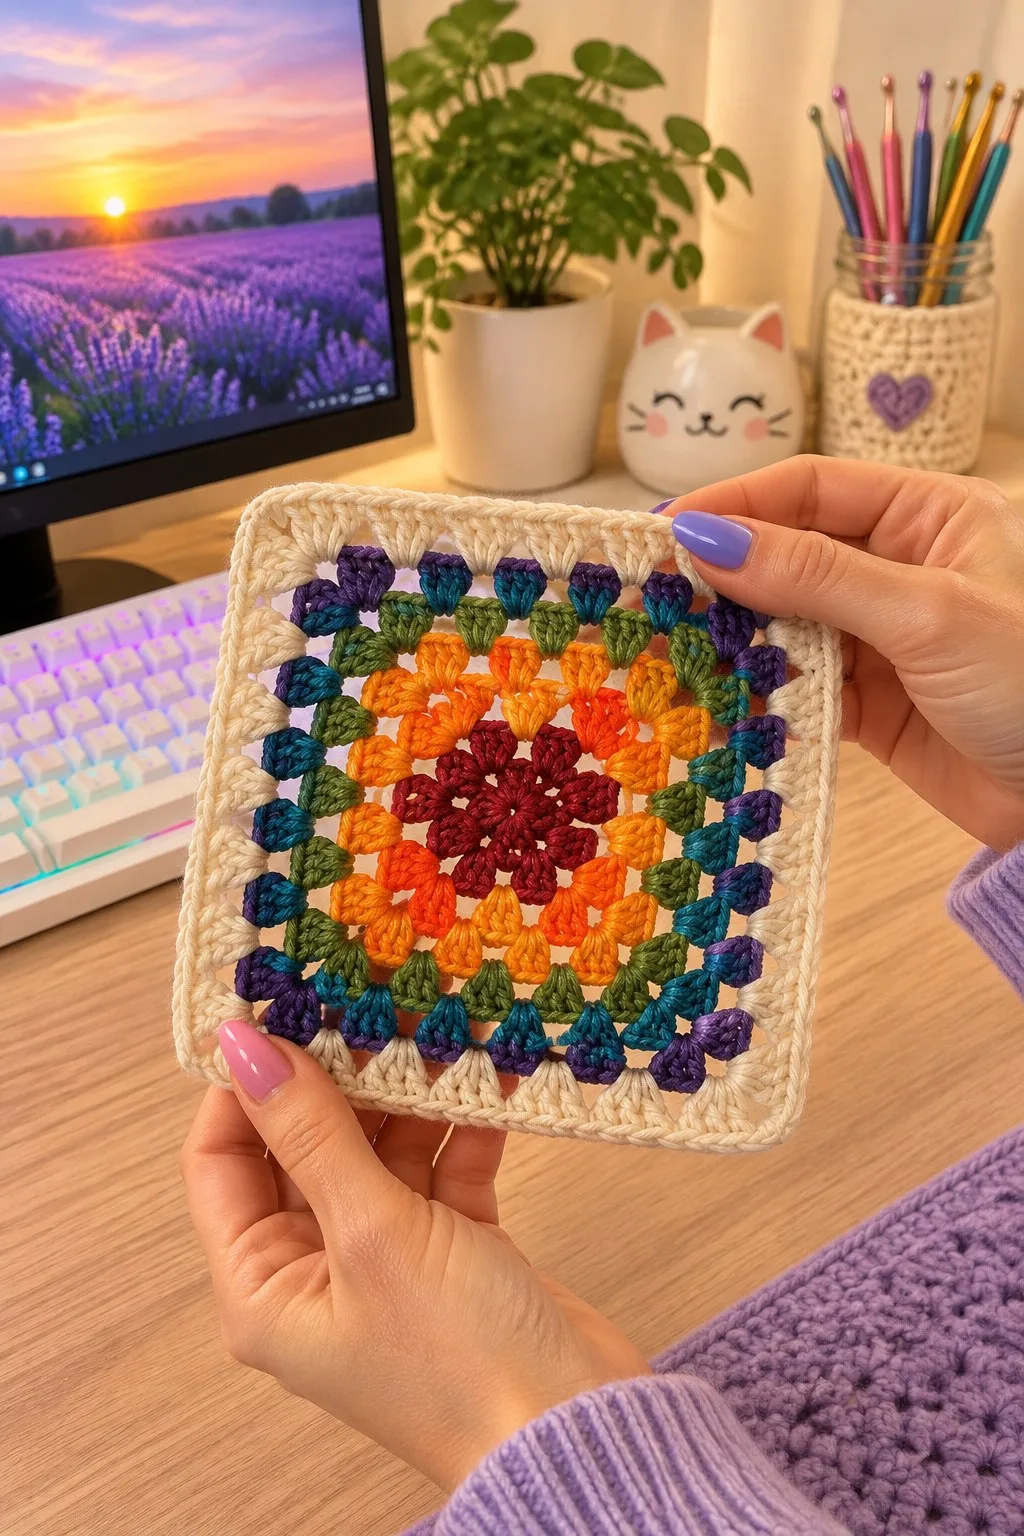
A bright, multicolor granny square with a crisp cream border — perfect for blankets, cushions or cozy throws. This pattern recreates the layered rainbow granny shown in the photos, using colourful rounds of 3-dc clusters, puff-style texture and a sturdy cream finishing border. The stitch-by-stitch instructions include color changes, texture rounds and multiple border options to make a finished square ready to join into a bed-sized afghan.
About This Multicolor Granny Square Blanket Pattern
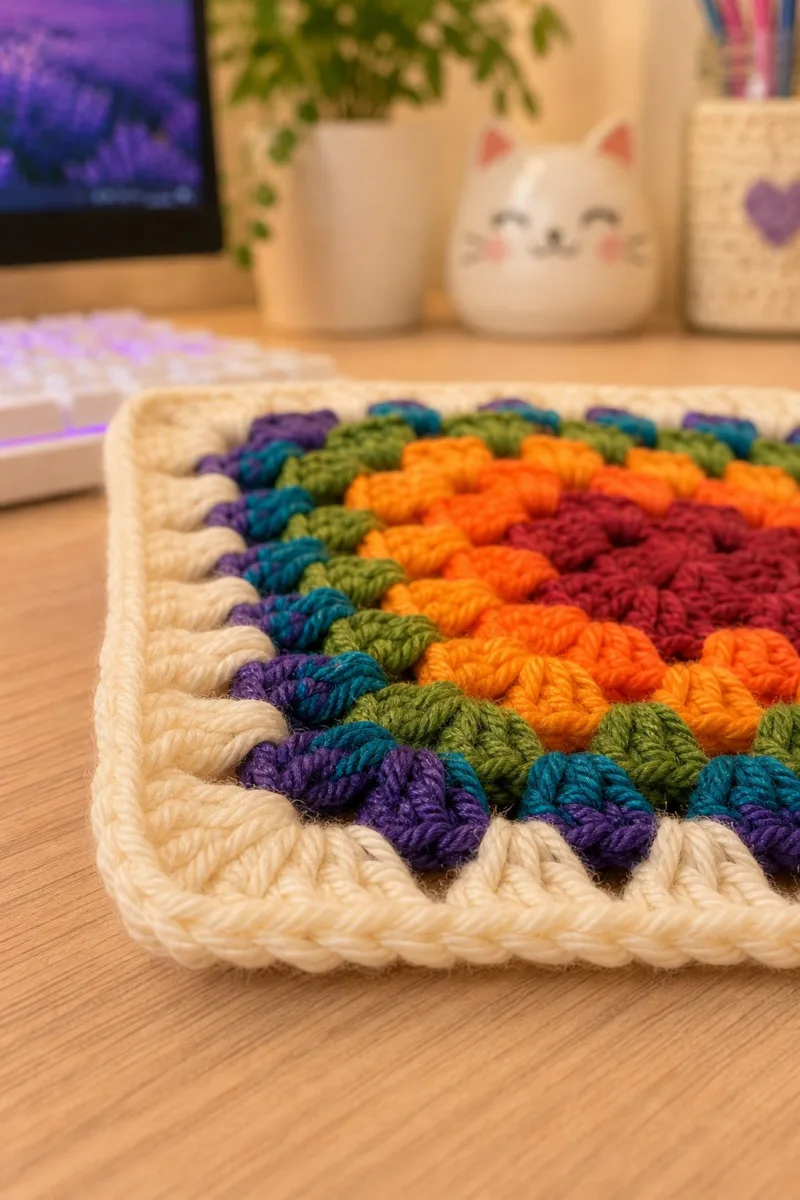
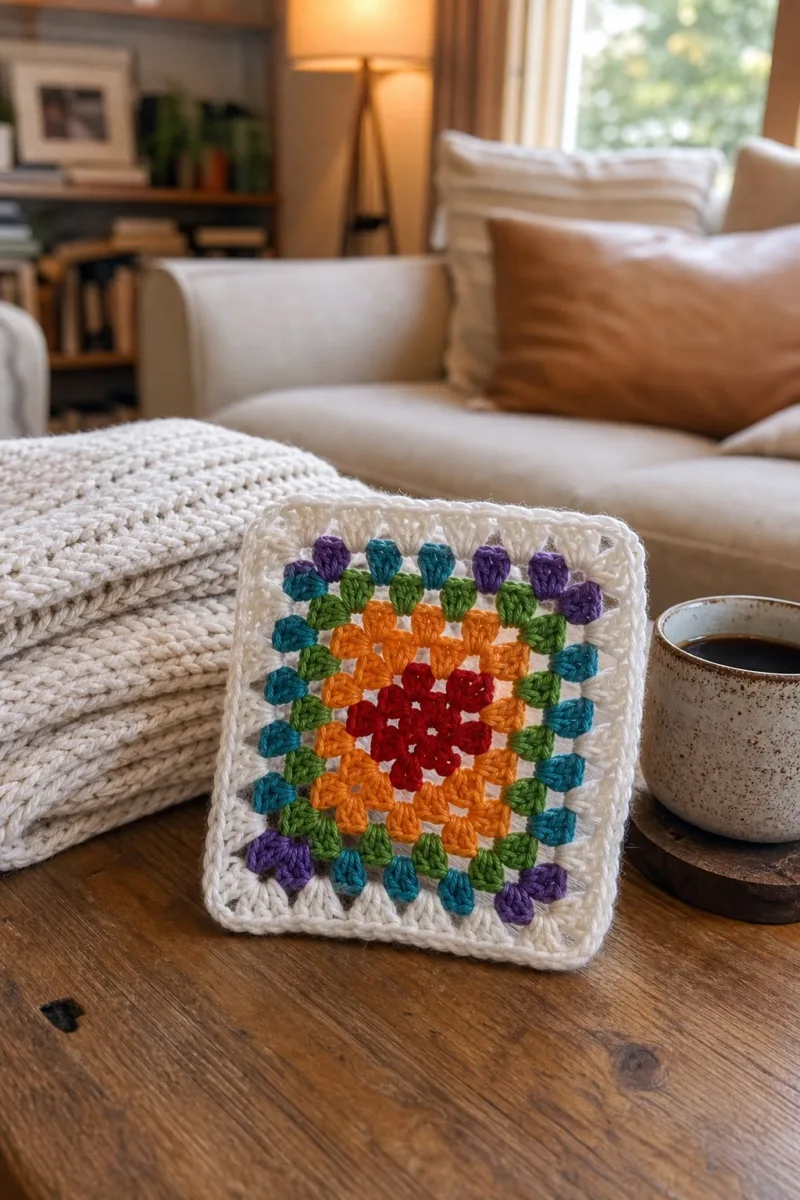
This pattern reproduces the multicolor granny square shown in the images — a layered rainbow centre built from classic 3-dc clusters, finished with a soft cream border that creates a neat, slightly puffed edge. The square pictured features deep berry, bright orange, golden yellow, grass green, teal and violet rounds, with a warm cream final border that smooths the corners for a modern, clean finish. The instructions include color change tips, texture and puff round options, plus two join methods for making an afghan.
The pattern is written so you can make a single feature square or repeat it to assemble a full blanket. Detailed Info notes walk you through tension, joining, blocking and creating a plump, even border for a professional result.
Why You'll Love This Multicolor Granny Square Blanket Pattern
I love this pattern because the color progression feels joyful and intentional — each round makes a small, satisfying change that builds toward a cozy finished square. The cream border balances the rainbow and gives each square a crisp framed look that works beautifully in large blankets or smaller home accessories. I also enjoy the combination of classic granny clusters with textured puff-like rounds that add depth without complicating the build.
- Cozy Accent – A warm touch for your space that transforms ordinary corners into inviting nooks filled with handmade charm.
Switch Things Up
I love how adaptable this granny square is — you can keep the same structure but change colours, the number of texture rounds, or the final border to suit your home. Try pairing pastels for a soft nursery throw or jewel tones for a cozy rustic bedspread.
I often customise by adding an extra puff round or swapping the shell border for a simple ribbed (post-stitch) frame; both create a slightly different silhouette and feel. When making a large blanket I plan colour layouts ahead so squares read as a cohesive design when joined.
Don’t be afraid to experiment: use variegated yarn for inner rounds, replace the cream border with a contrast colour for a bolder look, or work larger or smaller hooks to adjust final size while keeping the same round-by-round instructions.
Materials Needed
Main Fabric
- Worsted weight yarn (#4), approximately 200-300g in cream/off-white (main border and join)
- 30-40g in deep berry red (round 1 centre)
- 30-40g in bright orange (rounds 2-3)
- 30-40g in golden yellow (round 4)
- 30-40g in apple/grass green (round 5)
- 30-40g in teal/blue-green (round 6)
- 30-40g in violet/purple (round 7)
- Optional small amounts (10-20g each) of extra shades for extra color rounds or contrast
Tools Required
- 4.0mm (G) crochet hook for main work (or size recommended for your yarn)
- 3.5mm (E) crochet hook for tighter border/edging (optional)
- Yarn needle for weaving ends and seaming
- Scissors
- Stitch markers (at least 4)
- Blocking pins and blocking mat
- Tape measure or ruler
- Optional: blocking wires for crisp edges
- Optional: stitch counter or notepad to track color rounds
The Free Pattern
0% complete
Materials & Gauge
- Gauge is not critical for this blanket-style square but for consistency make a swatch: 12 dc x 8 rows = 4 inches using 4.0mm hook in worsted yarn. Adjust hook for your tension to match the square size shown (approximately 6.5" to 7" square when worked in worsted with 7 rounds of color and two-round cream border).
Colour Notes
- Use a new color for each round (as pictured) to get the layered rainbow effect. Change colors at the end of a round by completing the final stitch to the last yarn-over with the new color. Carry short floats on the back up to 4-5 stitches or fasten off and weave ends if joining into a blanket later.
Center & Granny Foundations
- Round 1: Using Berry (color A): Make a magic ring. Ch3 (counts as first dc), 2 dc in ring, ch2, *3 dc in ring, ch2* repeat 7 times (total 8 clusters). Join with sl st to top of beginning ch3. (24 dc, 8 ch-2 corner spaces)
- Keep clusters tidy: insert hook under both loops of each dc. The initial ch3 counts as first dc of the first cluster — that gives 8 cluster groups all around which form a round flower-like center.
- Round 2: Change to Orange (color B). In the first ch-2 corner sp work: (3 dc, ch2, 3 dc). *Sk next ch-2 sp and work 3 dc in the top of the next cluster space between the previous clusters (that is, into the center of the 3-dc group below)*. Continue: [3 dc in next side sp] then in the next corner sp work (3 dc, ch2, 3 dc). Repeat around completing 4 corner cluster-sets and 4 side cluster-sets. Join with sl st to the top of beginning ch3. (36 dc total this round, 4 corner ch-2 spaces)
- Round 2 turns the round into a square by building up 4 corner groups. Count corners as you work: each corner should have (3dc,ch2,3dc).
- Round 3: Change to Golden Yellow (color C). In each corner ch-2 sp work (3 dc, ch2, 3 dc). In every side 3-dc cluster from previous round work 3 dc into the space between clusters (the space between groups). Repeat around. Join. (48 dc, 4 corner ch2 spaces)
- Round 4: Change to Yellow-Orange (color D). Repeat Round 3: in each corner ch-2 sp work (3 dc, ch2, 3 dc). In each side space between clusters work 3 dc. Join. (60 dc, 4 corners)
- From here on one round equals one colour change if you want the same look as the photographs. Use a new color for each round to create the gradual rainbow effect. Always work corner groups into the ch-2 space from the previous round.
- Round 5: Change to Grass Green (color E). Work (3 dc, ch2, 3 dc) in each corner ch-2 sp. Work 3 dc in each side space between corner groups. Join. (72 dc equivalent, 4 corners)
- Round 6: Change to Teal (color F). Repeat corner and side pattern: (3 dc, ch2, 3 dc) in corners, 3 dc in side spaces. Join. (84 dc equivalent)
- Round 7: Change to Violet (color G). Repeat pattern: (3 dc, ch2, 3 dc) in corners, 3 dc in each side space. Join. (96 dc equivalent)
- At this point you have roughly 7 colour rounds built from the centre outward. The square should begin to take on a clear square shape. If you want a larger square add more colour rounds repeating the same increase method (corners always get the corner-group).
Expanded Colour Rounds (Optional extra rounds)
- Round 8: Optional: Change to a second Cream (or new color) and work as before: corners (3 dc,ch2,3 dc) and 3 dc in each side space. Join. (increases by 12 dc each round roughly)
- Round 9: Optional: Add another colour or repeat Violet. Corners: (3 dc,ch2,3 dc) in corner spaces. 3 dc in each side space. Join.
- Each new classic granny round increases the number of 3-dc side clusters by 4 (one on each side), so plan yarn amounts accordingly. If you add 4 extra colour rounds you should expect the square to grow by about 1.5 to 2 inches depending on tension and yarn weight.
Transition to Puff/Texture Rows
- Round 10: Change to Cream (border colour) but keep this round as a spacer: Ch1, sc evenly around working 1 sc in the top of each 3-dc cluster and 2 sc in each corner ch-2 space. Join with sl st. (This evens out the outer edge and prepares for textured rounds.)
- Working a round of sc smooths the edges and creates a base to place puff or post stitches for texture without pulling the corners out of square.
- Round 11: Using Cream (or a contrasting colour) work puff-style clusters into every third side cluster to mimic the slightly raised teardrop shapes visible in the photos. Puff cluster: yo, insert hook in the top of target 3-dc group, yo and draw up a loop; repeat yo, insert, draw up loop 3 times more (you will have 9 loops on hook), yo and pull through all loops, ch1 to close puff. Sk the adjacent 3 dc groups as indicated by the look, working a puff every 1-2 side spaces so the puffs line up into a decorative round. In each corner sc evenly (2-3 sc) to maintain square shape. Join. (Number of puffs depends on your number of side groups, typically 16-24 puffs)
- Puff clusters vary with yarn thickness — keep the same number of yarn overs for each puff to achieve uniform size. If your puffs are too tall flatten slightly with your non-hook hand while closing the loop.
- Round 12: Change back to Cream. Work 1 sc in each st and 2 sc in each corner ch-2 space around to tidy up and ensure the square stays even. Join. (counts equal to number of visible stitches from previous rounds)
- Round 13: Optional texture: Work 1 dc in the back loop only (BLO) into each st around to create a neat ridge. In corners work (1 dc BLO, ch2, 1 dc BLO). Join. (gives a framed ridge)
- BLO rounds add a subtle raised edge which helps the cream border sit slightly above the coloured rounds — this is visible in the close-up photo where the cream forms a neat ridge framing the colours.
Border Build (Detailed multi-round border to match photos)
- Round 14: Using Cream: Ch3 (counts as dc), work 1 dc in the same stitch as join, *sk 1 st, 5 dc shell in next st (shell = 5 dc in same st), sk 1 st, 1 dc* across the side, adjusting shells so they sit centered on each side between corners. In each corner work (1 dc, ch2, 1 dc) to maintain turn. Join. (shell count varies depending on square size; aim for 3 shells per side for a square approx 6.5")
- The visible triangular/arched shape on the last cream round in the photos is likely a simple shell or fan stitch repeated along the side. Arrange shells evenly across each side and keep corners consistent so the square stays balanced.
- Round 15: Using Cream: Work 1 sc in each dc and into the ch-2 corners make 3 sc (or 2 sc, ch2, 2 sc) to square the corners. Join. This evens the shells and gives a flat surface for the next round of large loops/rope edge.
- Round 16: Using Cream and a slightly larger hook if desired (optional): Create the large rounded loop edge seen in the close-up by working elongated loops: *ch5, sk 3 sts, sl st into next st* repeat across each side, placing ch5 loops evenly and making sure to place 3 loops into the corner ch-2 spaces to create smooth rounded corners. Join.
- These large chain loops are decorative and create the slightly rope-like raised frame visible in the photos. If you prefer a tighter look, work ch3 loops or 1 dc shells instead.
- Round 17: Using Cream: Work 1 sc into each ch-loop across to cover and secure the loops (1 sc in each ch sp), placing 3 sc in each corner ch-2 space to firm up corners. Join. This locks the decorative loops into a consistent frame.
- Round 18: Final smoothing round: Using Cream, work 1 hdc in each st around (or 1 sc if you prefer a shorter edge). Join and fasten off leaving a long tail if you’ll use whipstitch for a neat join when assembling multiple squares. Weave in ends.
- After this final tidy round block the square to size. Pin the square to a blocking mat to achieve the pictured crisp corners. Wet-block or spritz lightly and let dry fully for best results.
Alternative Textured Border Sequence (if you want extra height)
- Round 19: Using Cream: Work 1 rnd fpdc (front post double crochet) alternating with 1 rnd bpdc (back post double crochet) for 4 rounds total (two of each) to create a raised corded edge. In corners work (fpdc, ch2, fpdc) and (bpdc, ch2, bpdc) to maintain square shape. Join each round. (this adds about 0.5" height)
- Front and back post rounds create a ribbed frame similar to a rope — this is an optional look if you like the raised cream ridge visible in the close-up photos.
Joining Many Squares (two popular methods)
- Two widely used methods to assemble a blanket: (A) whipstitch/flat seam using a long tail and yarn needle, or (B) join-as-you-go (JAYG) to attach squares during the final border round. Both are described below.
- Method A — Whipstitch Join: Round 20 : Block all squares to exact same size. Place squares RS together. Using cream yarn and yarn needle sew through the top loops only (mattress stitch) across each seam, pulling gently to close gaps. For a neater join sew through the foundation sc round so the seam is less visible. Repeat for all adjoining edges to assemble rows, then sew rows together. Weave in ends and press lightly with blocking afterwards.
- Whipstitch gives a flat seam that is very secure for blankets that will be used frequently. Use a thinner yarn to create less visible seams if desired.
- Method B — Join-As-You-Go (JAYG): Round 21 : Work the final cream border for each square but in the side where you want to join a neighbor, replace sl st joins with the following: When you reach the side to join, hold finished neighbour square in position, and for each stitch across: work 1 sc in current square, then insert hook under corresponding stitch of the neighbor and work sl st to join (or sc through both loops for stronger seam). Continue to finish border as normal and corner stitches will be formed as (sc, ch2, sc) through both squares. This method joins squares seamlessly as you make them.
- JAYG produces a flat seam with the border edge incorporated; it saves sewing later and gives a continuous framed look like you see in the bedspread image.
Final Finishing & Blocking
- Round 22: After joining all squares: weave in all ends using a yarn needle. Lightly block the entire assembled piece — pin edges square and spray with water or use a steamer. Allow to dry fully before use to set the shape.
- Round 23: Optional final round for blanket: Work an outer border in cream around the entire blanket: 1 sc in each st around and in corners work (sc, ch2, sc) for 3 rounds for a consistent frame. For a puffed corner edge finish work a round of reverse single crochet/crab stitch to give a rope-like top edge.
- Crab stitch (reverse sc) is worked left to right — insert hook from left to right into next loop, yo, pull through and complete sc. It gives a twisted rope look like the neat rounded edge visible in the close-up images.
Troubleshooting & Adjustments
- Round 24: Info :
- If your square is slightly rectangular: add or remove one side cluster round (work one more classic granny round to lengthen the short side) or adjust border width to balance sides. If corners curl, add one sc round and re-block damp to relax and flatten the corners.
- Round 25: Info :
- To replicate the slightly elevated puff row from the original photos, add a round of tall puff clusters (triple puff) between two cream rounds: make each puff with 5 yarn-overs bringing 10 loops on hook before pulling through to close, ch1 to secure. Work evenly spaced across the side groups so the puffs form a neat row near the border.
Detailed Count Examples (for a 7-round-colour square)
- Round 26: Example counts (approximate) for a square made with 7 colour rounds then borders as described: Round 1 = 8 clusters (24 dc), Round 2 adds additional 12 dc (approx 36 dc), Round 3 approx 48 dc, Round 4 approx 60 dc, Round 5 approx 72 dc, Round 6 approx 84 dc, Round 7 approx 96 dc. The sc/hdc/edging rounds will have one stitch per previous cluster/space and should be counted as such when planning yarn quantities.
- These numbers are given as approximates because clusters and shell groups are counted in 3-dc groups rather than individual dc per se. Use them to estimate yarn, but prioritize measuring your own swatch.
Variations & Inspiration
- Round 27: Info :
- Variation ideas: make fewer colour rounds for a coaster-sized square; add extra textured rounds for a pillow insert; change the cream border for a contrasting dark edge; use variegated yarn for inner rounds to create a different rhythm of colour.
- Round 28: Info :
- To make a bedspread like in the first image, plan for approx 8-10 squares across the width and 10-12 down the length depending on the bed size. Join using JAYG for the most continuous look and finish with 3 rounds of cream for a cohesive frame.
Assembly Instructions
- Block every finished square to identical dimensions before any assembly; pin to a blocking mat and allow to dry fully.
- Attach head? N/A — Attach squares using join-as-you-go during the final border round: match edges carefully and work sl sts through both squares to form a flat seam.
- If using whipstitch: stack squares RS together and mattress stitch through the top loops (not around the corner ch-2) to keep seams neat and invisible.
- When joining rows, work row by row and pin the squares first to ensure even spacing and straight edges; check corners meet precisely to avoid staircase effects.
- After assembly weave in ends, then add an outer border in cream by working 1 sc in each stitch around, placing (sc,ch2,sc) in corners. Finish with reverse sc (crab stitch) for a rope edge if desired.
- Final pressing/blocking: re-block the complete blanket after joining to square up the assembly and set stitches, especially after heavy joining or textured rows.
Common Mistakes & How to Fix Them
- Skipping stitch markers when starting each round will make counting clusters and corners harder; mark your first stitch each round to keep orientation correct
- Changing colors without finishing the last stitch in the previous color can leave messy tails; complete the last yarn-over and pull through with the new color
- Working too loosely for granny clusters creates gaps that reveal your join or stuffing underneath when used as cushion inserts; use a slightly smaller hook if needed
- Not carrying unused yarn neatly inside the work will create lumps; weave or carry the yarn along the back when switching colors each round
- Ignoring corner definition makes joined blankets look wavy; follow corner stitch counts and block the squares flat before joining
- Overstuffing edges or handling them aggressively before blocking can distort the square's shape; block flat after finishing to even edges
Important Notes
- Use stitch markers at the start of each round to maintain orientation; granny squares are rotationally symmetrical so markers help identify round starts when joining.
- Stuffing not required for flat squares; however if making cushions, add a small amount of interfacing or lining to keep the square flat behind the pillow insert.
- Always change color by finishing the last stitch of the previous round to the last yo with the new color; this creates a neat, low-profile join.
- Maintain consistent tension particularly when working shells or puff stitches — an inconsistent tension will produce irregular shell sizes and wavy edges.
- When mocing to a new colour, weave in ends on the wrong side as you go for a tidy back; alternatively carry yarn if you plan a small project where floats won't show.
- If joining with whipstitch use a slip knot tail about 12-18" long at the start of seaming for comfortable hand sewing and less knotting later.
- For a crisp final look, steam-block lightly rather than saturating heavy blankets, and use blocking wires if you want perfectly straight edges.
- Always label and count your colour rounds for repeating an identical pattern across many squares — a simple list of colours per round saves time and confusion.
Finishing a rainbow granny square is pure joy — watching the colours layer and the cream border frame them is so satisfying. Each completed square is a small celebration of texture and hue, and assembling them into a blanket multiplies that happiness. Whether you keep it cozy for yourself or gift it to a loved one, this square becomes a lasting handmade heirloom. 🧶🌈
Spread warmth one stitch at a time and enjoy the relaxing rhythm of granny rounds. Happy crocheting! 🎉
Crochet Abbreviations
- mr
- magic ring
- ch
- chain
- sc
- single crochet
- hdc
- half double crochet
- dc
- double crochet (US terminology)
- tr
- treble crochet
- bpdc
- back post double crochet
- fpdc
- front post double crochet
- sl st
- slip stitch
- sk
- skip
- sp
- space
- rep
- repeat
- inc
- increase (2 sts in same st or sp)
- dec
- decrease (invisible decrease for sc or sc2tog as specified)
- yo
- yarn over
- st
- stitch
- BLO
- back loops only
- FLO
- front loops only
- ( )
- work instructions in brackets as directed
- x
- times
You Ask, We Answer
What is the finished size of this square?
Worked in worsted weight yarn with a 4.0mm hook and 7 color rounds plus the described border, each finished square will measure approximately 6.5" to 7". Your tension and yarn choice may alter size slightly.
Can I use different yarn weights for this pattern?
Yes — you can use lighter or heavier yarn, but adjust your hook size accordingly. Thicker yarns will make larger squares and require more yarn; thinner yarns will make smaller squares and may produce finer texture.
Do I need to use puff stitches?
No — puff or textured rounds are optional. They add depth and make the square more tactile. If you prefer a flatter look, replace puff clusters with 3-dc clusters or sc rounds.
How much yarn will I need for a blanket?
A lapghan made of roughly 6×8 squares (48 squares) will require approximately 2,000-3,000g of total yarn depending on border width and number of textured rounds. Estimate per-square yarn using the mainfabric quantities above and multiply by the number of squares.
Can I join squares as I go?
Yes — the pattern includes a join-as-you-go method that lets you connect squares during the final border round for a seamless look. JAYG saves sewing time and looks continuous when done carefully.
How do I prevent my corners from rounding?
Make sure you are working the full corner stitch sequence exactly (3 dc, ch2, 3 dc or the sc equivalents in the border) and block each square flat before joining. If corners still round, add extra sc in corners to anchor them.
What if my stitch count is off?
If a round's count is off, unpick back to the last round where counts matched. Fixing earlier gives a more even result — trying to compensate later can distort the square shape.
How to clean the finished blanket?
Care instructions depend on yarn choice — most acrylic yarns are machine-washable on cool gentle cycles; natural fibres may need hand washing. Always check yarn labels and test a swatch wash first.