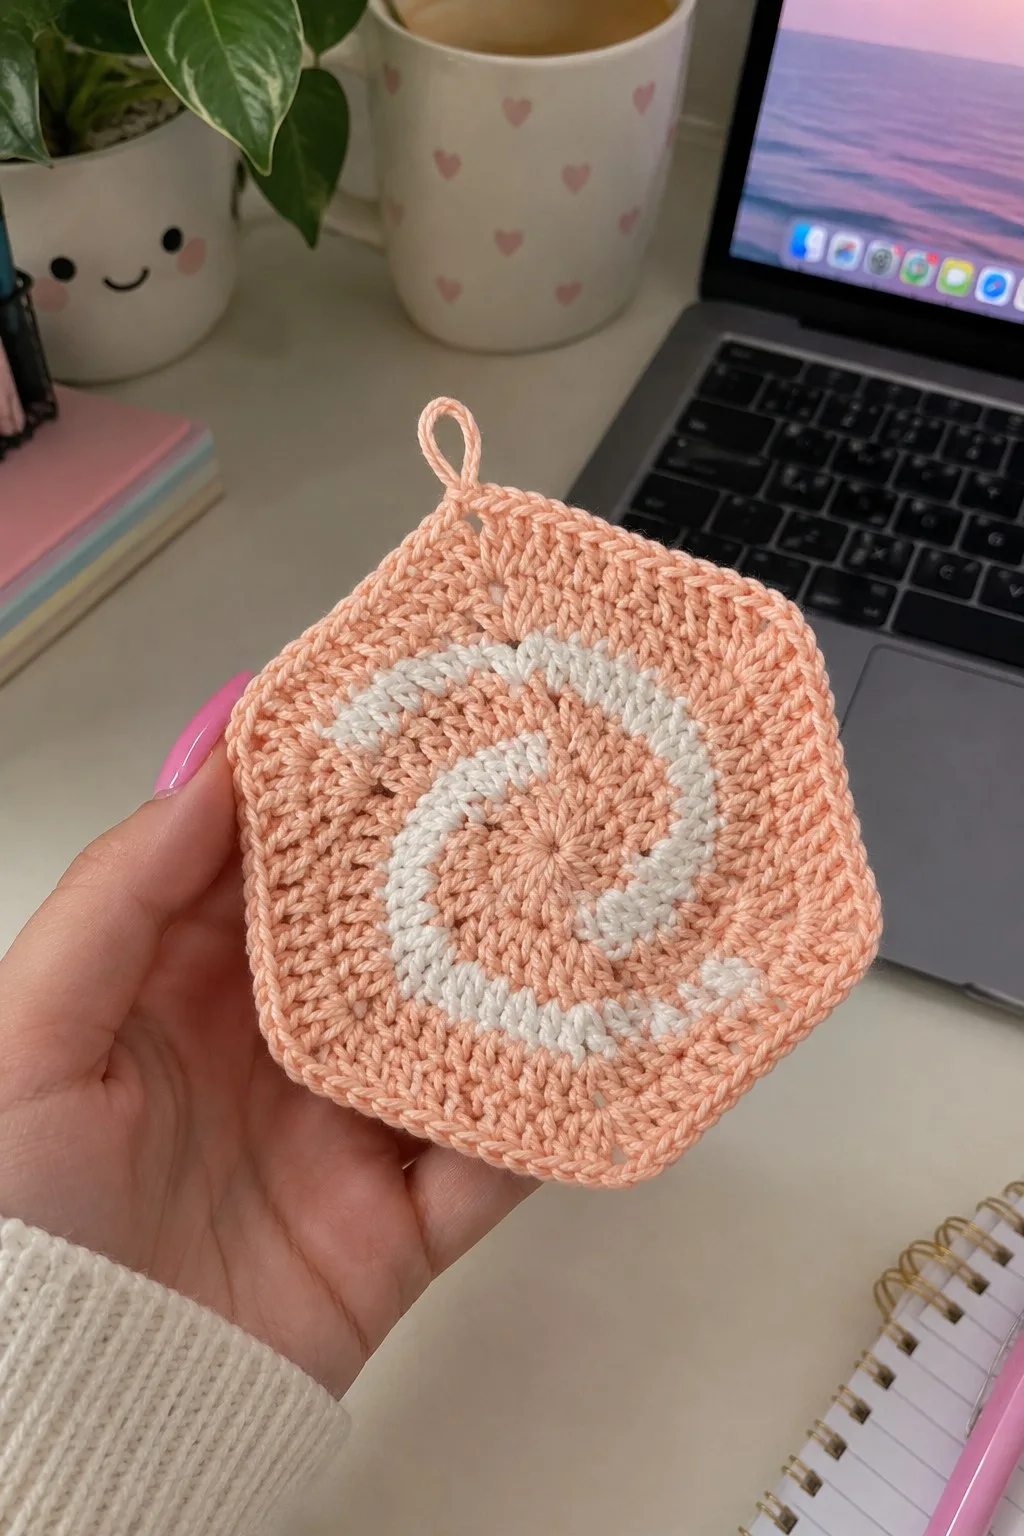
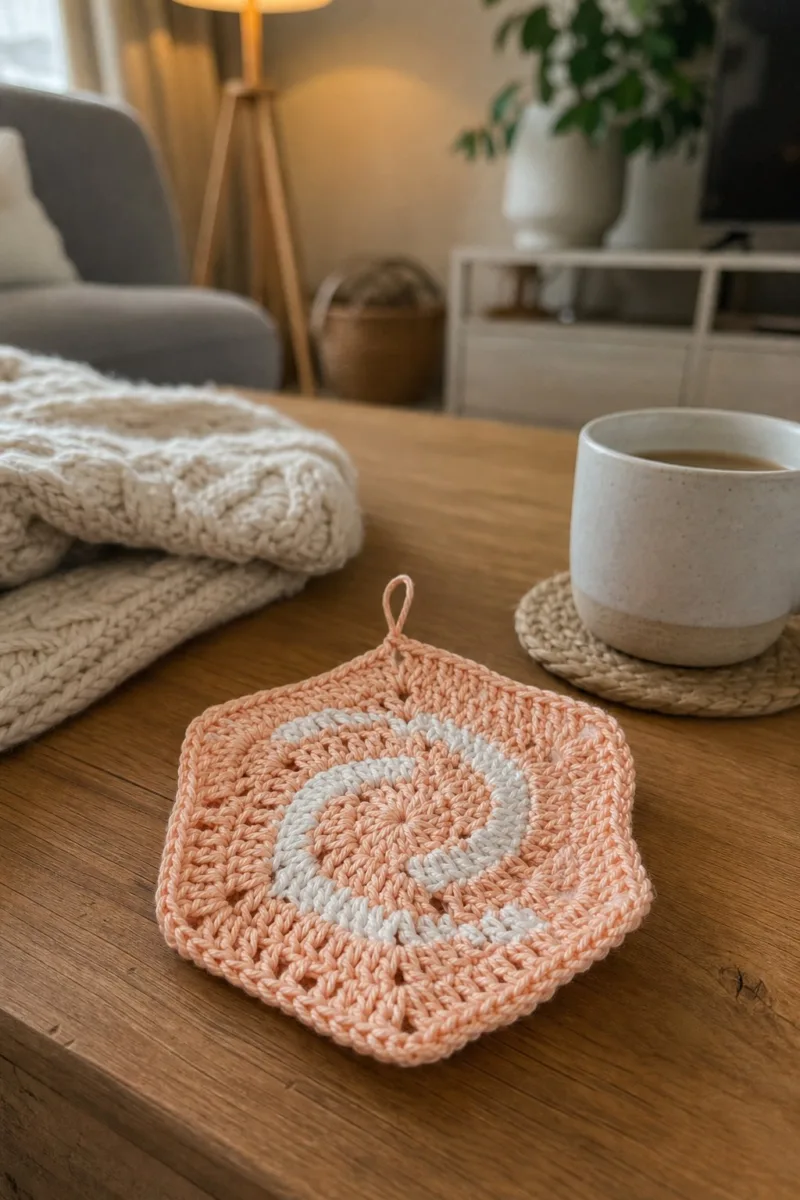
A modern peach hexagon with a soft white spiral, perfect as a decorative potholder, trivet or coaster. Worked in cotton yarn with textured rounds and a neat hanging loop. The spiral is added with surface stitch detail to keep the front smooth and durable.
About This Peach Hexagonal Spiral Potholder Pattern
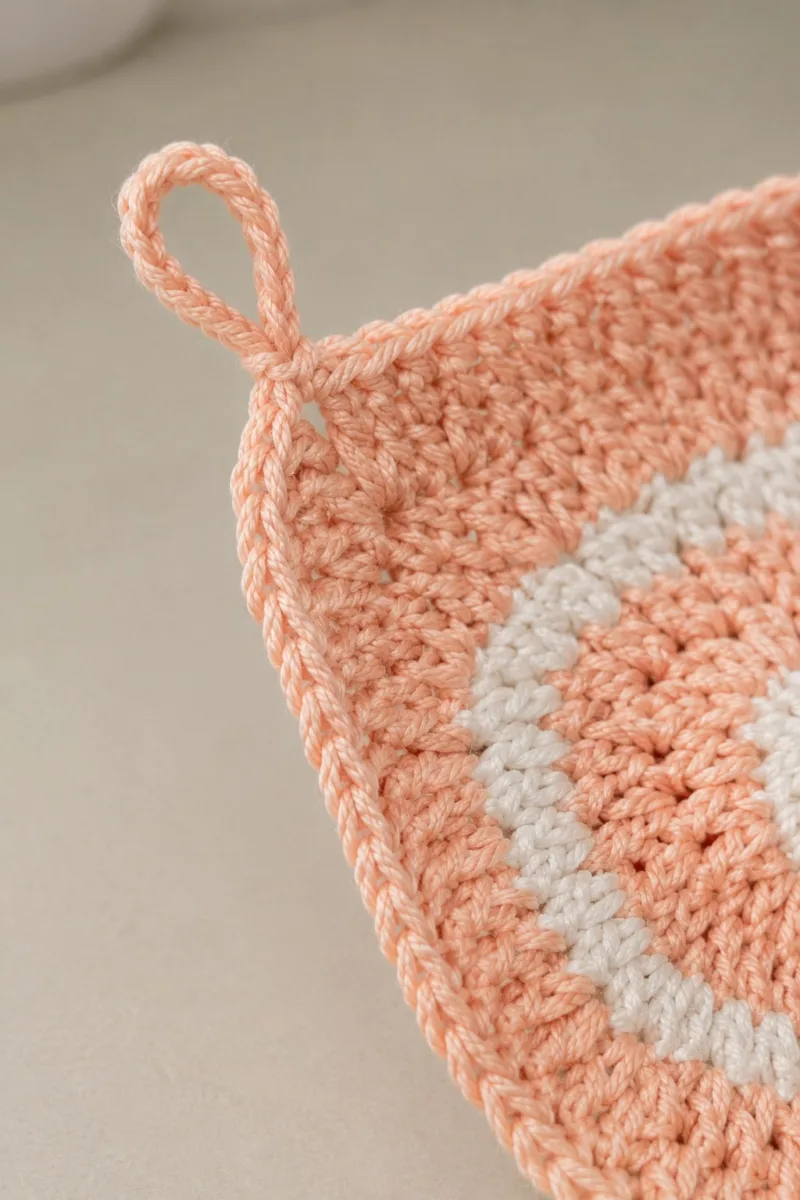
This pattern recreates a delicate peach hexagon with a white spiral worked as a subtle surface texture — a modern, minimal accessory for kitchen or living space. It uses worsted/ DK weight cotton, double crochet construction for a sturdy, heat-tolerant fabric. The piece finishes with a tidy single-crochet border and a small braided loop for hanging.
The spiral detail is added after the hexagon body is completed using surface slip-stitching to keep the front flat and graphic. The repeating rounds include BLO/FLO texture options so you can make a smooth or ridged finish.
Why You'll Love This Peach Hexagonal Spiral Potholder Pattern
I love how this pattern combines simple geometry with a bold spiral — it feels both modern and cozy. I also enjoy the surface stitch spiral technique because it gives a designer look without complicated colorwork. The finishing loop and tidy border make it satisfying to complete and display.
- Cozy Accent – A warm touch for your space that transforms ordinary corners into inviting nooks filled with handmade charm.
Switch Things Up
I absolutely loved writing this pattern because the hexagon shape plus the spiral detail gives such a modern, cozy feel. You can easily change the color palette — swap peach for coral or dusty pink, and try navy or mustard for the spiral for a bolder look.
I often switch the spiral to a tonal color for a subtle raised texture or to a high-contrast color for a graphic statement. Try adding an extra backing hexagon to make a thicker pot holder, or work more sc rounds on the border for added insulation. You can also make a set in different sizes by stopping the base rounds earlier or later.
I like to customize the loop too — make it longer for hanging or braid three thin strands of yarn for a textured loop. The construction is very forgiving: change stitch types (hdc for firmness, dc for speed) to suit your preference while keeping the spiral worked on top for the same signature look.
Materials Needed
Main Fabric
- Worsted/DK weight cotton (#4/3) approximately 100g in peach (main color)
- 20-30g in white or off-white for spiral detail
- Small scrap (5-10g) of contrast for hanging loop if desired (peach shown)
Tools Required
- 3.5mm (E) crochet hook (or adjust to get gauge with cotton yarn)
- 3.25mm (D) hook for tighter edging (optional)
- Tapestry/yarn needle for weaving ends
- Scissors
- Stitch marker
- Measuring tape or ruler
- Blocking pins and mat (optional)
- Optional: stitch holder or scrap yarn to hold loop while finishing
The Free Pattern
0% complete
Main Hexagon (Spiral Center)
- Round 1: 6 dc in magic ring, do not join (6)
- Work in continuous rounds for a spiral-friendly joinless center; use a stitch marker to mark the first stitch of each round.
- Round 2: Inc in each stitch around (12)
- Round 3: (1 dc, inc) x 6 (18)
- Round 4: (2 dc, inc) x 6 (24)
- Round 5: (3 dc, inc) x 6 (30)
- Round 6: (4 dc, inc) x 6 (36)
- At this point the hexagon has six noticeable corners created by the increases. Keep the six increase points aligned each round for a flat hexagon.
- Round 7: (5 dc, inc) x 6 (42)
- Round 8: (6 dc, inc) x 6 (48)
- Round 9-12: 1 dc in each st around (48)
- Work rounds 9-12 evenly to build a flat center before widening further. Keep counts consistent and use marker to track the first stitch of each round.
- Round 13: (6 dc, inc) x 6 (54)
- Round 14: (7 dc, inc) x 6 (60)
- Round 15: (8 dc, inc) x 6 (66)
- Round 16: (9 dc, inc) x 6 (72)
- If you prefer a smaller potholder, stop after round 12 or 14. For the pictured palm-sized piece continue to round 16 to reach a comfortable working size for the spiral.
- Round 17-20: 1 dc in each st around (72)
- Round 21: 1 dc in each st BLO (72)
- Round 22-24: 1 dc in each st around (72)
- Rounds 21-24 introduce a subtle ridge by working BLO on round 21; this creates a nice texture contrast with the spiral and helps define the hexagon's face.
- Round 25-28: 1 dc in each st around (72)
- Round 29: Change to a slightly smaller hook (optional) and work 1 hdc in each st around for a denser fabric (72)
- Switching briefly to hdc tightens the fabric for the area where the spiral contrast will rest; this helps the surface slip stitch sit nicely without sinking.
- Round 30-33: 1 dc in each st around (72)
- Round 34: 1 dc in each st FLO (72)
- Round 35-36: 1 dc in each st around (72)
- By alternating FLO/BLO rounds you can create subtle banding. The pictured sample has smooth body with one slightly raised ridge. These texture rounds are optional but highly effective.
- Round 37-44: 1 dc in each st around (72)
- Round 45: Switch to peach (main color) if you ever changed; 1 sc in each st around working in BLO for a defined base edge (72)
- Prepare for the surface spiral by securing ends and making sure the top is flat. The spiral will be added with surface slip stitches in white yarn.
- — Surface Spiral (contrast white): Info : The spiral is worked after the base is complete by using surface slip stitch (or surface single crochet) to draw a spiral line from center outward. Work slowly and follow the curve; practise on a spare round swatch first.Round 46 : Attach white yarn at the very center post (work a sl st through the post of the center dc), ch1, then surface sl st into the front of each dc for 6-8 stitches to make the first short arc (this is counted as Spiral Row 1)Round 47 : Continue surface sl st following the arc: work 10-14 sl st in a gentle outward curve, skipping a few stitches on the inside side to bias the line and create a spiral effect. Fasten off when arc ends; weave tail.Info : Surface slip stitch uses the front loops/post of the dc. Pull the white yarn snug but not tight so it sits on top of the peach surface. Create a gradual curve by changing stitch frequency along rounds.Round 48 : Begin spiral round 2: join white again at the end of previous arc and surface sl st continuing the spiral path. Work longer arcs each pass so the spiral grows outward (aim for 20-30 sl st on later passes)Round 49-56 : Repeat surface sl st passes, each time re-joining white and continuing the spiral path around the hexagon to create 2.5–3 full turns depending on your preference. Keep spacing even and soften turns by adding or skipping stitches as needed.Info : The pictured spiral has a soft, thick white band; to achieve that thickness you can work 2 rows of surface sl st close together, or do one pass of sl st and a second pass of short slip-stitch clusters to thicken the line.Round 57 : Optional: Work a tidy row of peach yarn sl st around the base of the spiral to lock the white in place and create a subtle border next to the spiral (72)Info : When adding surface detail, step back occasionally to make sure the spiral reads well across the hexagon – adjust stitch counts if a turn looks too tight or too loose.— Expansion & Texture Rounds :Round 58-61 : 1 dc in each st around working evenly to the same stitch count (72)Round 62 : 1 hdc in each st around for a firmer band (72)Round 63-66 : 1 dc in each st around (72)Info : These rounds strengthen the body under the spiral so daily use will not cause distortion. Use hdc for a denser band and then return to dc for visual balance.Round 67 : 1 dc in each st BLO (72)Round 68-70 : 1 dc in each st around (72)Info : Work one BLO round to create a faint ridge that frames the spiral; this subtle ridge provides a handmade, textured look as seen in the photos.— Border & Hanging Loop :Round 71 : Change to sc: 1 sc in each st around working into back loop only for a neat edge (72)Round 72 : 1 sc in each st around (72)Round 73 : 1 sc in next 4 sts, ch 20 (or desired length), skip 6 sts, 1 sc in next 52 sts, join the chain loop to the starting point with sc into first sc to attach loop. (72 including loop attachment area)Info : Adjust the chain length for a larger or smaller loop. The pictured loop is short — chain 10–14 for a tidy hanging loop. When joining the loop, be sure it sits flat and not twisted.Round 74 : Work 1 sc around entire piece including the loop base, placing 2 sc into the st immediately before and after the loop join for reinforcement (74 effective stitches around corner areas)Round 75 : 1 sl st in each st around for a flat, finished edge (72)Info : If you want a decorative finish, substitute crab stitch (reverse sc) for round 75 to give a twisted rope effect on the edge as seen in some samples.— Decorative Edge Options (extra rounds) :Round 76 : Optional picot row: *1 sc in next 3 sts, ch3, sl st into last sc to form a picot* repeat around (adjust repeat to maintain neat spacing)Round 77 : Optional: 1 sl st around to settle picots and tidy borderInfo : Picots add a lacy finish but can catch on fabrics — avoid if using as a heavy-duty potholder. For a neat modern look keep the simple sc + sl st edging.— Final Stabilizing Rounds :Round 78-82 : Work 1 sc in each st around for 5 rounds to build a thicker border (72)Info : Multiple sc rounds around the edge create a cushioned border and improve durability for everyday use — this is why the pattern includes extra rounds to reach a pleasing thickness.Round 83 : Fasten off peach yarn leaving a 20 cm tail for weaving. Weave the tail through the edge stitches on the wrong side to hide it.Round 84 : Weave in all remaining ends using tapestry needle, trimming close to the fabric (no knots visible on the front)Info : Weave ends in a few different directions to secure them; for cotton yarn a few tidy passes and a small dab of fabric glue on the tail end (on the wrong side) provide extra security.— Optional Surface Texture Enhancements (extra decorative rounds up to 100) :Round 85-88 : If you prefer a raised spiral, work 2 rounds of surface sc directly over the white sl sts using white yarn to thicken the band (each pass considered a round)Round 89 : Optional contrast bind-off: join white and sc around only the spiral area to highlight it (work sparingly to avoid bulk)Round 90-94 : Stabilize the back: on the wrong side work 1 sc in each back loop around for 5 rounds to create a flatter, smoother back surface (72)Info : Many photos show a tidy flat back — these additional rounds are optional but make the potholder reversible and neater when hung on view.Round 95-98 : Optional final finishing rounds: 1 sc in each st around, then 1 sl st for final tidying pass (72)Round 99 : Block lightly: dampen and pin the hexagon to a flat blocking mat, ensure corners are even, leave to dry fullyRound 100 : Final check: trim any loose ends, touch up loop if necessary. Your peach hexagonal spiral potholder is complete.Info : Blocking evens stitches and opens the spiral visually. For cotton yarn, gently press with steam while not flattening the textured spiral area.
Assembly Instructions
- Weave in and secure all ends on the wrong side with a tapestry needle; hide tails along several rows for a tidy finish.
- If you created the loop by chaining and joining, reinforce the loop base by sewing around the chain join with several whip stitches into the border rounds.
- If you used surface slip stitch for the spiral, secure the ends by weaving the tail under the nearest back loops and trimming close; use a small knot inside the fabric if you prefer extra security.
- Block the finished hexagon to flatten and even the corners; pin each corner out at equal angles to keep a consistent hexagon shape while drying.
- If making a reversible piece, add the optional wrong-side sc rounds (rounds 90-94) before final finishing to produce a smooth back surface.
- Check tension and evenness after blocking; if corners pull in, add one extra sc in each corner on the next sc round to release tension and re-block.
- Reinforce the hanging loop by stitching through the loop base and the edge rounds with a length of yarn and knotting securely on the wrong side.
- Store the finished potholder flat or hang by the loop; avoid exposing to extreme heat or flame even though cotton offers heat tolerance.
Common Mistakes & How to Fix Them
- Skipping stitch markers at round starts can cause misaligned corners and an uneven hexagon shape; mark every round start.
- Working too loosely will produce holes and poor heat resistance; use a slightly smaller hook than yarn label suggests for tight fabric.
- Changing colors without weaving tails in or securing them will leave messy backs; carry the yarn or weave tails neatly as you go.
- Starting the surface spiral too early makes placement awkward; complete the base hexagon first for a real visual guide.
- Not counting increases evenly across the six sides will make the hexagon warp; perform increases in the same positions each round.
- Ignoring blocking will leave the piece slightly wavy; wet-block lightly to flatten the hexagon and open the spiral.
Important Notes
- Use stitch markers consistently at the beginning of each round to avoid counting errors and maintain proper hexagon shaping
- Work the spiral as surface stitching after the body is complete for the best placement and visual control
- Stuffing is not required for this flat accessory; keep fabric flat by working with consistent tension and blocking at the end
- When changing colors, carry unused yarn along the wrong side or weave tails in immediately to avoid long floats
- Cotton yarn will relax after washing and blocking — wet block lightly and shape corners for a perfect hexagon
- For a more durable potholder, add extra sc rounds around the edge to thicken the border and padding
- If making as a trivet, consider adding another hexagon back and join both pieces with sc rounds for extra thickness
- Keep a smaller hook on hand for edging and hdc rounds to tighten the border as needed
This peach hexagonal spiral brings a touch of modern charm to any kitchen or living space. The spiral detail is bold but gentle, and the cotton fabric is both pretty and practical. I love how quickly this project comes together and how satisfying the final blocking step feels. Hang it, gift it, or use it daily — this little handmade accent always adds warmth and personality. 🧶🍑
Crochet Abbreviations
- mr
- magic ring
- ch
- chain
- sc
- single crochet
- hdc
- half double crochet
- dc
- double crochet (US)
- tr
- treble crochet (US)
- inc
- increase (2 stitches in same stitch)
- dec
- decrease (invisible dec if preferred)
- sl st
- slip stitch
- BLO
- back loops only
- FLO
- front loops only
- st(s)
- stitch(es)
- sp
- space
- rep
- repeat
- ( )
- work instructions in brackets as directed
- x
- times
You Ask, We Answer
What is the finished size of this potholder?
Using worsted/DK cotton and the stated hook, the finished hexagon will measure approximately 10-12 cm (4-4.5 in) across from corner to corner. Stopping earlier or later rounds will change the size proportionally.
Can I use different yarn weights for this pattern?
Yes — thicker yarn (bulky) will enlarge the finished size and produce a thicker potholder; thinner sport yarn will make a smaller, lighter piece. Adjust hook size and rounds to taste.
Do I need to make the spiral with a different color?
No — the spiral can be done with the same color for a subtle texture or with contrast yarn for the graphic look shown. Surface slip stitch is used for the contrast spiral.
How much yarn will I need?
Approximately 100g of main peach cotton and 20-30g of white are sufficient for the piece as written. Exact amounts vary with gauge and number of extra rounds you choose to add.
Is a hanging loop necessary?
No — the loop is optional. It makes the piece easy to hang for display and storage. You can also make a larger loop or omit it for a purely tabletop trivet.
How do I make the spiral sit flat?
Work the surface slip stitches snugly but not too tight, and then block the finished piece flat. If the spiral pulls up, lightly steam-block to relax the tension.
Can I make this reversible?
Yes — add the optional wrong-side stabilization rounds (rounds 90-94) to create a smooth back, or make a second hexagon and join right sides together for a padded reversible potholder.
What's the best way to wash this?
Cotton can usually be machine washed on a gentle cycle and dried flat. Avoid high heat to preserve shape and color; air drying or low heat is recommended.