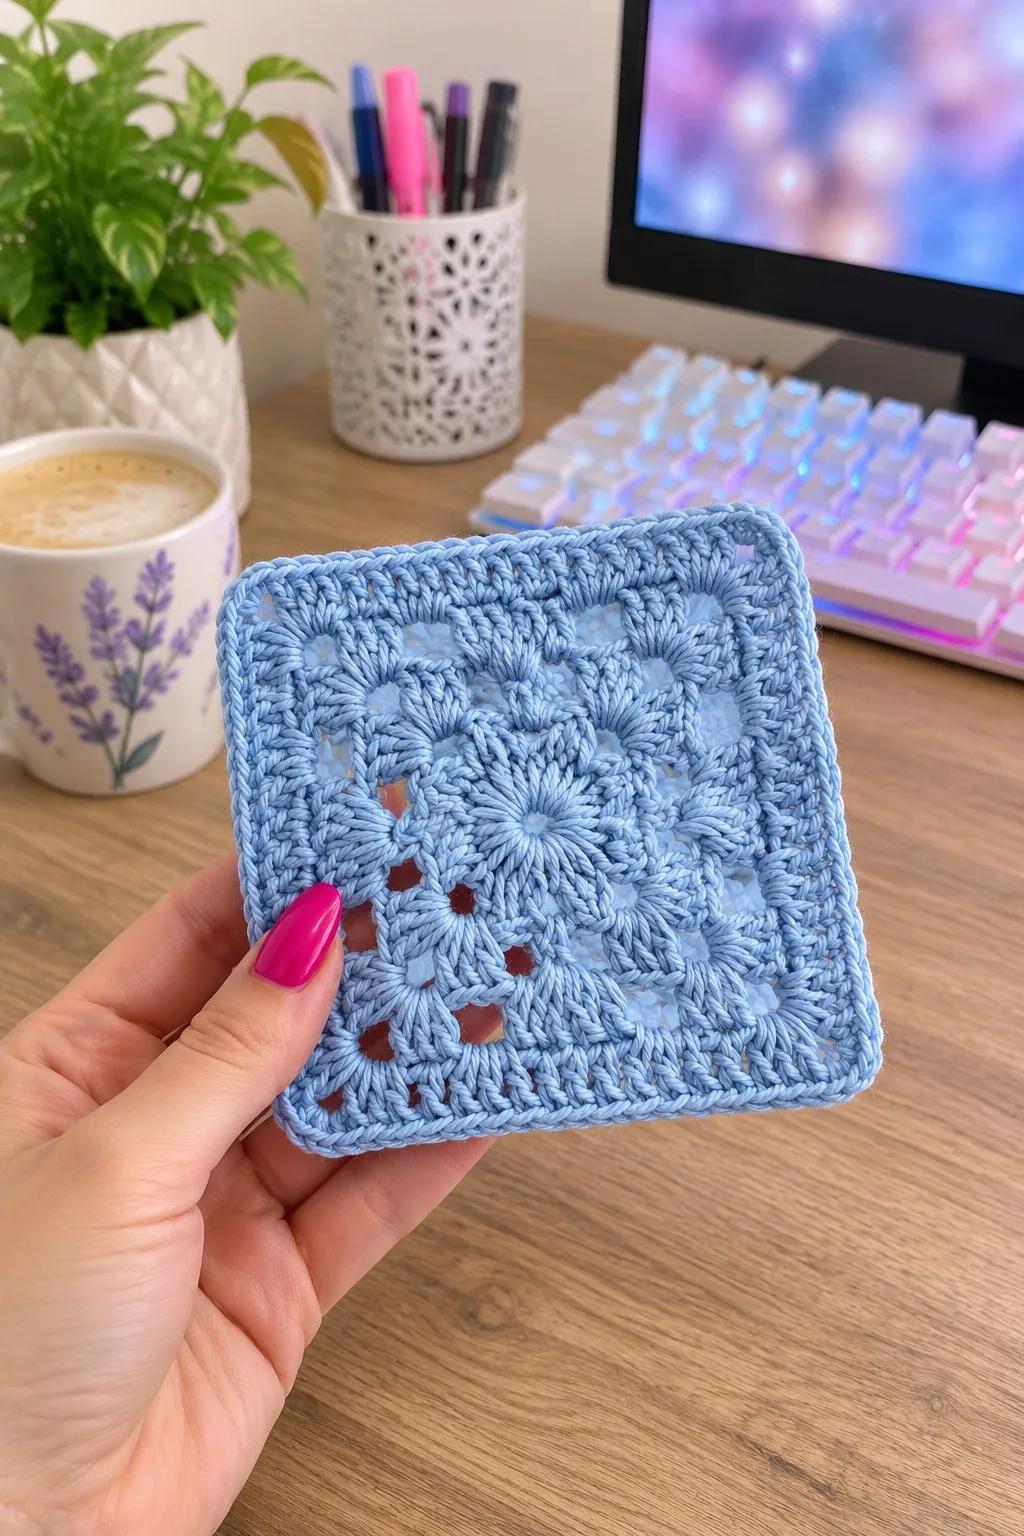
A soft, baby-blue granny square blanket made from elegant raised sunburst centers and chunky shells. This pattern shows how to crochet a textured square with puff/sunburst stitches, convert it into a perfect square, join multiple squares, and finish with a layered decorative border. Ideal for a cozy bed throw or nursery blanket—soft, modern and wonderfully tactile.
About This Blue Cool Granny Square Blanket Pattern
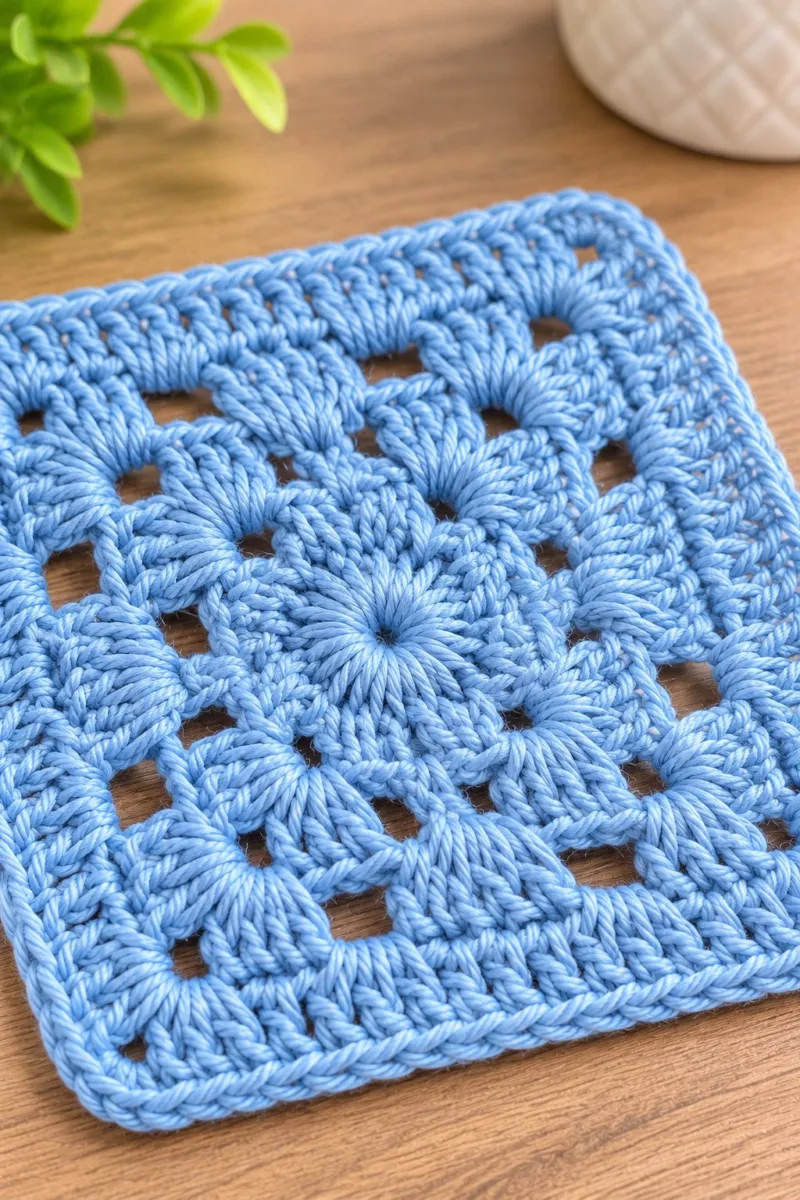
This pattern recreates the cool baby-blue granny square seen in the photos: a raised sunburst center (puff-style star), layered shell rounds, and a smooth square conversion with a subtle raised border. The design reads beautifully as single squares or repeated across a full blanket, and finishes with a neat textured border that flatters each square. Photos show 15–20 cm squares made with a worsted/light-worsted cotton-blend yarn that blocks flat and holds a crisp stitch definition.
The pattern uses a sunburst/puff center to give depth, then shifts to shell and cluster rounds to shape the square. Join-as-you-go and a multi-row border options are included, making assembly and finishing easy for a polished blanket.
Why You'll Love This Blue Cool Granny Square Blanket Pattern
I love this pattern because the raised sunburst center is impossibly tactile—each puff cluster creates a tiny bloom that catches the light. The subtle square shaping and clean final border make the blanket versatile for nursery or adult bedrooms. I also enjoy how the repeated square motif stitches up quickly and stacks into a calming, consistent texture. The blue color in the photos is soothing and highlights the stitch definition beautifully.
- Cozy Accent – A warm touch for your space that transforms ordinary corners into inviting nooks filled with handmade charm.
Switch Things Up
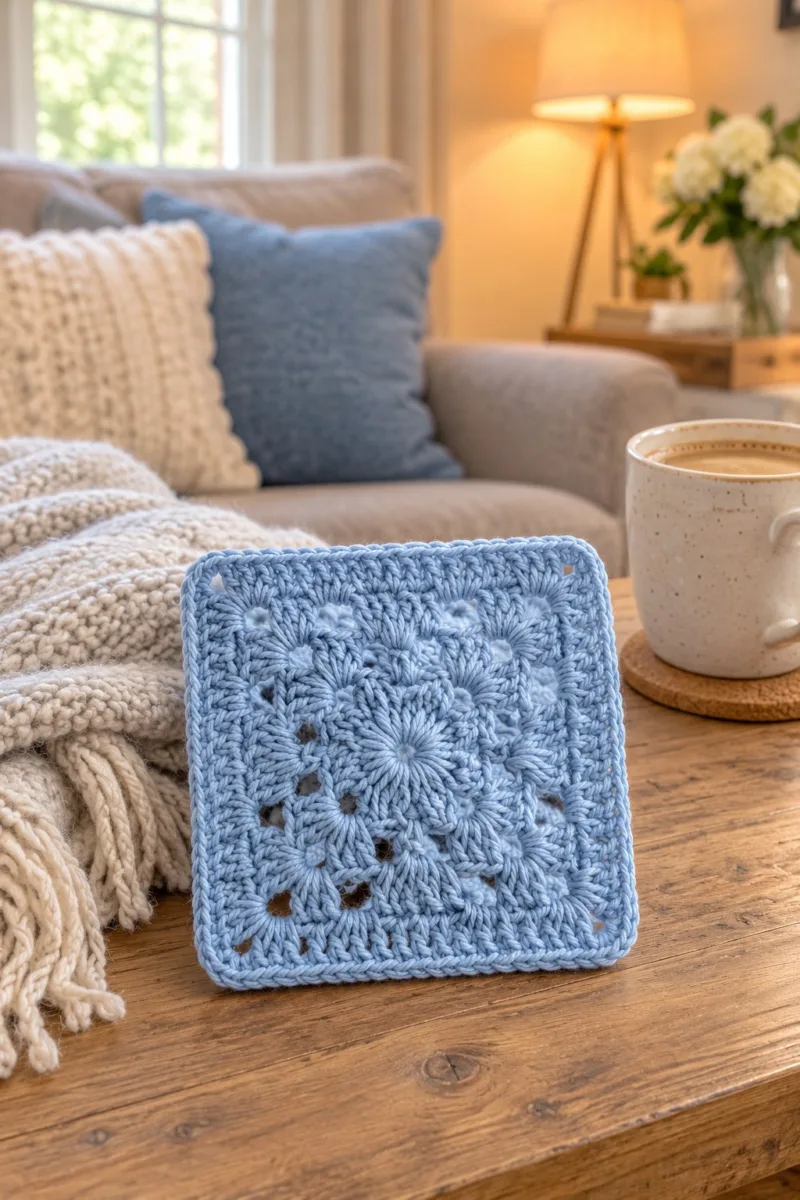
I absolutely adore how versatile this square is — the raised sunburst center makes it unique and easy to personalize. You can change the center to a flat cluster, swap the border for a scalloped edge, or use a contrasting color for the final rounds.
I like to experiment by altering yarn weight and hook size: a DK yarn with a 3.5mm hook makes sweet small squares for a baby blanket, while a bulkier yarn produces a cozy lap blanket quickly. For a modern twist, try alternating two shades of blue or add a neutral band between squares.
If I wanted a reversible blanket, I would block all squares first and use mattress stitch for joining — the seam disappears and both sides look great. If I wanted extra texture, I’d add more BLO rounds or an extra crab-stitch round for a rope-like edge.
Materials Needed
Main Fabric
- Worsted/light-worsted weight cotton-blend yarn (DK/Light #3 or Worsted #4 equivalent) in baby blue, approximately 900-1200g for a lap blanket (approx. 36–49 squares depending on final blanket size)
- For one sample square (approx. 15cm/6in): about 20-25g baby-blue yarn
- Small amounts (10-20g) of the same color reserved for joining and borders
- Optional: contrasting color 50-100g if you plan stripes or two-color joining
Tools Required
- 4.0mm (G) crochet hook for main work (adjust as needed for gauge)
- 3.5mm (E) crochet hook for tighter edging (optional)
- Yarn needle for weaving in ends and seaming
- Stitch markers (at least 6)
- Scissors
- Blocking pins and mat for shaping squares
- Tape measure or ruler
- Optional: row counter or notepad
The Free Pattern
0% complete
Notes & Special Stitches
- This pattern uses a puff (sunburst) stitch to create the raised center. Puff stitch used here: YO, insert hook into stitch, YO and pull up a loop; repeat YO, insert, pull up a loop 4 more times (total 5 loops pulled up). YO and pull through all 6 loops on hook, ch1 to close puff. Each puff counts as one stitch for counting purposes. Adjust number of loops per puff if you prefer a larger or smaller puff.
- Gauge: one finished square measures approximately 14–16 cm (5.5–6.5 in) with 4.0mm hook and worsted/light-worsted cotton. Change hook size if your square is larger or smaller. Blocking will flatten and equalize the square.
Sunburst Center (Rounds 1-6)
- Round 1: Make a magic ring. Ch3 (counts as first dc), work 11 dc into ring. Pull ring closed. Join with sl st to top of ch3. (12 dc)
- Keep your ch3 loose so the center does not pucker. The ch3 at the beginning of this round counts as a dc.
- Round 2: Ch1, *puff in next stitch (see notes) (1 puff), ch1* across around to create 12 puff stitches with a ch1 between each puff. Join with sl st to first puff top. (12 puffs, 12 ch1 sps)
- Work puff stitches on top of each dc to create a sunburst. Keep each puff loose enough that you can insert hook into puff spaces in the next round.
- Round 3: Sl st into first ch1 space between puffs. Ch3 (counts as dc), 2 dc in same ch1 space, *ch1, 3 dc in next ch1 space; rep from * around. Join with sl st to top of ch3. (12 clusters of 3 dc separated by ch1 = 36 dc, 12 ch1 sps)
- This round builds a ring of small 3-dc clusters that will anchor the next petal round. Keep counts of ch1 spaces for symmetry—there should be 12.
- Round 4: Sl st to center of first 3-dc cluster. Ch2 (counts as hdc), 3 hdc in same cluster center, *ch1, 4 hdc in next cluster center; rep from * around. Join with sl st to top of ch2. (12 groups x 4 hdc = 48 hdc, 12 ch1 sps)
- Work the hdc groups into the body of each cluster to form a low petal. These will create a softer transition between puff center and shell rounds.
- Round 5: Sl st to first ch1 space between hdc groups. Ch3 (counts as dc), 2 dc in same ch1 space, ch2, 3 dc in same ch1 space (corner made), *skip to next ch1 space, 3 dc in ch1 space, ch2, 3 dc in same ch1 space; rep from * around for 4 corners. Join with sl st to top of ch3. (This round establishes the 4 corner ch2 spaces and 3-dc sides; count total = 4 corners + 8 side clusters = 44 dc approximately depending on distribution)
- Round 5 begins the conversion toward square shaping by adding 4 corners (3dc, ch2, 3dc). If your clusters are dense, you may place corners in the 1-2 stitches that sit nearest the quarter points. Mark corner chain-2 spaces with stitch markers.
- Round 6: Working in established pattern and into ch2 corners: From any corner, sl st into corner ch2 sp, ch3 (counts as dc), 2 dc, ch2, 3 dc in corner (first corner complete). Along each side between corners work: ch1, 3 dc into next side opening or space; repeat around. Join with sl st to top of ch3. (This round has four 3dc-ch2-3dc corners and 3-dc clusters along 4 sides; total stitch count will depend on number of side clusters but expect approx. 60–68 dc including corner stitches)
- Use this round to ensure the square is beginning to form. If a side looks too short or too long, you can add an extra cluster on that side in the next round to even the square out.
Shell Rounds & Square Shaping (Rounds 7-16)
- Round 7: From any corner ch2 sp: sl st into ch2 sp, ch3 (counts dc), 2 dc, ch2, 3 dc in same ch2 sp. *Along side between corners: ch1, (3 dc in next ch1/sp), ch1; rep across until next corner; at next corner work (3 dc, ch2, 3 dc) into the corner ch2 sp. Rep from * around. Join with sl st to top of ch3. (Add 1 shell per side section; stitch count grows by multiples of 12 roughly; expected total ~80 dc including corners and side shells)
- Work shells so that each side ends up with the same number of shell clusters. Shell = 3 dc worked in the same space. Mark the corners to count shells easily.
- Round 8: Ch1, sc in same corner stitch to anchor, then along side work (ch1, 3 dc) into each shell top from previous round; at corner work (3 dc, ch2, 3 dc) into corner ch2 sp. Join with sl st to first sc. (Square becomes more pronounced; expect approx. 96 stitches across entire round)
- If your square is already very large, and you want a smaller finished square, skip to the border section after rounds 8–9. For the blanket in the photo, squares were built to a medium size before joining.
- Round 9: Ch3 (counts as dc), 2 dc in same st, *ch1, skip next top, 3 dc in next top; repeat across each side until corner. At corner work (3 dc, ch2, 3 dc) into ch2 sp. Join with sl st to top of ch3. (This round re-establishes 3-dc shell clusters with ch1 gaps between them; total stitches grow—approx. 108 dc including corners)
- Keep the ch1 spaces consistent to maintain even spacing for future rounds and join points. Use stitch markers to mark every other shell if you plan to align squares for join-as-you-go.
- Round 10: Ch1, sc in same stitch, *ch3, sc into center of next shell (the 2nd dc of shell) to create an open chain section for a lacy look; rep across each side; at corner work (sc, ch3, sc) into corner ch2 sp. Join with sl st to first sc. (This round introduces ch3 corner spaces for a slightly lacier grid; expected total varies approx. 120 chain and sc placements)
- If you prefer a more solid square (as in the photos), instead of ch3 between scs work ch1 and a sc into shell centers. The pictured square has medium openness between shells; the instructions below continue with moderate openness.
- Round 11: Ch3 (counts as dc), work 2 dc into each sc or chain-space as established along sides; at corners work (3 dc, ch2, 3 dc) into ch3 corner spaces. Join with sl st to top of ch3. (Stitch count increases predictably by adding shells between corners; expected approx. 132 dc)
- This is a great round to check final square dimensions. Lay your square on top of a blocked square or measure against other squares to ensure consistency. Make small adjustments now by adding or subtracting a shell on each side in the next round.
- Round 12: Repeat round 11 pattern: ch3, 2 dc in same st, 3 dc clusters across sides into previous dc spaces, corner (3 dc, ch2, 3 dc). Join with sl st. (Square should now be showing clearly defined sides with equal shells per side; expected total ~144 dc)
- For blanket use, most makers aim for squares with 3–6 shell repeats per side depending on desired finished size; the sample square uses 4–5 repeats per side to make a medium blanket square.
- Round 13: Ch1, sc into first dc, *ch2, skip next dc, sc into next dc to create a small picot-like spacing across sides; at corner work (sc, ch2, sc) into corner ch2 sp. Join with sl st. (This decorative spacer reduces bulk approaching the border and gives the pattern in the photo a slightly lacy grid effect)
- You may switch to a slightly smaller hook for the final shaping rounds if you want a firmer edge before edging. The sample kept the same hook for consistent texture.
- Round 14: Ch3 (counts as dc), 2 dc in same stitch, then work 3 dc into each ch2 side-sp between scs; corners: (3 dc, ch2, 3 dc) into corner. Join with sl st to top of ch3. (Square is now expanded; expected total ~160 dc)
- If your squares are slightly rectangular, block them now and measure after blocking. Blocking evens the stitches and helps joining line up perfectly when using join-as-you-go.
- Round 15: Ch1, sc in first stitch, work 1 sc in each dc and ch2 corner spaces around to create a solid, even base for edging. Join with sl st. (Stitch count equals number of visible stitches along perimeter; typically ~64–72 sc depending on how many shells were worked per side)
- This round creates a dense base for the final outer rounds and is the transition used in the photo: a slightly denser single crochet edge next to the final decorative triple dc border.
- Round 16: Ch1, sc into same st; *sc into each st across side until corner; at corner work (sc, ch2, sc) into corner ch2 sp. Join with sl st and fasten off leaving a 20–25 cm tail if you plan to join with whip stitch. (This completes the square foundation for joining or final border)
- Fasten off and weave in ends if you will seam squares later. If using join-as-you-go (JAYGO), do not fasten off—proceed directly into the join rounds.
Decorative Border Option A: Simple Raised Border (Rounds 17-28)
- Round 17: With RS facing, join yarn at any side with sl st. Ch3 (counts as dc), dc in same st, *dc in next st across side; at corner work (dc, ch2, dc) into corner ch2 sp. Join with sl st to top of ch3. (This round builds a double-thickness border; expected total ~72–90 dc)
- Keep your dc height even; this first border round gives the square a little extra body and matches the photo look of a buffered shell edge.
- Round 18: Ch1, sc into first dc and each dc across to create a tidy edge. At corners work (sc, ch2, sc). Join and fasten off if making single squares. (Stitch count equals number of dc from prev round)
- For the raised look in the images, a final round of front-loops-only (FLO) slip stitches or hdc creates a raised ridge—continue if you want that texture.
- Round 19: Optional FLO ridge: Join yarn in back loop of any sc, ch1, *hdc in each sc BLO around, corners work (hdc, ch2, hdc) in corner. Join and fasten off. (Creates subtle raised ridge seen on the outside edge)
- The sample square in the photos has a small raised ridge before the final round; using BLO for a single round emphasizes the frame.
Decorative Border Option B: Layered Shell Border (Rounds 17-28 alt)
- Round 17: Join yarn at any corner. Ch3 (counts dc), 2 dc in same corner sp, *along side: 1 dc in each sc/st for 3–5 sts, then (3 dc, ch2, 3 dc) into next corner; repeat. Join with sl st. (This produces an outer shell repeat)
- Option B is slightly more decorative for a photo-ready blanket edge. It creates deeper shell ridges and frames the square like the blanket photo.
- Round 18: Ch1, sc into each dc and into corner ch2 sp work (sc, ch2, sc). Join with sl st and fasten off if done. (This evens edge if shells are lacy)
- Round 19: Optional final round: With RS facing, join and work 1 round of crab stitch (reverse sc) around to give a spiral defined finish. Work 1 reverse sc into each stitch; corners work 1 reverse sc, ch2, 1 reverse sc. Fasten off and weave in ends.
- Crab stitch creates a rope-like outside edge that photographs nicely and protects the blanket edge from wear.
Join Methods Overview (Info Block)
- There are three primary joining methods recommended: 1) Join-as-you-go (JAYGO) slip-stitch or dc join, 2) Mattress stitch / whip stitch after blocking, 3) Slip-stitch seam resulting in a visible ridge. The photos show a very neat join—likely JAYGO or a tightly sewn whip stitch with matching yarn. Choose the method that best suits your comfort and desired seam visibility.
Join-as-you-Go Method (JAYGO) for First Edge (Rounds 29-48 as join steps across squares)
- JAYGO is done when the last round of a square is worked and you attach into the adjacent already-placed square by working through its outer round stitches. For clarity we break joining into a sequence of rounds assuming four connecting sides: attach one side at a time and then the second side, corner to corner.
- Round 29: Work to the last round of Square A. When you reach a corner that meets Square B, ch1, sc into corner of Square A, then insert hook into corresponding stitch on Square B outer round and sl st (or sc) to join; continue around the side by working your border stitch into Square A and then joining into Square B's outer stitches every third stitch (or according to stitch ratio) to create a flat seam. Complete the side and move to next square. (This round length depends on blanket layout; counts will mirror square perimeter)
- Keep tension slightly snug when joining so squares sit flat. For larger blankets, join an entire row of squares first, then join rows to rows to avoid excessive handling of finished joins.
- Round 30: After joining first side, rotate to join the adjacent side in the same manner: sc into Square A then sc/sl st into Square C at equivalent intervals. Corners should be joined to maintain alignment. Continue until four sides of Square A are joined to surrounding squares where applicable. Fasten off when a square has all required neighbors joined. (Per-square joining stitch count equals outer sc stitches from round 16/18)
- For a large blanket assemble in panels: join 4–6 squares into strips, then join strips together. This reduces windiness and keeps seams tidy. Use stitch markers at seam start and end.
- Round 31: Optional neat seam: After all squares are joined JAYGO, work a joining round across the entire blanket: With RS up, join yarn and work 1 round of single crochet into the seams only (working sc through adjacent loops of joined stitches) to flatten and strengthen the seams. Fasten off. (This becomes one continuous seam round around blanket perimeter and across internal joins)
- This seam round produces the tidy joined look in the photos—a shallow ridge that reads as a deliberate frame. Use matching yarn for invisibility.
Full Blanket Assembly Sequence (Rounds 32-76 as combined assembly instructions per row/panel)
- To assemble a blanket similar to the one in the background photo, plan a grid of 6 x 6 squares for a throw approx. 90 x 90 cm (size will vary). The directions below walk you through joining each panel row, then joining rows, adding reinforcement rounds, then finishing the entire perimeter border with multiple decorative rounds to achieve the layered look.
- Round 32: Create 6 squares and join them in a horizontal strip using JAYGO for each adjacent square: join right side as you work final round of each square. After strip is complete, fasten off and work along the top edge with a reinforcing sc round—sc evenly across seam with corners marked. (Repeat for 6 strips)
- Make 6 rows/strips of 6 joined squares for a 6 x 6 layout. Adjust number of squares per side to scale the blanket. Create and block all squares before final joining if you prefer mattress stitch instead of JAYGO.
- Round 33: Join strip 1 to strip 2: align the underside of strip 2 with the upper side of strip 1. With RS facing, work into the seam loops using sc or sl st at intervals matching the outer sc round to create a neat seam. Continue until all six strips are joined into a full blanket. Fasten off. (This step does not change squares' stitch counts; it simply connects panels)
- Pin strips together before joining to ensure no offset; this ensures that corners meet cleanly and that seams are straight across the blanket.
- Round 34: Work a continuous reinforcement round: With RS facing, join yarn at any seam and work 1 round of sc into every seam loop across the blanket, and 1 sc into outer perimeter stitches. Corners: (sc, ch2, sc) in corner spots. Join and fasten off. (This round tidies and strengthens internal seams)
- If working with many color changes or a delicate yarn, consider a second reinforcement round with a slightly thicker yarn or smaller hook for extra durability.
- Round 35: Outer decorative border – Round 1: Working around the whole assembled blanket, join yarn in the outermost corner, ch3 (counts as dc), work 2 dc into corner, then work dc evenly across side into the top of each outer stitch; at each outer corner work (3 dc, ch2, 3 dc) into corner. Join with sl st. (This round increases the outer perimeter and frames the blanket; stitch count equals number of visible perimeter stitches + corner additions)
- The photos show a raised, layered border. We will build 6–10 border rounds depending on desired frame height. Keep track of corner ch2s to anchor subsequent rounds.
- Round 36: Border round 2: Ch1, sc in each dc across side; corners: (sc, ch2, sc) into ch2 corner. Join with sl st. (Creates a firm base for subsequent shell/decorative rounds)
- This sc round creates the neat dense band that appears in the sample photos between the inner square and the outer decorative rows.
- Round 37: Border round 3: Ch3 (counts dc), 2 dc in same stitch; *skip 1–2 sts (or work 1 dc in each stitch across if fewer sts), 3 dc in next space to create small shells; repeat across sides; corners: (3 dc, ch2, 3 dc) in corner. Join. (Creates soft shell texture)
- Spacing between shells should be consistent to avoid wavy edges. If blanket edge waves, block it and add a firm sc round.
- Round 38: Border round 4: Ch1, sc in each stitch across to anchor shell pattern. Corners: (sc, ch2, sc). Join and fasten off if you prefer fewer border layers. (This evens out shell round)
- Many designers alternate a shell round with a sc round to create the layered look—this sequence produces the same photo-like effect with texture that is visible but not bulky.
- Round 39: Border round 5: With RS facing, join yarn and work 1 round of hdc in BLO across—place hdc into back loop of scs from previous round to create a raised ridge. Corners: (hdc, ch2, hdc) into corner. Join and fasten off. (Visible raised ridge similar to photo)
- Working in BLO creates a subtle ridge. You can follow with a crab stitch round for a polished rope-like edge (counts as next optional round).
- Round 40: Optional final border round: Crab stitch (reverse sc) around the entire blanket to finish: join with sl st, ch1, reverse sc in same st and each stitch around; at corners work reverse sc, ch2, reverse sc. Fasten off and weave in ends. (Creates a tight protective finishing edge)
- The sample blanket uses a smooth final edge—crab stitch is optional but recommended for durability and a neat photo-ready finish.
Alternate Joining: Mattress Whip Stitch After Blocking (Info & Steps)
- For a nearly invisible join that looks clean on both sides, block all squares first, then use mattress stitch (also called invisible join) with matching yarn threaded on a tapestry needle. Align squares RS up and sew through the base loops between the outer stitches (do not catch the surface stitches) to pull seams together. This results in a flat seam without a ridge and is great if you prefer reversible blankets.
- Round 41: After blocking, join squares into strips using mattress stitch: overlap edges by aligning stitch posts, then use whip-like mattress tucks through adjacent base loops every 3–5 mm to maintain consistent seam tension. Tie off and weave tail into seam. Repeat for all seams. (No additional crocheting required for this step)
- Mattress stitch yields the flattest seam and is my preferred method if the blanket will be used on both sides. The join is invisible from the RS if done correctly.
Finishing Touches & Blocking (Info Block – Rounds 42-48 conceptual)
- Round 42: Weave in all yarn tails using a yarn needle; hide the ends through multiple loops so they don't come undone. Apply a gentle steam or wet-block: pin blanket to measured blocking board or carpet to square up corners and sides. Allow to dry thoroughly. (Blocking evens stitches and flattens puff centers)
- For cotton blends, damp blocking gives the best results: spritz lightly and use pins to align. Avoid over-stretching which can distort pattern geometry.
- Round 43: If desired, sew a label or tag to the back side near a corner. Attach tassels or fringe at corners if you want the playful finish seen on some blanket variations—make 4 tassels approx. 6–8 cm long and secure through corner ch2s. (Add decorative elements as preferred)
- Tassels and fringe add weight to corners and can help the blanket drape beautifully. Use matching yarn and secure tassels strongly with a double knot before weaving ends.
Troubleshooting & Tips (Info Blocks sprinkled)
- If your center puffs close inwards, use fewer loops per puff or loosen tension. If center holes are large, tighten the initial magic ring or add an extra round of dc to close the gap. When joining, match the number of outer sc stitches on both squares to avoid puckering.
- To change finished square size, add or subtract shell repeats on each side prior to the single crochet foundation round. Each additional shell round increases square side length by ~1.5–2 cm depending on yarn and hook.
- To create a baby blanket like the photographed version (approx. 90 x 90 cm), plan 6 x 6 squares sized 14–16 cm each. For a crib blanket go 5 x 7 squares or adjust accordingly.
- Keep gauge consistent: work a sample square and measure before committing to full blanket. Blocking can change size by up to 10%, so account for that in planning.
Stitch Count Summary Examples (Reference rounds 1-16 counts)
- Example counts (approximate; may vary by tension): Round1=12 dc; Round2=12 puffs; Round3~36 dc; Round4~48 hdc; Round5~44 dc with 4 corners; Round6~60–68 dc; Round8~96 dc; Round12~144 dc; Round15~64 sc perimeter; adjust as needed per your square variations.
- These example counts help you verify your work at key intervals. Use them as a checkpoint—if you’re far off, correct earlier rounds before proceeding.
Assembly Instructions
- Assemble squares into horizontal strips using join-as-you-go: work the final round of a new square and slip-stitch or sc into the corresponding stitches of the adjacent finished square’s outer round. Pin corners to maintain straight edges before joining the next square.
- Join rows to rows: once you have multiple strips, align two strips RS facing the same way and join along the long seam using mattress stitch or whip stitch for a flat seam. Use pins to keep alignment exactly even before sewing.
- Reinforce seams by crocheting a single crochet round through seam loops: after joining all squares, work 1 round of sc around the entire blanket focusing on seam loops to flatten and strengthen connections.
- Add outer border: with RS facing, join yarn at any corner and work 3–8 decorative rounds (dc/shell rounds alternated with sc rounds) increasing corner ch2s until you reach desired border depth.
- Finish outer edge: for a professional result work one round of hdc in BLO to create a raised ridge, then finish with crab stitch (reverse sc) for a neat, durable edge.
- Weave in and secure all tails: weave yarn tails into the backs of seams or along BLO rounds for invisibility. Trim close to fabric and hide ends under the nearest stitch for security.
Common Mistakes & How to Fix Them
- Skipping stitch markers at the start of each round can cause your rounds to drift and misalign shell placement; always place a marker in the first stitch
- Pulling your yarn too tightly when working puff or cluster stitches can make them too small and hard to work into on later rounds; keep puffs slightly loose and even
- Not blocking your squares after finishing can result in uneven edges and difficulty joining; gently steam or wet-block squares to flatten and even edges
- Joining squares loosely will create gaps; use join-as-you-go or a slightly tighter slip-stitch seam for a neat finish
- Not counting chains at corners can break your square symmetry; mark each corner chain-space and count repeats carefully
- Using a hook that’s too large gives floppy squares that won’t sit flat; use a hook slightly smaller than the yarn label for firm stitch definition
Important Notes
- Use stitch markers at the start of each round and mark the four corner ch2 spaces early to keep square geometry consistent
- Stuff yarn tail ends into the back of seams when joining to avoid bulky knots at the surface
- Block each square before final joining for an even grid and easier alignment; damp blocking is best for cotton blends
- When working puff stitches, keep loops even and slightly loose—tight puff loops make later stitches hard to work into
- If joining via JAYGO, make the joining round the final round of each new square—this reduces sewing and gives a clean seamless look
- Check directionality: ensure all squares have RS (right side) facing the same direction before joining to keep pattern orientation consistent
- Weave in ends across several stitches to prevent them from pulling free; hide ends in seams or border rounds for the cleanest finish
This soft blue granny square blanket pattern turns basic stitches into a tactile, sunburst-centered throw you’ll treasure. Each square grows from a raised puff center into shell rounds that shape a tidy square, and the tidy layered border gives a finished, polished look. Make a single statement square or assemble many into a snuggly blanket—either way you’ll enjoy the rhythmic flow of clusters and shells. 🧶💙 Cozy up with a cuppa and a row or two—the result is absolutely worth it!
Crochet Abbreviations
- mr
- magic ring
- ch
- chain
- sc
- single crochet
- hdc
- half double crochet
- dc
- double crochet
- tr
- treble (UK = triple)
- sl st
- slip stitch
- rep
- repeat
- st
- stitch
- sp
- space
- yo
- yarn over
- puff
- puff stitch (explicitly defined in notes)
- cl
- cluster (used for 3- or 5-dc clusters)
- BLO
- back loops only
- FLO
- front loops only
- ( )
- work instructions in brackets as directed
- x
- times
You Ask, We Answer
What is the finished size of this blanket?
Using the recommended yarn and hook, one finished square measures about 14–16 cm (5.5–6.5 in). A 6 x 6 grid of these squares will make a throw approximately 84–96 cm (33–38 in) square. Final size depends on blocking and exact gauge.
Can I use different yarn weights for this pattern?
Yes. You can use lighter or heavier yarn, but you must adjust your hook size accordingly. A lighter yarn (DK) will produce smaller squares and require more squares for the same blanket size; heavier yarn will produce larger squares and fewer total squares.
Can I embroider or change the center decoration?
Absolutely. The puff sunburst center can be swapped for standard dc clusters, bobbles, or a simple cluster if you prefer less texture. Adjust subsequent rounds to accommodate the change in height and width of the center motif.
How should I join squares for a neat finish?
Join-as-you-go (JAYGO) with slip-stitch or sc gives a very neat, nearly invisible seam similar to the sample photos. Alternatively mattress stitch after blocking gives an invisible reversible seam. For a visible ridge, use slip-stitch join or crochet a seam round.
How much yarn will I need for the blanket?
Estimate approximately 900–1200g of worsted/light-worsted yarn for a 6 x 6 square throw depending on yarn brand and stitches. Make a test square and weigh it to calculate exact yarn required for your planned blanket size.
Do I need to block the squares before joining?
Blocking is strongly recommended. It evens the stitches, flattens puff centers, and makes joining easier. Wet-block or steam-block cotton-blend squares, pin them square, and allow to dry completely before assembly.
Can I add tassels or fringe like in some variations?
Yes. Add tassels at corners or fringe along sides after all joining and blocking. Secure them with a double knot and hide ends in the nearest seam for durability.
What if my stitch count is off?
If counts are off by more than a couple of stitches, unravel to the last round where counts matched and identify the missing/excess increases or decreases. Using stitch markers at corners and round starts prevents counting errors.