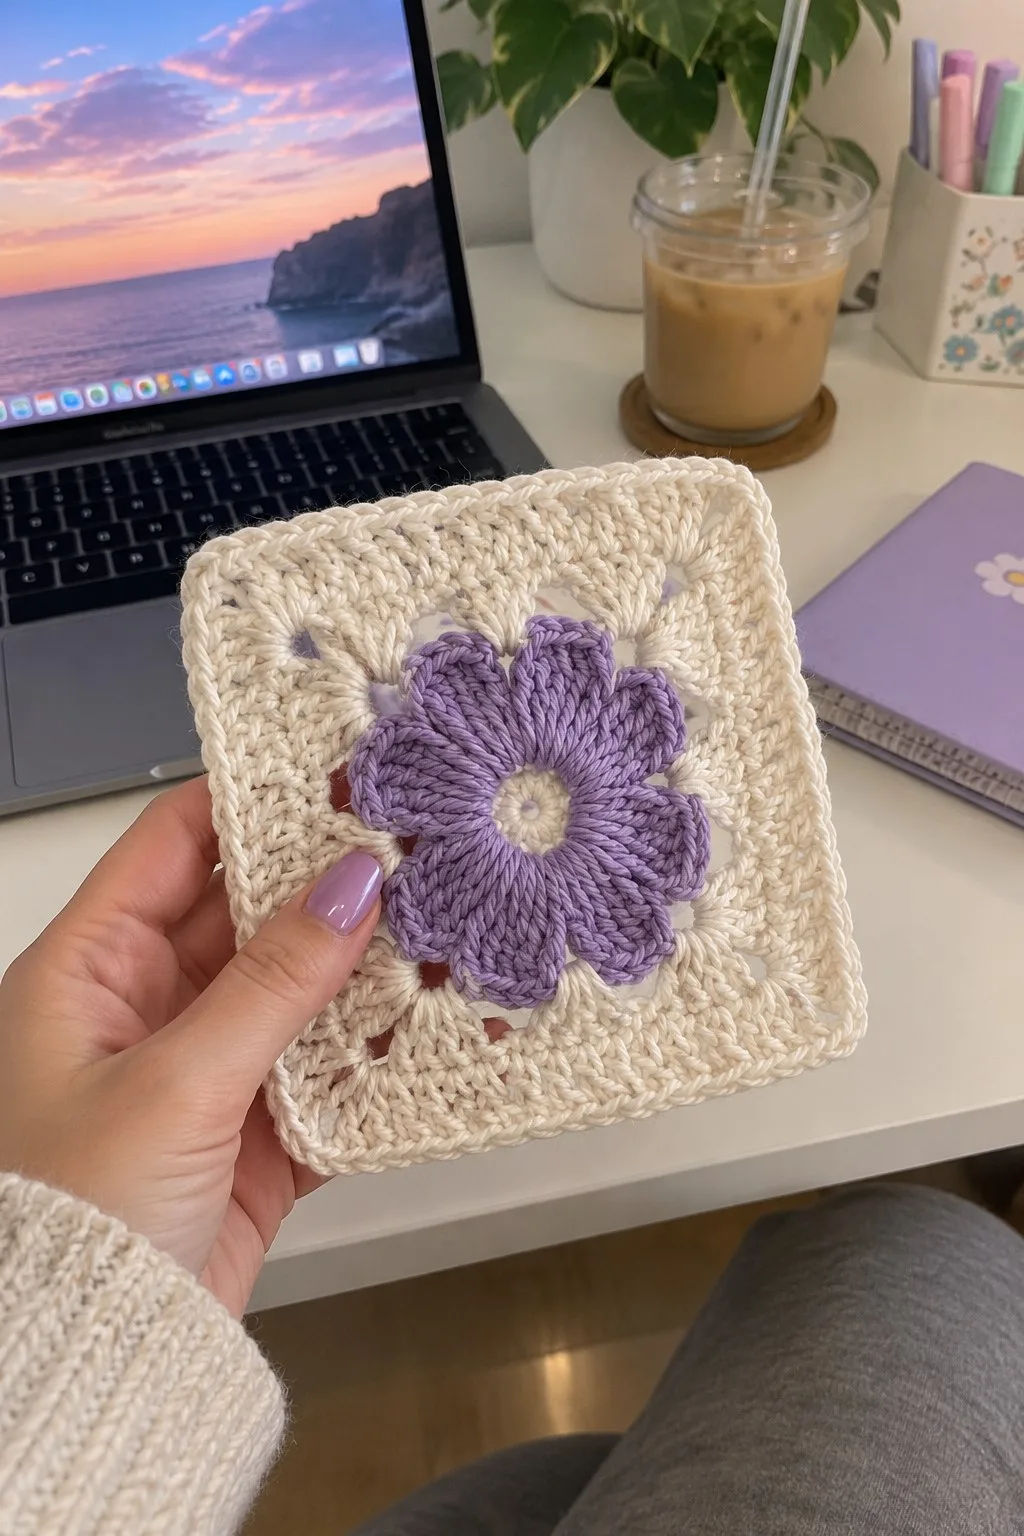
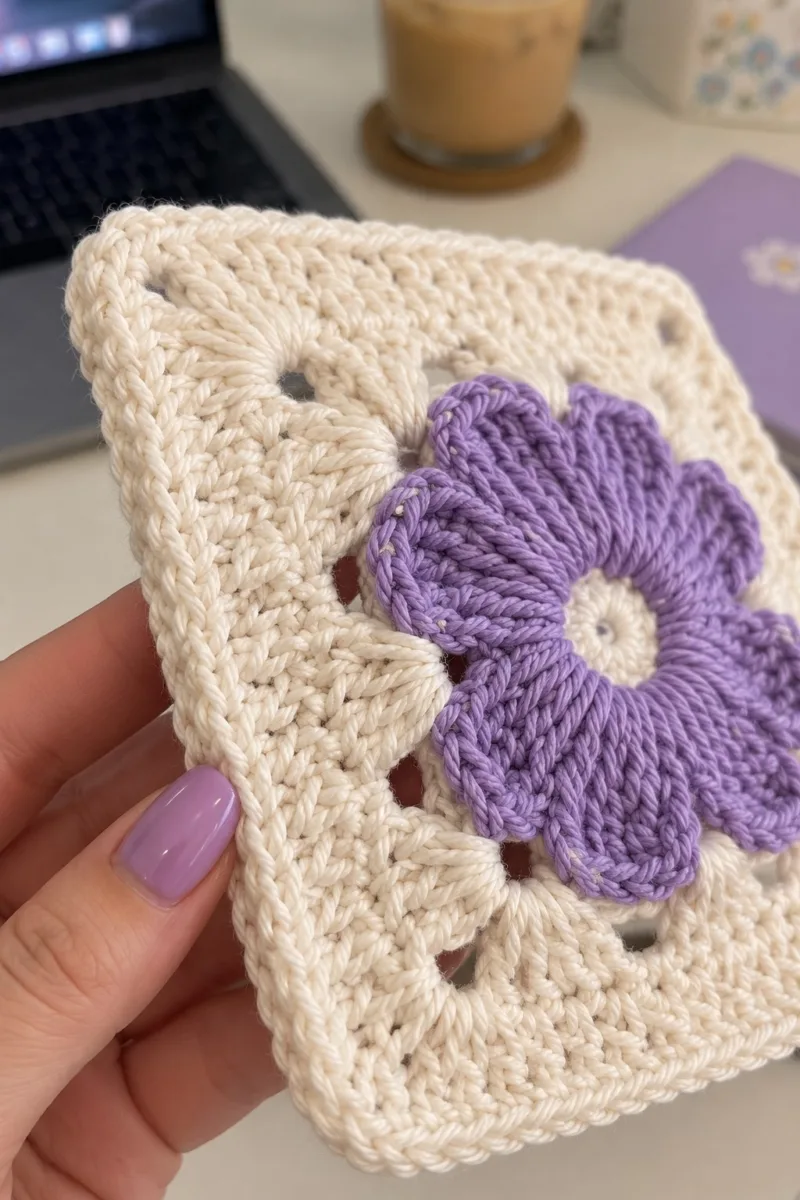
A soft milky-cream granny square motif with a raised lavender flower center, perfect for a dreamy bedspread or throw. This pattern recreates the petal-puff center and airy lacy square surrounding it, designed for seamless joining into a blanket. Detailed rounds, edging options, and join methods included to make a full bedspread of repeating squares.
About This Milky Lavender Granny Square Bedspread Pattern
This pattern recreates a milky-lavender floral granny square perfect for a cozy bedspread or blanket. The motif features a raised, sculpted lavender bloom in the center, worked with puff/cluster techniques, surrounded by creamy openwork rounds that create a soft, lacy square. Each square measures approximately 6.5-7.5 inches depending on yarn and tension, and the pattern includes detailed instructions for making a full bedspread using join-as-you-go or sew-and-seam methods. The soft cream border and delicate petal shaping give a vintage-yet-modern look that photographs beautifully.
Unique features include a sculpted 8-petal center worked over multiple rounds, generous chain-space corners for easy joining, and three optional edging styles to finish the blanket. The pattern is ideal for intermediate crocheters who enjoy textured stitches and color changes.
Why You'll Love This Milky Lavender Granny Square Bedspread Pattern
I love this pattern because the sculpted lavender flower pops so beautifully against the warm milky background — it feels like a soft vintage garden captured in yarn. The petal shaping is tactile and satisfying to work, and the airy cream rounds keep the motif elegant and not too heavy. I also appreciate how forgiving the motif is for joining into a blanket; the chain corners make alignment simple and neat.
- Charming Critter – A delightful animal design with sweet details that capture the essence of your favorite woodland and farmyard friends.
Switch Things Up
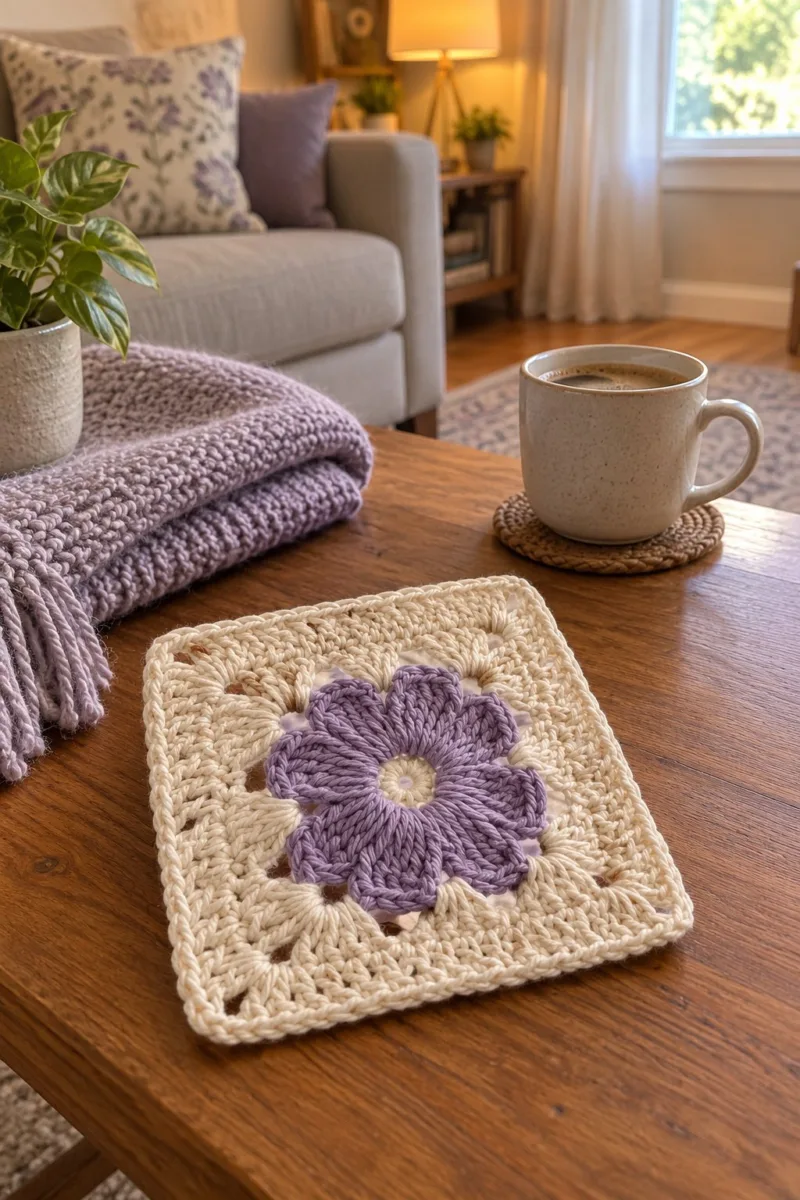
I absolutely loved designing this milky lavender motif because the sculpted petals make each square feel like a tiny bouquet. You can easily customize the color palette — switch the lavender to dusty rose, sage, or blue for a fresh look. I often alternate two accent colors across a blanket to create a subtle checker effect.
For variation, try changing petal puff height: use 3-loop puffs for a flatter, embroidered feel or 5-loop puffs for dramatic texture. You can also change the number of rows in the square body to make the motif larger or smaller without changing the petal structure.
I also recommend trying different joining styles: a lavender ladder join gives a framed look, while an invisible mattress stitch keeps it soft for everyday use. I encourage you to make a sample of three squares in different joins to find the look that speaks to you.
Materials Needed
Main Fabric
- Worsted weight yarn (#4), approximately 1200-1500g in milky cream (main background color) for a twin/full bedspread (estimate varies by size)
- 500-700g in lavender/purple for the flower centers (accent color)
- Small amounts (20-30g) of pale cream or slightly lighter cream for petal central rounds if you want a subtle two-tone center
- Optional contrast for edging: 100-200g in slightly darker cream or soft lavender
Tools Required
- 5.0mm (H/8) crochet hook for main work (adjust per your tension and yarn)
- 4.0mm (G) hook for tighter petals if desired (optional)
- Tapestry/yarn needle for sewing in ends and joining
- Stitch markers (at least 6) to mark petal starts and round beginnings
- Scissors
- Blocking pins and surface for blocking each square
- Measuring tape or ruler
- Optional: fabric glue for securing ends, optional decorative buttons
The Free Pattern
0% complete
Overview
- This pattern describes one 8-petal raised flower granny square (milky background, lavender petals). Gauge will vary; the sample squares are made in worsted weight cotton blend using a 5.0mm hook and measure approximately 7" square after light blocking. The motif uses puff clusters and extended front-loop stitches for sculpted petals. Work in joined rounds as described or make multiples and join later. Keep stitch markers to mark petal centers and round starts.
Notes & Puff Stitch
- Puff: Yo, insert hook, yo, pull up loop (repeat 3-5 times depending on puff height), yo and pull through all loops on hook, ch1 to close puff (counts as 1 stitch). In this pattern the puff is worked as a 5-loop puff unless otherwise indicated. Maintain consistent loop height for uniform petals.
Flower Center (Lavender)
- Round 1: Make a magic ring. Work 6 sc into magic ring. Pull tight. (6)
- Round 2: Inc in each st around – 2 sc in each st. (12)
- Round 3: (1 sc, inc) x6. (18)
- Round 4: (2 sc, inc) x6. (24)
- Change to lavender yarn here if you started center in cream; in our sample the very central round remains cream for a tiny eye then lavender begins for petals. If changing color, join in any stitch and carry tail neatly to weave in later.
- Round 5: Switch to lavender. (3 sc, inc) x6. (30)
- Round 6: 1 sc in each st around. (30)
- Round 7: 1 sc in each st BLO around to create a shallow ridge for petal base. (30)
- Mark the beginning of this round – you will use the ridge as a guide to place petal clusters evenly. Count out groups of (30/8) = 3–4 stitches per petal base; we will create 8 petals, so some petals will occupy 3 stitches and some 4 for even spacing. Use stitch markers to mark 8 evenly-spaced starting points.
- Round 8: Placement round: *sc in next 3 sts, ch2, sk 1 (or sk 0 to adjust), rep from * until 8 markers are reached; adjust so you have 8 ch2-spaces. End with sl st to first sc. (30, with 8 small ch-spaces)
- We used 30 base stitches to give a tighter petal placement. If your count ends at 32, adjust petals to fit 8 petals evenly – the pattern relies on 8 petals equally spaced.
- Round 9: Petal Set Up: Work in each ch2-space around: join with sl st to first ch2-space, ch1, (sc, ch1) into same sp, sl st to next ch2-space and repeat for each petal base – this creates shallow separation points. End sl st. (placement only, no change in overall st count)
- Petal shaping begins next. Keep yarn tails long for weaving or hide ends between petals when switching colors.
- Round 10: Petal Round 1 (foundation): Working into the first ch1 sp made at each petal base, join yarn and ch2 (counts as first hdc), then work 3 hdc into same space, hdc into next 2 base stitches (or into next 2 sc if your distribution uses 3-stitch petals), sl st to tip point. Repeat for each of the 8 petals. End sl st. (This round builds petal bulk; stitch count across base remains the same but you are building height.)
- Round 11: Petal Puff foundation: In each petal top (the small gap/space you created), work 1 ch1, 5-loop puff (yo, insert in designated top st or space, pull up loop; repeat 4 more times; yo pull through all loops), ch1 to close, sl st to base. Make 8 puff clusters total, one per petal.
- Keep the puff stitch yarn-overs consistent. A 5-loop puff gives a prominent petal; if you want a flatter petal use 3-loop puff. Secure each puff with a ch1 to prevent gaps.
- Round 12: Working behind the puffs (toward the center), sc around the center base across all stitches: sc in each base st between puffs to encircle the petal bases neatly. (30 sc around center)
- Round 13: Petal Fulling round: For each petal, create scalloped edge by working: in space behind puff, (sl st, sc, hdc, dc, hdc, sc, sl st) across the puff top to create uniform petal shape. Repeat for 8 petals. This is decorative and does not change the main circular count as you are working into the front loops and top of puffs – just ensure symmetry.
- After this round your petals will be clearly raised and rounded. If petals are too flat, on future squares work taller stitches in the center of each petal (tr or extended dc).
- Round 14: Petal secure round: Working in the V of each stitch behind petals, sc in each st around and when you reach the small ch1 spaces between petals, work 3 sc into that space to anchor petals to the center. (approx 34–36 sc depending on your anchor increases)
- Round 15-18: Work 4 rounds even in sc or hdc (your choice) around petal base to create a small collar that stands slightly proud of the square body. Suggested: Round 15: 1 sc in each st (34). Round 16: 1 sc in each st (34). Round 17: 1 hdc in each st (34). Round 18: 1 hdc in each st (34).
- If you prefer a tighter center, use sc for these rounds; for a softer blended center use hdc. Keep the 34-st count by distributing increases evenly when you encounter corner extra stitches.
Transition to Square (Cream)
- Attach milky cream yarn with a sl st to the back loop of any stitch at the outer petal collar. We will now arrange into a square using corner chain-spaces to allow later joining. From here forward all counts will be presented as totals at end of round, and corner instructions will be explicit.
- Round 19: First cream round: Ch3 (counts as first dc), dc in same st, *dc in next 4 sts, (dc, ch2, dc) in next st to form corner; rep from * 3 more times, dc in next 4 sts, sl st to top of starting ch3. Count: 4 sides x [4 dc per side + corner cluster 2] + initial stitches; approximate total 40–44 dc depending on exact distribution. Relay count as follows: (4 sides x 4 dc) = 16 dc + 4 corners x (dc, ch2, dc) = 8 dc = 24 dc + starting dc's = 2 = ~26; because outer base had 34 sts you'll be spreading them across corners – the key is four evenly spaced corners.
- On motif-to-square transition rounds it is more important to place corners evenly than to hit a precise single number; aim to create 4 corner ch2-spaces placed approximately at the midpoints between groups of petals such that the square grows evenly.
- Round 20: Work 1 dc into each dc around, and in each corner (dc, ch2, dc). (Maintain same total count as last round; simply build height) – approximate total ~40–48 dc depending on spacing.
- Round 21: Switch to a shell-border starter: *sk 1, (2 dc, ch2, 2 dc) in next st as a corner-shell, sk 1, 2 dc in next 3 sts; rep around; sl st to join. This round begins to square the motif visually. (Corners create ch2 spaces and shell density per side will be 4–6 shells depending on exact stitch distribution)
- Count per round will vary by how you allocated the 34 base stitches earlier; use the pattern of shells and corner shells to shape evenly. Mark corners with a removable marker for future rounds.
- Round 22: Shell expand round: In each side, work (ch1, sc) between shells then (2 dc, ch1, 2 dc) in shell spaces; in corners work (2 dc, ch3, 2 dc) to expand corner ch space. This expands the square and stabilizes corners. (Total clusters per side will increase by 1–2; approximate total stitches 80–96 depending on distribution)
- From now on we will work rounds that increase the number of shell clusters per side to form a larger square. For consistency, after each round count clusters per side and ensure symmetry: each side should gain equal cluster repeats.
Body Square Rounds (Cream)
- Round 23: 1 sc in each st around, working (3 sc) in ch3 corner to maintain square. (Est. total 100 sc)
- If your total differs slightly, do not worry; keep the 3-sc corner grouping for a smooth square growth. Using sc in this round stabilizes the layout before more openwork rounds.
- Round 24: Openwork round: *ch3, sk next 2 sc, (dc, ch1, dc) in next sc, ch3; rep across each side, (dc, ch2, dc) in corners. This adds airy chain spaces that echo the motif openness. (count varies by side; ensure symmetry)
- Round 25: Build round: Work 2 dc into each chain-space created, 1 dc in each dc. In corners work (dc, ch3, dc). This begins to unify the shells into a regular square pattern. Approx totals will increase by 32–40 stitches per round as chain-spaces are replaced by dc pairs.
- Check alignment with adjacent squares if you are working more than one motif; chain-spaces align with future join points. If using join-as-you-go (JAYG), you will use these ch3 spaces to attach to neighbor squares in later joining rounds.
- Round 26: Even round: 1 dc in each st around; corners remain (dc, ch3, dc). Count increases modestly; this seals previous openwork into a neat surface for joining. (Est. 140–160 dc)
- Round 27: Shell repeat: On each side, *sk 2, (3 dc) in next st, ch1; rep until corner, (3 dc, ch3, 3 dc) in corner. Rep around. This creates clearly visible shell groupings to read as decorative rows. (Total shells per side will now be visible; total stitch count depends on side shells x3dc)
- At this stage your square should visually read as a square with shells and chain spaces. Keep counts similar on opposite sides to avoid skewing the square. Pin the square flat and count clusters per side if needed.
- Round 28-35: Repeat sets of: 1 even dc round, 1 openwork round (ch3 and dc groups), and 1 shell-building round to increase the square size evenly. For example: R28: even dc; R29: openwork; R30: shell; R31: even dc; R32: openwork; R33: shell; R34: even dc; R35: openwork. Each 3-round set grows the square roughly 0.5" – 1" depending on yarn/hook. After round 35 the square should be roughly 5-6" across (unblocked).
- Measure after round 35. If you want larger squares like the sample bedspread (approx 7" finished), continue the same 3-round sets until desired size is reached. Our sample continued to round 60 for the bedspread squares.
Extended Body Rounds for Full Bedspread Size
- Round 36-60: Continue the motif of: even dc round, openwork round (ch3 spaces replaced by 2-dc clusters), and shell round (3-dc shells and corner ch3 expansions). Specifically: R36 even dc; R37 openwork (ch3 spaces), R38 shell (3dc groups and corner ch3). Repeat this 8 more times adding visual rows and square size. By round 60 the square in our sample reached roughly 7" after gentle blocking. Maintain corners as (3dc,ch3,3dc) for stable joins later. Total stitch counts will vary but maintain equal repeats per side for symmetry.
- If you are making a whole bedspread, make a gauge swatch of 4 squares joined to determine the number of squares needed across and down to cover your bed dimensions. For example, a twin bed in the sample used 6 squares across and 8 down (48 squares). Adjust as necessary.
Decorative Rounds & Corner Reinforcement
- Round 61: Switch to a slightly smaller hook (4.5mm) if you like a tighter decorative edge. Work 1 sc in each st around; in corners work (sc, ch2, sc). This tightens corners in preparation for joining. (Total similar to previous but sc instead of dc)
- Round 62: Picot round (optional): *sc in next 2 sts, (sc, ch3, sl st to first ch) as picot edge at your chosen interval (e.g., every 4th stitch), repeat around. In corners, place a picot inside ch2 corner. This adds a delicate edge. End with sl st. (Count varies by placement)
- Picots add a vintage vibe and help hide minor join irregularities. If you prefer a modern neat edge, skip picots and do two rounds of sc instead.
- Round 63: Finish round: 1 hdc in each st around, working (hdc, ch2, hdc) in corners. Fasten off and weave in ends. At this point each square is finished and ready to join.
Joining Options (Choose One)
- Option A: Join-As-You-Go (JAYG) – Works well for continuous, neat joins. Option B: Mattress stitch / whipstitch after blocking. Option C: Decorative join using slip-stitch ladder or single crochet join for raised seams. All options use the corner ch3 spaces on each square.
- Join-As-You-Go Option (JAYG): When you reach the final round on a square and approach a corner, instead of making a corner ch3, you will sl st into the corresponding ch3 space of the placed neighbor square; then continue final-round stitches, connecting each side in turn. For clarity: with RS facing, align squares RS together or RS out based on your preferred join look, and when you arrive at a side, sl st into neighbor ch3, then continue shell pattern. Repeat for each side as you place new squares; corners: sl st into corner ch3, ch3, sl st into same neighbor ch3 to make corner sturdy.
- JAYG keeps the blanket from flaring at seams and is efficient for large spreads. Use a matching cream yarn for invisible joins or a contrasting lavender for decorative lines.
- Mattress Stitch / Whipstitch Option: Block all squares (see blocking notes). Lay squares RS up and align edges. Using a darning needle and matching yarn, mattress stitch through the visible loops along the sides, taking equal depth from each square to close gaps. For a reinforced seam, sew twice across each join. Fasten off and weave ends securely.
- Slip Stitch Ladder Join: With RS facing you, hold two squares together and using a hook with cream yarn, work slip-stitches through the front loop of the first square and the back loop of the second square, forming a neat ladder seam. Repeat all around. This join lies flat and creates a subtle ridge.
- Choose a joining method that matches your bedspread usage: Mattress stitch for a soft, flexible blanket; slip-stitch ladder for a slightly more structured seam; JAYG to finish squares quickly as you make them.
Border Options (Pick One)
- Border Option 1 – Simple Picot Edge: With RS facing and working in continuous rounds around assembled blanket, join cream yarn at any point. Round 1: 1 sc in each st around, placing 3 sc in each corner. Round 2: *sc 3, picot (ch3 sl st to base), repeat around. Fasten off and weave ends. This gives a delicate finish.
- Border Option 2 – Classic Scallop: Round 1: 1 dc in each st around, (dc,ch3,dc) in corners. Round 2: *sk 2 dc, (5 dc) in next dc as scallop, sk 2 dc, sc in next dc; rep around. This creates a prominent scalloped border about 1-1.5" wide depending on yarn.
- Border Option 3 – Braided Rope Edge: Round 1: 1 sc in each st around. Round 2: Work alternating fpdc and bpdc across, placing 3 fpdc in corner to keep it flat. Round 3: Repeat fp/bp round to accentuate twisted rope look. Fasten off. This option gives a modern, sturdy finish for everyday use.
- All border rounds should be blocked lightly after completion to even the blanket. Consider adding an accent lavender ladder row 2 rounds in from the edge for a framed look matching the petal centers.
Finishing & Blocking
- Block each square by pinning to measured templates and spritzing with water or using a steam iron at safe distance on the wrong side. Allow to dry completely before joining. After joining, block the whole blanket for a final even finish. Weave in ends using the yarn needle and hide ends in stitches on the wrong side. Trim any visible tails and neaten joins by re-stitching if needed.
Troubleshooting & Adjustments
- If your petals look squashed, make puff loops fewer (3 instead of 5) or switch to a slightly thicker yarn for increased loft. If square sides curve in, add extra chains into corner ch3 (make ch4) to flatten. Conversely reduce corner chain to ch2 to reduce flaring. Practice the petal rounds on a swatch to get consistent puffs before making many squares.
Stitch-by-Stitch Recap for One Square (Condensed)
- Round 1: Magic ring, 6 sc (6)
- Round 2: Inc x6 (12)
- Round 3: (1 sc, inc) x6 (18)
- Round 4: (2 sc, inc) x6 (24)
- Round 5: (3 sc, inc) x6 (30)
- Round 6: sc around (30)
- Round 7: sc BLO around (30)
- Round 8: Placement round to make 8 small ch-spaces around center for petal bases (30)
- Round 9: Petal setup: sc & ch1 placements in ch-spaces to prep petals
- Round 10: Petal base: join color and work hdc groups and hdc across base to build petals
- Round 11: 5-loop puff in each petal top (8 puffs)
- Round 12: sc around petal bases to anchor (30 sc)
- Round 13: Petal scallop shaping across puffs (no change main count)
- Round 14: Anchor round with occasional 3-sc increases between petals (34–36 sc)
- Rounds 15-18: Even sc/hdc collar rounds around petal base as desired (34 sc/hdc)
- Round 19-23: Switch to cream and form first square rounds with (dc, ch2, dc) corners to make four ch3 corner spaces and begin shells
- Round 24-60: Alternate openwork (ch3 and dc clusters), shell-building, and even dc rounds to expand the square until desired size (repeat sets). Maintain corner (3 dc, ch3, 3 dc).
- Round 61-63: Decorative rounds finishing with hdc and picots or scallops per choice. Fasten off and weave tails.
- Repeat the above for as many squares as needed. The sample spread in the photos used 49 squares (7×7) with each square blocked to 7" finished and joined with cream join-as-you-go and a scalloped border. Adjust counts and rounds for your desired finished square size.
Assembly Instructions
- Block all squares to the same measured size before joining; pin to a flat surface and spritz with water or light steam, then allow to dry completely to stabilize squares.
- If using Join-As-You-Go (JAYG), attach final round of a new square directly into the ch3 corner and side ch3 spaces of already-placed neighbors – always align petals to center for an even pattern.
- For sewn joins, place squares RS together and mattress stitch through the front loops on each side; use a matching cream yarn and take equal depths from both squares to achieve an invisible seam.
- When joining corners, make sure the corner (3dc,ch3,3dc) of each square lines up; if necessary add or reduce 1-2 stitches to match corner placement between adjoining squares.
- After joining rows or blocks, press the seam flat by blocking the joined area to even density where needed; repeat until full bedspread assembled.
- Sew in all loose ends on the wrong side, weave each tail at least 2" along the fabric, and trim close. Add final edging around the whole blanket as directed by one of the border options.
- If you want a framed look, add one or two rounds of contrast lavender single crochet (or ladder join) one or two rounds in from the outer edge before the final border.
- Check joins for gaps; if small holes appear at joins, reinforce by stitching behind the seam with matching yarn to close the gap neatly.
Common Mistakes & How to Fix Them
- Skipping stitch markers at round starts can cause misaligned petals and uneven square sides; always mark your first stitch of each round.
- Working petals too tight will curl them inward; keep tension comfortable and consistent when doing puff and extended stitches.
- Not counting the petal repeat placement accurately will shift petal centers and create lopsided motifs; mark or flag each petal base.
- Joining squares without blocking first may produce uneven edges; block squares lightly for even joins and neat corners.
- Using too large a hook for puff stitches can make petals floppy and undefined; use recommended hook size and adjust only slightly for tension.
- Neglecting to weave in tails between two rounds makes the back messy and more difficult to seam; leave long tails and weave in as you go.
- Overstuffing between rounds when trying to flatten petals will compress texture; allow petals to maintain loft and block gently instead.
- Changing yarn brand mid-project without gauge checking leads to size mismatches; swatch a motif with new yarn and adjust hook accordingly.
Important Notes
- Use stitch markers consistently at the beginning of each round and to mark each of the 8 petal starting points for even petal placement.
- Stuff petals lightly between rounds only if you want extra loft; usually blocking and tension control will give the desired raised petal effect without stuffing.
- Work puff stitches with even loop height to ensure uniform petal size; the number of loops controls puff height (3 loops = flatter, 5 loops = tall).
- When joining squares, align the centers and petals for a cohesive blanket pattern; misaligned centers will create noticeable diagonal shifts across the spread.
- Maintain consistent tension throughout the project; use the hook size suggested and adjust only slightly if your gauge is off.
- Weave in tails as you go to avoid a large finishing task; consider weaving every 6 squares to keep work tidy.
- Block each square before joining; unblocked squares often differ in size causing ripples after seaming.
- If adding a wool or acrylic blend yarn, test a washed sample to ensure the yarn does not felt in blocking or laundering.
This milky lavender granny square is a soft dream in yarn—a cozy floral motif that makes a stunning bedspread! The raised lavender petals give romantic texture while the creamy square edges keep the blanket airy and elegant. Working these motifs is relaxing and meditative, with each square bringing you closer to a beautiful handmade heirloom. 🧶💜
Whether you choose a subtle picot edge or bold scallops, this design photographs beautifully and feels wonderful to curl up under. Happy crocheting and enjoy every petal! ✨
Crochet Abbreviations
- ch
- chain
- sl st
- slip stitch
- sc
- single crochet
- hdc
- half double crochet
- dc
- double crochet
- tr
- treble (triple) crochet
- fpdc
- front post double crochet
- bpdc
- back post double crochet
- puff
- puff stitch (see notes for method)
- sk
- skip
- st
- stitch
- rep
- repeat
- RS
- right side
- WS
- wrong side
- sp
- space
- tog
- together
- BLO
- back loops only
- FLO
- front loops only
- (-)
- stitch count at end of round
You Ask, We Answer
What is the finished size of one square?
Based on the specified yarn and hook (worsted weight and 5.0mm), one finished square will measure approximately 6.5–7.5 inches after light blocking. Your gauge may vary slightly depending on tension and yarn.
How many squares do I need for a bedspread?
Count depends on desired blanket size. A sample twin used approximately 7×7 = 49 squares at 7" each. For a full or queen, increase squares accordingly (e.g., queen may be approx 10×10 = 100 squares). Always swatch and calculate based on your blocked square size.
Can I change yarn weight or hook size?
Yes. Changing yarn weight will proportionally change square size. Choose a hook 1–2 sizes smaller than yarn recommendation for a dense, non-holey fabric. Make a gauge swatch to determine how many squares you'll need for your desired dimensions.
Do I have to use puff stitches for petals?
No. Puff stitches create the sculpted look, but you can use clusters, extended dc, or 3-loop puffs for a flatter petal. The pattern includes suggestions to adjust puff loops (3 or 5) for different petal heights.
Which joining method is best?
All joining methods presented work well: Join-As-You-Go is efficient and neat; mattress stitch is soft and flexible; slip-stitch ladder creates a slightly raised seam. Choice depends on desired finished look and how much time you want to spend.
How much yarn will I need for a full bedspread?
A rough estimate for worsted weight yarn: 1200–1500g cream and 500–700g lavender for a twin/full-sized bedspread depending on how many squares and border rounds you include. Buyer beware: yarn amounts vary by tension and final size.
How to prevent petals from fraying or coming loose?
Secure puff clusters with the closing ch1 and anchor petals to the center with sc rounds. Weave in ends securely and block gently. For extra security, use a small dab of fabric glue hidden inside the puff on the wrong side before final weaving if the blanket will be heavily used.
Can I wash the finished blanket?
Follow the yarn manufacturer's care instructions. Many cotton-blend worsted weights can be machine-washed gentle and laid flat to dry. Always test a swatch for colorfastness and shrinkage before laundering your full blanket.