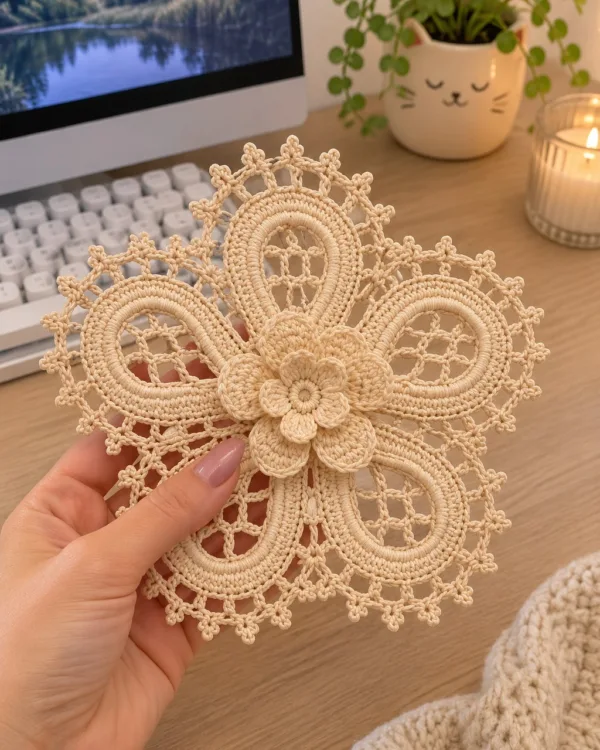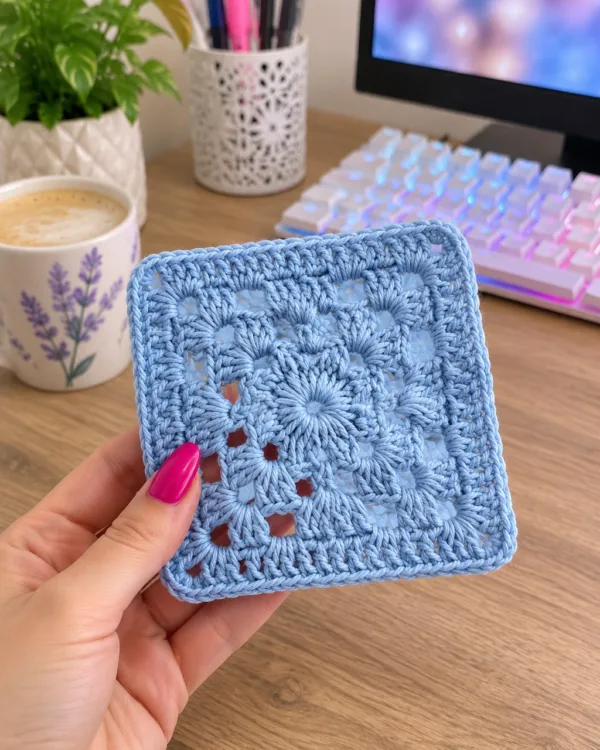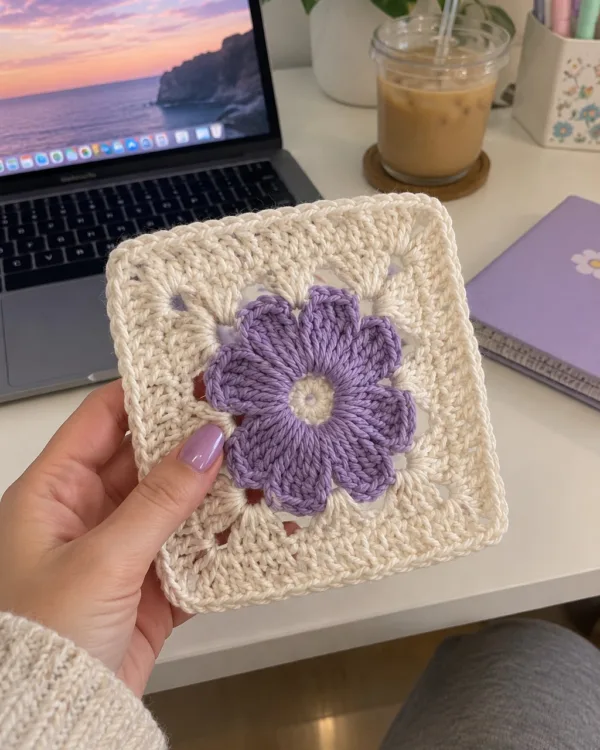
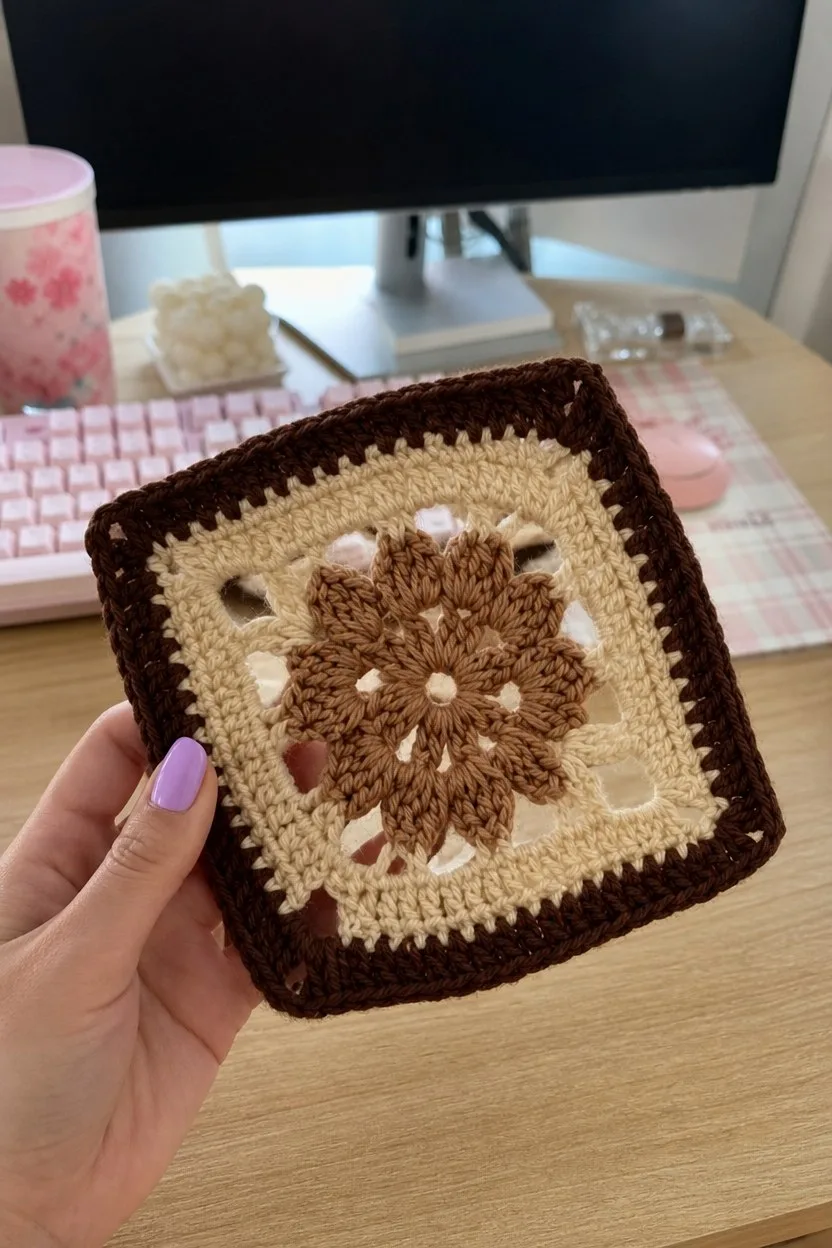
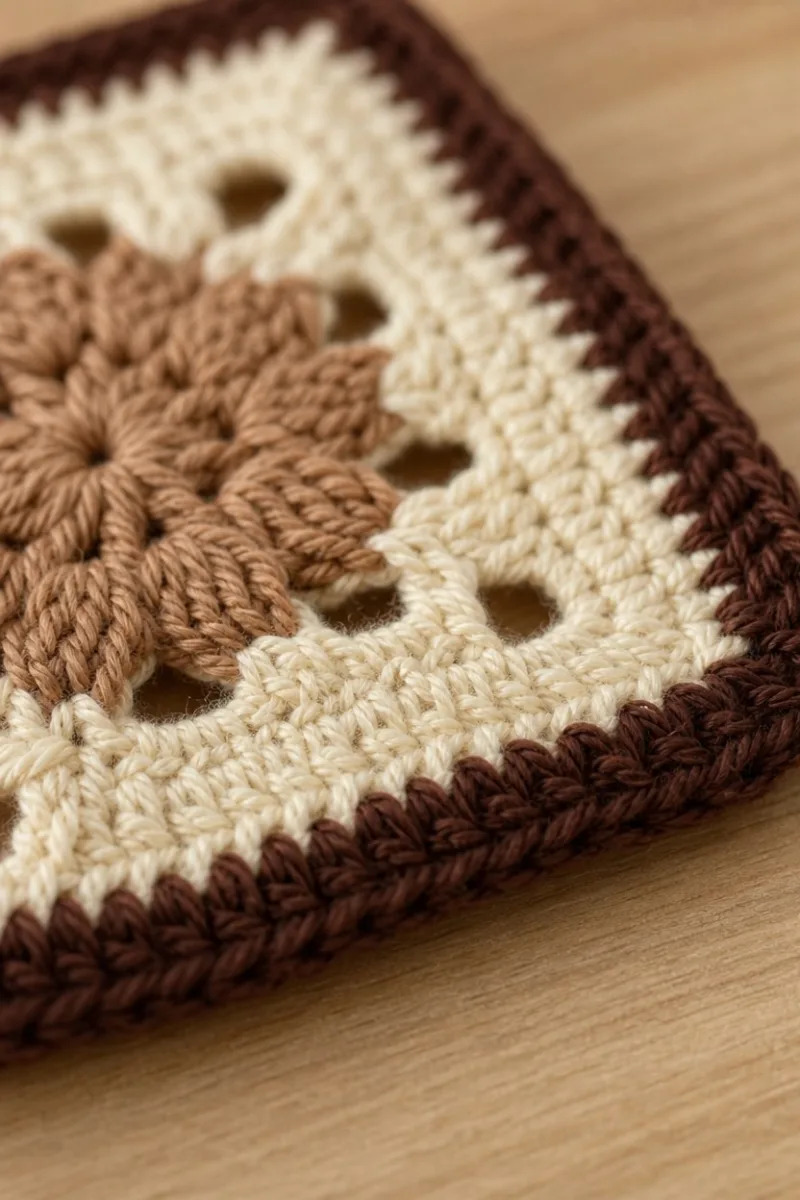
A warm, vintage-inspired granny square motif worked in three harmonious browns — deep chocolate, creamy beige and warm tan. This mosaic-style square features a raised floral center made with puff/cluster stitches, airy eyelet rounds and a sturdy triple-border that frames each square perfectly.
The square creates a soft, textured blanket when joined and looks beautiful alone as a coaster or cushion panel. Suitable for making an entire afghan in coordinating colorways.
About This Brown Mosaic Granny Square Pattern
This pattern recreates the brown mosaic granny square shown in the photos: a raised floral medallion center in warm tan, framed by a soft cream field and finished with a deep chocolate border. The motif uses puff/cluster stitches for the flower, simple chain eyelets to create negative space and classic corners to square up the rounds. The result is a plush, slightly dimensional square that lies flat and joins smoothly into an afghan.
Designed to be modular, each square can be repeated to make blankets, cushions, bags or table runners. The three-color scheme creates a neutral, autumnal palette that suits many home decors.
Why You'll Love This Brown Mosaic Granny Square Pattern
I love this pattern because the raised floral center gives such a cozy, handcrafted look without being fussy. The combination of small eyelets and solid rounds creates a great balance of texture and drape. I also enjoy the deep chocolate border — it frames the square like a picture and makes every motif pop.
- Cozy Accent – A warm touch for your space that transforms ordinary corners into inviting nooks filled with handmade charm.
Switch Things Up
I absolutely loved writing this pattern because the three-tone palette and raised floral center make each square feel like a little framed picture. You can easily change the center color to something brighter for a pop, or use all neutrals for a calm, modern look.
I often experiment with border width — adding an extra chocolate ridge or two creates a chunkier frame like the sample. You can also swap the puff petals for simple 3-dc clusters for a subtler texture if you prefer a flatter motif.
Another fun switch is to change the background rounds to a variegated yarn for a more painterly effect, or work the final border in a contrasting color to create bold statement squares. I encourage you to try a few samples to see which combo you love best!
Materials Needed
Main Fabric
- Worsted weight yarn (#4), approximately 120-200g in deep chocolate (border/main accent) for a lapghan of multiple squares
- Worsted weight yarn (#4), approximately 120-180g in creamy beige (background) to work the main body across many squares
- Worsted weight yarn (#4), approximately 80-120g in warm tan (center floral accent) for the raised flowers across squares
- Small amounts (10-20g) of contrast or detail colors if you choose to add embroidery or decorative stitches (optional)
Tools Required
- 4.0mm (G) crochet hook for main work (adjust if your gauge differs)
- 3.5mm (E) hook optional for tighter borders or smaller details
- Yarn needle for sewing in ends and joining squares
- Scissors
- Stitch markers (at least 4) to mark corners and round starts
- Tape measure or ruler to check gauge and square size
- Blocking pins and blocking mat (optional but recommended for even squares)
- Optional: small crochet hook (2.5–3.0mm) to tidy ends
- Optional: washable fabric glue for securing tricky ends (use sparingly)
The Free Pattern
0% complete
Notes & Gauge
- Gauge: After Round 28 (main square body), each finished square measures approximately 14 cm (5.5 in) using worsted yarn and 4.0 mm hook. Gauge will vary with yarn and hook — adjust hook to match desired size.
- Throughout the pattern I use US terms. Join rounds with a slip stitch to the top of the starting chain unless told otherwise. Change colors on the last yarn-over of the stitch before the new color when neat color joins are required.
Center Flower
- Round 1: Make a magic ring. Ch 3 (counts as first dc), work 11 puff clusters into ring, join with sl st to top of ch-3 (12 clusters).(12)
- Puff cluster (puff) used here: yarn over, insert hook in ring, yarn over pull up a loop; repeat 2 more times (you have 7 loops on hook), yarn over pull through all loops, ch 1 to close puff. Each puff counts as one cluster. Keep loops even to make uniform petals.
- Round 2: Ch 1, *sc in ch-1 space between puffs, ch 2* around, ending with sc in same space as start. Join with sl st to first sc. (12 sc, 12 ch-2 spaces)
- Round 3: Change to warm tan if not already. Working in FLO of Round 1 puffs: join with sl st into the top of any puff, ch 3 (counts as dc), work 2 dc in same puff top, ch 1, *3 dc in next puff top, ch 1* around, join to top of ch-3. (12 groups of 3 dc, 12 ch-1 spaces = 36 dc total)
- This round builds petal height. Working into the top of the puff ensures the petals fan outward. Keep tension loose enough to allow petals to open but not so loose the round becomes floppy.
- Round 4: Ch 1, *sc in ch-1 space between petal clusters, ch 3, sk the 3-dc cluster top, sc in next ch-1* around. Join with sl st to first sc. (12 sc, 12 ch-3 spaces)
- Round 5: Switch to creamy beige. Into each ch-3 space: join, ch 3 (counts as dc), work 3 dc, ch 1, 4 dc in same ch-3 space (creates a fan). Ch 1, sc in next sc. Repeat around for 12 fans. Join to top of starting ch-3. (12 fans of 8 dc each separated by scs = 96 dc total, 12 sc)
- Fans create a transition from rounded petals to a square-ish next rounds. Keep fans even; block later to square up. If your fans look tight, use a slightly larger hook for this round only.
- Round 6: Ch 1, sc in same st, *ch 5, sc in center of next fan (between the two sets of dc), ch 2, sk the fan top, sc in next sc* around. Join with sl st. (12 sc, 12 ch-5 spaces, 12 ch-2 spaces)
- Round 7: Into each ch-5 space: join, (2 dc, ch 3, 2 dc) — corner shell made. Between corners: 3 dc into each ch-2 space from previous round. Repeat around yielding 12 corner shells and 12 small 3-dc clusters between. Join to top of starting dc. (Counting: 12 corners x 4 dc = 48; 12 small clusters x 3 dc = 36; total approx 84 dc, plus ch-3 corners)
- These corner shells are the beginning of the square shaping. The ch-3 corner loops will be used in later rounds for consistent square corners.
- Round 8: Ch 1, sc in same st, *ch 2, sc into center of next 3-dc cluster (between clusters), ch 2, sc into center of corner ch-3, ch 2, sc into center of next 3-dc cluster, ch 2, sc into next sc* around. Join. (This round converts fans and shells into a lattice of chain spaces to square-up the motif)
- Round 9: Change to creamy beige if not already. Working into each chain-2 space along edges: join, work 3 dc into each chain-2 space. In each corner ch-3 space work (2 dc, ch 2, 2 dc). Repeat around. Join. (Edge dc groups per side will total 3-dc clusters repeated, corners have 4-dc shells separated by ch-2)
- At the end of Round 9 you should see a clear square outline forming. Count clusters per side to ensure symmetry; each side should have the same number of 3-dc groups between corner shells.
Square Formation (Even Rounds & Squaring)
- Round 10: Ch 2 (counts as hdc), hdc in next st and in each dc across until you reach corner ch-2; in corner ch-2 work (hdc, ch 2, hdc). Continue along each side. Join to top of starting ch-2. (Total stitch count will reflect number of dc from previous round; count approx 84–96 hdc depending on your gauge)
- Round 11: Ch 1, sc in same st, *ch 3, sk 2 sts, (sc in next st), repeat across to corner: sc in corner ch-2; continue to make evenly spaced ch-3 eyelets around the square. Join.
- This eyelet round creates the open work seen around the floral center in the photos. Count your ch-3 spaces per side (commonly 6–8 depending on gauge). Adjust seat spacing to keep corners aligned.
- Round 12: Into each ch-3 space make (2 dc, ch 1, 2 dc). In corners work (2 dc, ch 2, 2 dc) into the corner ch-2 from Rnd 10. In sc spaces along edges work sc. Join. (This fills the eyelets with small shells and stabilizes the square.)
- Round 13: Ch 1, sc in same st, *1 sc in each st across until the corner; in corner ch-2 work (sc, ch 2, sc). Repeat all around. Join. (Continue building a denser fabric; count will equal previous round’s stitch count with corners adding ch-2 spaces.)
- Begin watching the square dimensions. If your motif wants to curl, stop and check tension or add a stabilization round by working sc in BLO for a texture change.
- Round 14: Ch 2 (counts as hdc), hdc in each st around, working (hdc, ch 2, hdc) into each corner ch-2. Join. (Even round of hdc gives a neat frame and evens stitches.)
- Round 15: Ch 1, sc in same, *ch 4, skip 3 sts, sc in next st* along the sides, making larger eyelets. In corners work sc into corner space. Join. (Eyelets are decorative and visible in the photos as larger open diamonds between center and body.)
- If you prefer fewer open spaces, work ch-3 instead of ch-4. The sample uses ch-4 to give airy look between center and body rounds.
- Round 16: In each ch-4 space: join, work 5 dc cluster (5 dc, ch 1) to make a wide shell. Sc in the sc spaces. In corners: (2 dc, ch 2, 2 dc). Join. (This round increases overall stitch count and helps to shape toward a square with four distinct side panels.)
- Round 17: Ch 1, sc in same, *ch 2, sc in top of center dc of next shell* repeat across sides. In corners sc, ch 2, sc in corner. Join. (This stabilizes shells and spaces.)
- Use a stitch marker at the side center (midpoint of each side) to help count symmetry; many crocheters mark the center of each side for later alignment when joining squares into a blanket.
- Round 18: Change to creamy beige if required. Ch 2, hdc in each st and in each ch-2 along edges; work (hdc, ch 2, hdc) in corners. Join. (This round is a tidy, even fabric and acts as a background frame.)
- Round 19: Ch 1, sc in same, *1 sc in each st across to corner, in corner work (sc, ch 3, sc)*. Repeat. Join. (Adds a row of sc to prepare for a thicker border.)
- Round 20: Ch 3 (counts as dc), dc in each st across, in corner ch-3 work (2 dc, ch 3, 2 dc). Join. (This becomes the first solid round of the outer field.)
- At this stage the square should be approximately 10–11 cm (4–4.5 in) depending on your yarn. If you want a larger square, add more rounds of dc/hdc alternation before starting the heavy border rounds.
Main Body & Stabilizing Rounds
- Round 21: Ch 1, sc in same, *BLO: 1 sc in each st BLO around to create a subtle ridge. In corners work (sc, ch 3, sc) in the ch-3 corner space. Join. (Stitch count equals previous round.)
- Round 22: Ch 2, hdc in each st around, (hdc, ch 2, hdc) in corners. Join. (Even round to distribute tension and bulk evenly before borders.)
- Round 23: Ch 1, sc in same, *dc cluster (2 dc, ch1, 2 dc) in every 3rd st along edge to add texture; sc between clusters. In corners maintain (sc, ch 3, sc). Join.
- Round 24: Ch 1, sc in each st around for one tidy sc round, making sure to work (sc, ch 3, sc) in each corner to keep square shape. Join. (This sc round is the foundation for the thick dark border.)
- Weave in any stray tails from the center now or leave them to be woven into the back of the border. Weaving in before border helps prevent long tails showing at joins later.
- Round 25: Change to deep chocolate. Ch 3 (counts as dc), dc in each st around. In each corner ch-3 work (2 dc, ch 3, 2 dc). Join. (This is the first chocolate round giving a dark frame.)
- Round 26: Ch 2, hdc in each st around, work (hdc, ch 2, hdc) in corners. Join. (Smooth step to even the chocolate border.)
- Round 27: Ch 1, sc in same, *ch 1, skip 1, (sc in next) repeat creating a dense sc fabric in chocolate for two rounds. In corners work (sc, ch 3, sc). Join. (Stitch count equals previous round.)
- Check the square. The pictured motif has a robust final border; the next rounds add height and firmness so the square sits flat and frames the cream center beautifully.
- Round 28: Ch 3, dc in each st around. In corner ch-3s work (2 dc, ch 3, 2 dc). Join. (This will be the last neutral-toned round before heavier chocolate ridging.)
- Round 29: Ch 1, sc in same, *Work 1 sc in each st BLO for a ridged texture along border; in corner ch-3 work (sc, ch 3, sc). Join. (This BLO round creates the small v-texture visible at the edge.)
- Round 30: Ch 1, sc in same, *sc in each st for two rounds to thicken border; in corners maintain (sc, ch 3, sc). Join. (This adds body to the square's edge.)
- If you plan to join squares with whip stitch later, keep the final sc rounds flat and even; they should align with neighboring squares when placed next to each other.
Deep Chocolate Ribbed Border (Decorative Frame)
- Round 31: Change to deep chocolate if not already. Ch 2, hdc in BLO around for 1 full round, working (hdc, ch 2, hdc) in corners. Join. (Creates first rib ridge.)
- Round 32: Ch 1, sc in same st, *sc in each st around for a tidy round; in corners work (sc, ch 3, sc). Join.
- Round 33: Ch 3, dc in each st around, work (2 dc, ch 3, 2 dc) in corner ch-3. Join. (This raises the border slightly.)
- Round 34: Ch 1, sc in same, *BLO: sc in each st BLO to make a defined ridge. In corners sc, ch 3, sc. Join. (Ridge detail similar to photo close-up.)
- Round 35: Ch 1, sc in each st around to firm the edge. Join. (This creates a dense final sc round to prepare for final finishing rounds.)
- Frequently the sample shows a very prominent single chocolate round that is thicker; you can repeat Rounds 31–35 as necessary to match visual depth of border in photo. Each repeat increases border thickness by approx 3–5 mm depending on yarn.
- Round 36: Ch 1, sc in same, *1 sc in each st around. In corners work (sc, ch 3, sc). Join. (Neat finishing round.)
- Round 37: Ch 1, sc in next 2 sts, *sl st in next 2 sts, sc in next 2 sts* across the sides, working corners as (sc, ch 3, sc). Join. (Decorative slip-stitch picot effect on the chocolate edge.)
- If you dislike the slip stitch texture, replace with plain sc. The small alternating sl-st/ sc gives the sample its slightly scalloped look in the close-ups.
- Round 38: Ch 1, sc in same, *sc in each st around. Join. Fasten off and weave in ends securely along back of the square. (Final tidy edge for single square use.)
- At this point the square dimensions will be final. Measure: ideal sample ≈ 14 cm (5.5 in). Adjust earlier rounds or add extra border rounds for larger squares before finishing off.
Alternate Extra-Deep Border (Optional to match sample thickness)
- Round 39: If you want an even thicker chocolate border replicate Rounds 31–38 again: Ch 2, hdc in BLO around, join. (This adds one more raised ridge.)
- Round 40: Ch 1, sc in each st around, join. (Dense row stabilizes new ridge.)
- Round 41: Ch 3, dc in each st around, in corners (2 dc, ch 3, 2 dc). Join. (Adds third height layer to border.)
- Repeating border rounds adds visual weight identical to the cozy sample blanket. Add as many repeats as needed until the border visually matches the reference photo.
Joining Options & Assembly Rounds
- Several joining options are possible: whip stitch (invisible on right side), join-as-you-go (JAYG) using slip-stitch joins, or crocheted seams using sc or hdc. The following rounds outline an attractive JAYG slip-stitch join method and a whip-stitch finish method.
- Round 42 (JAYG Preparation): When making your last round on a square and leaving it unfastened, work the final sc round with the chocolate color and do not weave in ends. Align an unfinished square with a finished square, right sides facing up for slip-stitch joining.
- Round 43 (JAYG Join on one side): Start at a corner on the square you want to attach: insert hook through corner ch-3 of the finished square and through the corner ch-3 of the new square, yarn over and sl st to join. Continue along side: sl st through next st of finished square and corresponding st of new square across the side. Work corners as 3 sl sts into corner ch-3s. Fasten off at end of side. Repeat for all sides as desired. (This creates a neat flat join on the right side.)
- For JAYG, use a matching yarn color for the join so the seam blends into the border. Work slowly and line up stitch posts carefully to avoid ripple.
- Round 44 (Whip Stitch Join Method): Alternatively, weave a long tail (approx 40–50 cm for each side) and pin squares right sides up with matching corners aligned. Using a yarn needle and tail, whip stitch through the back loops of the sc rounds of both squares, spacing stitches evenly. Tie a secure knot at the end and weave in tails. (This method is stable and hides the seam on the front.)
- Whip stitching gives a slightly raised seam on the right side compared to slip-stitch JAYG which lies flatter. Choose based on preference and how your blanket will be used.
- Round 45 (Seam Finishing): For visible seam reinforcement, work a reverse single crochet (crab stitch) along the outermost chocolate edge: using the right side facing you, work sc in reverse direction (left to right) into each outer loop. This gives a rope-like edging and tidy finish. Join and weave in ends.
- Crab stitch adds a subtle, decorative finishing line that matches the sample’s clean framed look. If you used whip-stitch joining, crab stitch also hides any join irregularities.
Optional Embellishments & Final Details
- Round 46: Surface crochet: Using contrast color, slip stitch a decorative line across the diagonal or add small embroidered stitches into the center petals using a yarn needle. Secure ends and weave thoroughly. (No stitch count — decorative.)
- Surface embroidery adds a handcrafted look. Use single strand of yarn for delicate lines and secure with a few small stitches before hiding tails inside border.
- Round 47: Blocking: Lightly spritz squares with water and pin to a blocking mat, stretching to exact square dimensions, then allow to dry. Focus on squaring corners and evening out puff petals. (No stitch count — finishing step.)
- Blocking can change final size by up to 5–10 mm. Pin corners carefully so adjacent squares when joined remain even. For cotton yarn, steam blocking flattens petals more; for acrylic use spritz and allow to dry without ironing.
Alternate Simple Variation (Single-Color Square)
- Round 48: If you prefer a single-color look, substitute the center and cream rounds with the same yarn and follow identical round structure. Keep puff/cluster rounds in the same color for discreet texture without color contrast. (Stitch counts follow above rounds accordingly.)
- Color-blocking gives the mosaic look; a single color reduces contrast but highlights texture. Try monochrome for a modern minimalist afghan.
Troubleshooting & Adjustments
- Round 49: Info :
- If your square cups inward, add an extra round of sc (tight) around the edge. If it flares, add a round of BLO hdc to weigh it down. Adjust tension more than stitch count to remedy shape issues.
- Round 50: Info :
- To enlarge the square uniformly, add pairs of increase rounds: (dc round, sc round) until the desired size. Always keep corners consistent as (2 dc, ch 3, 2 dc) to maintain square geometry.
- End of pattern steps. The above rounds present a complete approach to recreate the shown brown mosaic granny square, with options for border depth, joining and finishing. Use the Info tips liberally for best results.
Assembly Instructions
- Attach squares using Join-As-You-Go (JAYG) slip-stitch method: when you make the last sc round of a new square, align it with the finished square and sl st through corresponding stitches across each side to form neat joins.
- Alternatively, use whip stitch to join squares: pin squares right sides up, then whip stitch through back loops of outer sc round across each side; tie off and weave in tails securely.
- When joining multiple squares, place them in a layout and attach in rows first, then join rows together to keep alignment consistent and reduce distortion.
- Sew in all ends after at least two adjacent sides are attached to avoid pulling seams out of alignment. Weave tails into the back of the border multiple times for security.
- Block each square before final assembly to ensure consistent shape and size; pin corners and edges to exact measurements and let dry fully before stitching squares together.
- For extra stability along the outer blanket edge, work a final round of reverse single crochet (crab stitch) in deep chocolate once all squares are joined.
- If using JAYG, keep tension of slip-stitch joins even: not too tight (which puckers) and not too loose (which gaps). Pin squares before joining if needed.
- When adding surface embroidery or decorative crochet joins, do this after blocks are joined so patterns align across seams.
Common Mistakes & How to Fix Them
- Skipping stitch markers at round starts can cause misaligned corners and an un-square motif; place a marker at each corner turning chain and at the start of rounds.
- Not keeping consistent tension when making puff clusters causes uneven petals; practice the puff stitch a few times to get consistent loop height.
- Changing colors without securing ends neatly leads to loose floats; weave in short tails or carry yarn inside small gaps to avoid visible ends.
- Forgetting to block squares before joining may result in rippled joins; always lightly block or steam squares to even them before assembly.
- Using an oversized hook will create gaps and visible stuffing in heavily textured stitches; choose the recommended hook size to keep fabric dense.
- Failing to count stitches after each round makes later increases/decreases incorrect; recount at the end of each round to ensure accuracy.
Important Notes
- Use stitch markers consistently at the beginning of each round and at corner turning chains to avoid counting errors and maintain square geometry.
- Stuffing is not required for this flat motif. If you add raised elements, block the square gently to distribute texture evenly.
- For the puff stitch, keep loop height consistent across clusters to ensure petals look uniform; practice on a scrap before starting the project.
- Weave in ends as you go if you dislike managing long tails later, but avoid cutting too short — leave at least 6–8 cm to thread through a yarn needle comfortably.
- When changing colors, change on the last yarn-over of the previous stitch for a neat, nearly invisible join; carry yarn along wrong side if working short color runs.
- If joining many squares into a blanket, make a swatch of 4 assembled squares and measure to estimate yarn requirements for a full-sized afghan.
- Maintain consistent blocking practices: if you steam blocks, use the same steam pressure across all squares so they behave identically when joined.
- Keep a tally or notebook of rounds and color changes for each square so that sets of squares remain consistent when making large projects.
Finishing this brown mosaic granny square brings together texture, color and vintage charm into a single framed motif. Each square is a tiny piece of handcrafted art, and joining them turns simple stitches into a cozy heirloom blanket. I hope you enjoy the meditative process of making each floral center and watching your afghan grow row by row. Grab a cup of tea, settle in, and savor every stitch — happy crocheting! 🧶🍂
Crochet Abbreviations
- mr
- magic ring
- ch
- chain
- sc
- single crochet
- hdc
- half double crochet
- dc
- double crochet
- tr
- treble crochet
- sl st
- slip stitch
- sk
- skip
- sp
- space
- st
- stitch
- inc
- increase (2 stitches in same st)
- dec
- decrease (worked as indicated, usually sc2tog or invisible dec)
- puff
- puff stitch (see Info for exact sequence)
- rep
- repeat
- BLO
- back loops only
- FLO
- front loops only
- ( )
- repeat instructions in brackets as directed
- x
- times
You Ask, We Answer
What is the finished size of this square?
Using worsted weight yarn and a 4.0 mm hook, each finished square measures approximately 14 cm (5.5 in). Your gauge may vary with hook size and tension.
Can I change yarn weight for a different size?
Yes. Using thicker yarn and a larger hook will increase square size; thinner yarn will reduce size. Adjust border rounds accordingly to keep the square shape.
Do I have to use puff stitches for the center?
No. You can substitute simple clusters (3 dc cluster) if puff stitches are unfamiliar. Puff stitches give more dimensional petals, but clusters will still look lovely.
How much yarn will I need for a blanket?
Yarn requirements depend on blanket size and number of squares. As a rough estimate: a 6×8 square lapghan (48 squares) using this yarn scheme may require 1200–1800 g total. Make a small swatch and calculate accurately for your yarn.
What's the best way to join squares without a visible seam?
Join-As-You-Go slip-stitch method creates an almost invisible seam on the right side and lies flat. Whip stitch on the back also hides the seam from the front and gives stability.
How do I avoid stretching during joins?
Pin squares carefully before joining, and avoid pulling your joining stitches tight. Keep join stitches firm but elastic to allow the fabric to drape naturally.
Can I machine wash this blanket?
Machine washing depends on yarn fiber. Use washable acrylic for easy care or follow care instructions of the yarn label. Always test a small piece first to check colorfastness and shrinkage.
How do I fix a mistake discovered later in the round count?
It's best to unravel back to the round where the stitch count was correct and redo from there. Use a stitch marker to mark the start of each round to make detection easier.