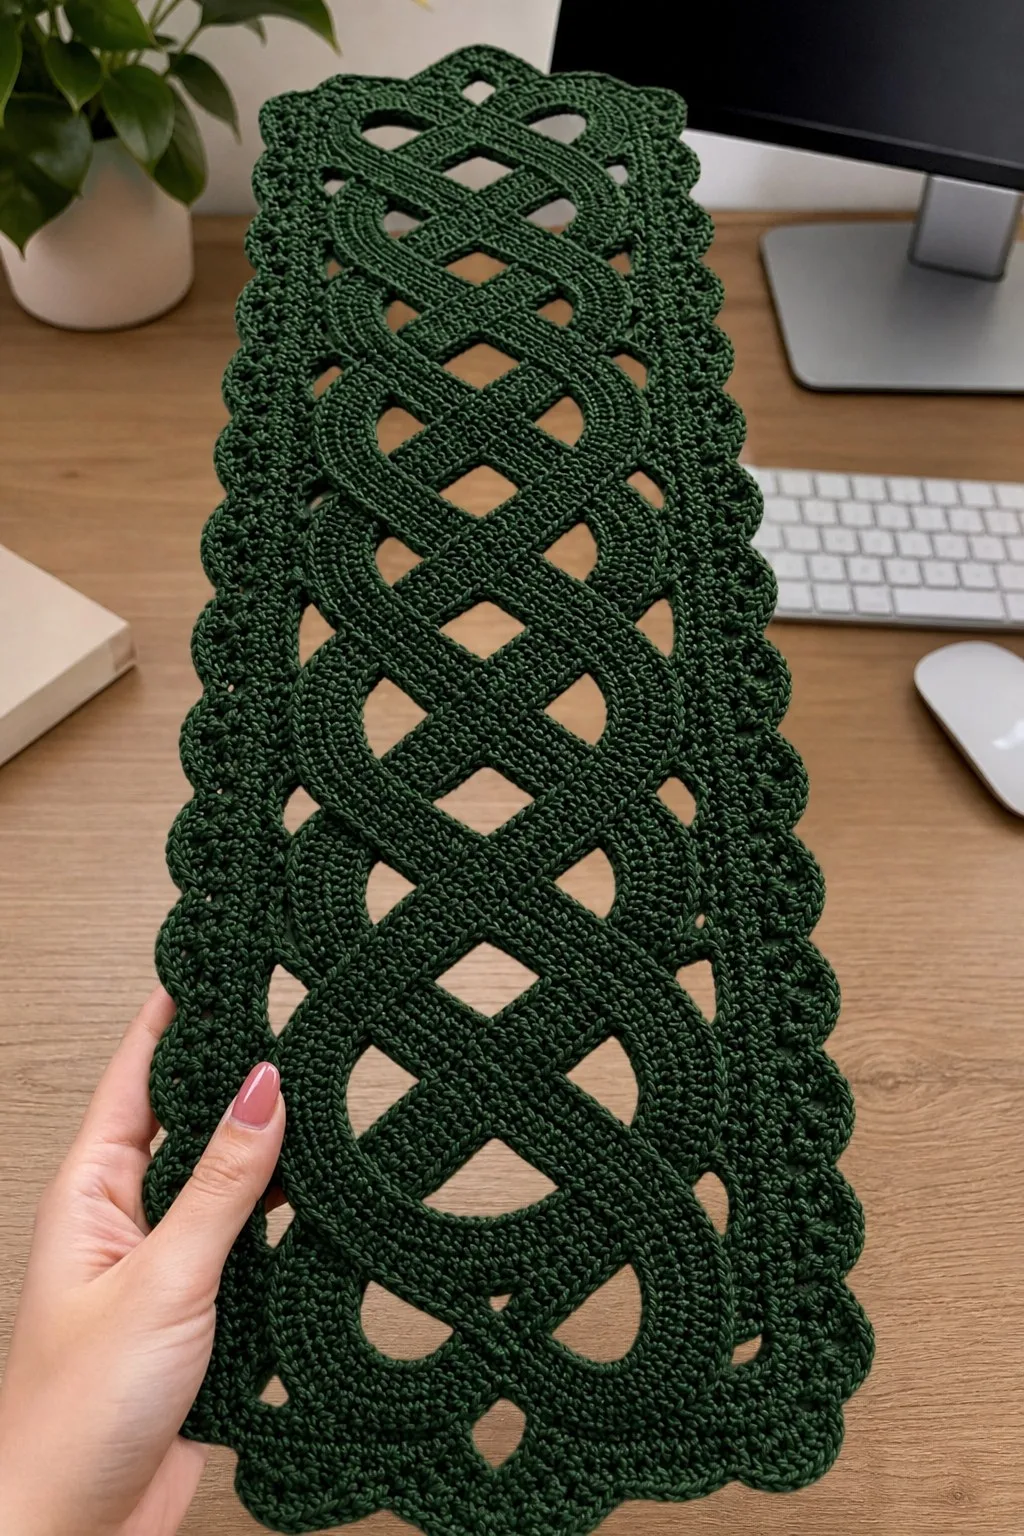
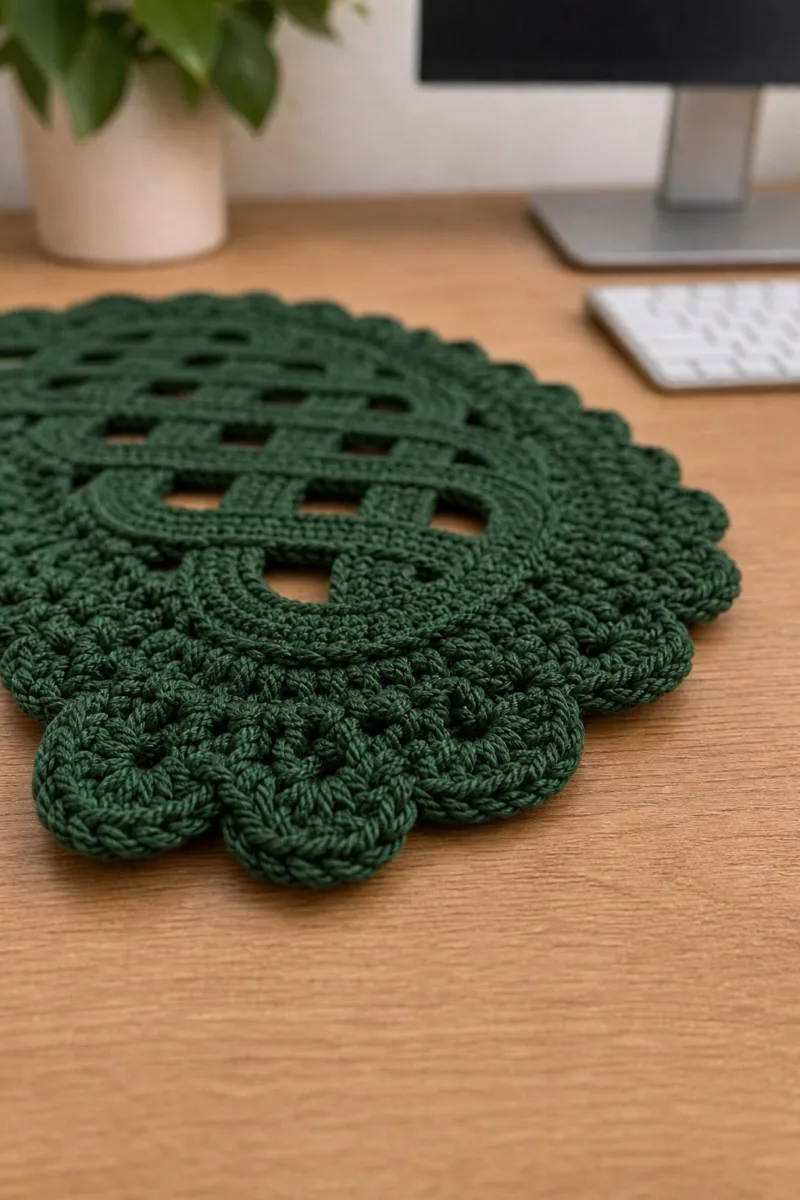
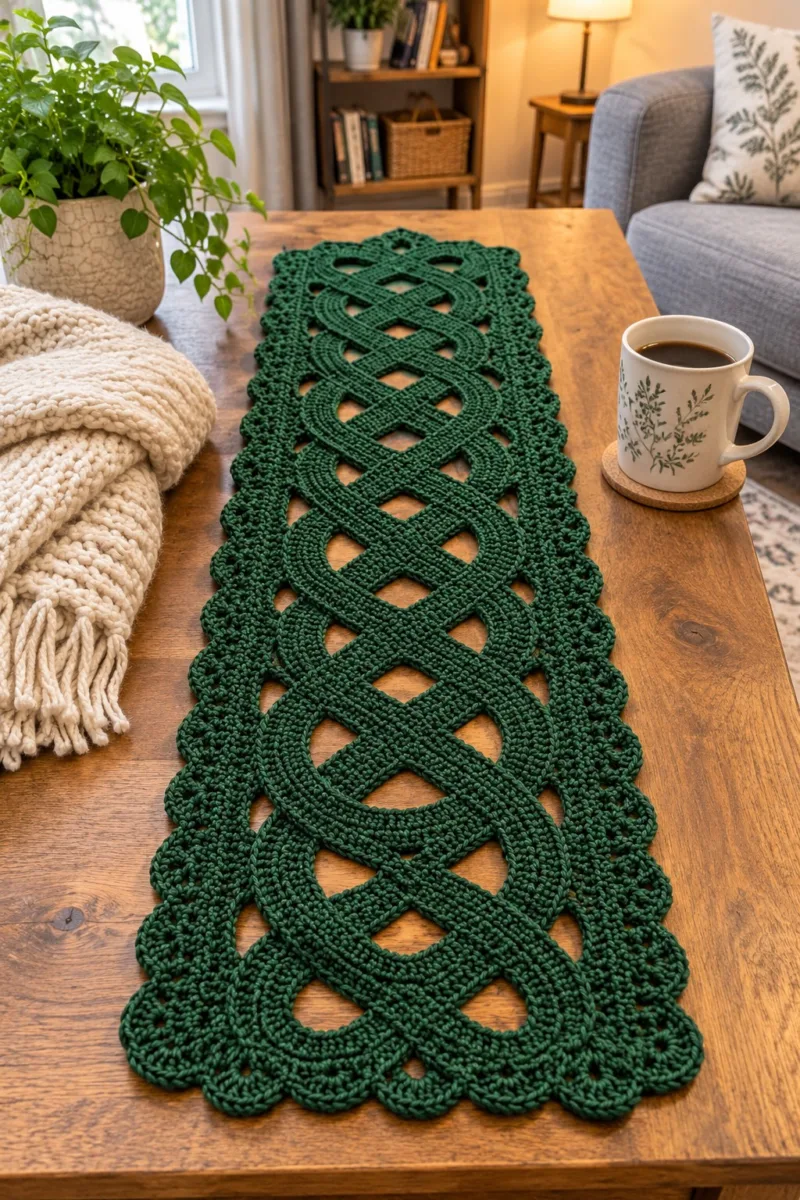
A richly textured emerald green table runner inspired by traditional Celtic knotwork. This pattern creates two raised braided cords that interlace across an open diamond mesh, finished with a scalloped shell border. The runner lays flat and dramatic on a table, with clear instructions for cord construction, assembly, and an elegant edging.
About This Celtic Knot Emerald Table Runner Pattern
This pattern recreates a raised Celtic knot runner worked in a deep emerald cotton or cotton-blend yarn. The design is built from two identical raised cords that are seamed into an interlaced knot motif and joined over a diamond mesh background. The final result is a richly dimensional, yet flat-running table runner perfect for a dining table, console, or sideboard.
The runner pictured measures about 32-34 inches long and 8-10 inches wide in worsted-weight cotton, with a dense, durable texture and scalloped edging. It uses simple stitches (single crochet, slip stitch, shells) arranged in repeated rows and seamed carefully for that braided, raised effect.
Why You'll Love This Celtic Knot Emerald Table Runner Pattern
I love this pattern because it combines structural crochet with decorative shaping—creating a dramatic center braid and delicate openwork at the same time. The raised cords give a wonderful sculptural feel, while the scalloped edge adds a soft, finished look. I find the repetitive rows relaxing but the assembly step rewarding when the knot comes together.
- Cozy Accent – A warm touch for your space that transforms ordinary corners into inviting nooks filled with handmade charm.
Switch Things Up
I absolutely love how adaptable this Celtic knot runner is—it’s a brilliant base for color and texture experiments. Try the same construction in natural linen or a light sage for a softer, more muted table accent.
I also like adding subtle contrast by working the outer scallop in a slightly lighter green or cream to highlight the shell peaks. Another fun modification is making three narrower cords for a fuller braid or making the mesh diamonds larger for a lace-like effect.
For seasonal touches, swap in metallic thread for one round of the shell edge or add tiny embroidered motifs in the mesh diamonds. The basic pattern is forgiving and invites playful customization—so make it your own.
Materials Needed
Main Fabric
- Worsted weight cotton or cotton blend (#4) in emerald green — approximately 240-300g (3-4 skeins depending on yardage, roughly 600-800 yards total)
- 50-70g in a matching deep green for small joining seams and edgings (if using separate skein)
- Small amount (10-15g) of contrasting or lighter green if you wish to highlight the scallop peaks (optional)
- Optional: matching sewing thread for hidden seams (10-15g)
Tools Required
- 4.0mm (G) crochet hook for main work (adjust if using a different yarn brand)
- 3.5mm (E) crochet hook for neater edge/shell work (optional)
- Yarn needle for sewing and weaving in ends
- Stitch markers (at least 6) to mark cord edges and placement points
- Scissors
- Pins and blocking mat for shaping and pinning knot layout
- Measuring tape or ruler
- Optional: blocking spray or light steam iron for flattening pieces
The Free Pattern
0% complete
Project Overview
- This runner is constructed from two identical raised cords (the braided elements), a central open diamond mesh panel that the cords sit on, and a scalloped shell border worked after assembly. The two cords are seamed together at crossing points to create the interlacing Celtic appearance. Work the components flat, block them, arrange and pin to form the knot, then join and work the edging all around for a neat finish.
- Finished Size: Approx. 32-36" long x 8-10" wide using worsted cotton and a 4.0mm hook. Using thicker yarn or larger hook increases size proportionally.
- Gauge: 16 sc x 20 rows = 4" in single crochet worked tightly. Gauge is flexible for this decorative runner but affects final dimensions.
Central Raised Cord (Make 2)
- Round 1: Ch 18, sc in 2nd ch from hook and in each ch across — 17 sc. Turn (17)
- Round 2: Ch 1, sc in BLO in each st across (17). Turn (17)
- Round 3: Ch 1, sc in BLO in each st across (17). Turn (17)
- Round 4-8: Repeat Round 3. Work tightly to build a sturdy ribbed strip (17 each)
- Working in BLO creates a ribbed surface that mimics a raised rope. Keep tension firm so the strip holds shape when folded and seamed.
- Round 9-40: Continue repeating Round 3 until the strip measures approximately 30-34 inches long, or desired length for the runner proportion. Maintain 17 sts per row (17)
- Measure your strip periodically. You will make two identical strips. For a shorter runner, reduce row repeats; for a longer runner, add repeats. Make sure both strips are exactly the same length before seaming into tubes.
- Round 41: Fold strip lengthwise with WS together. Starting at one short end, sl st through both layers in each stitch across to join into a narrow tube (17 sl st). Fasten off, leaving a long tail for seaming if desired.
- Round 42: Using RS facing out, use your hook to pick up the seam edge and work 1 rnd sc around the entire tube: work sc evenly along one long edge, 3 sc in each short end to round the corner, then sc down the other long edge (approx. 34-36 sc around depending on seam accuracy). Join with sl st to first sc. (approx. 34-36)
- Round 43: Ch 1, sc in each st around. Join. This rounds-up the seam and adds thickness to the cord body. (same count)
- Round 44: Ch 1, sc in each st around. Join. Fasten off and weave in ends. Repeat entire section to make the second identical cord.
- Alternatively, if you prefer a flatter raised cord, skip rounds 42-44 and simply whipstitch the fold closed and blot shape by pressing rather than crocheting extra rounds.
Diamond Mesh Background Panel
- Round 1: Ch 40 (or adjust multiple to match cord length plus allowances — this panel stretches under the cords), sc in 2nd ch from hook and in each ch across (39). Turn (39)
- Round 2: Ch 1, sc in each st across. Turn (39)
- Round 3: Ch 3 (counts as dc), sk 1, dc in next st, *ch 3, sk 2, dc in next st; rep from * across ending with dc in final st. Turn. (pattern creates vertical spaces)
- Round 4: Ch 1, sc in each dc and sc into each ch-3 space: work (sc, ch 3, sc) in each ch-3 sp to create diamond openings across the row. Turn. (adjust counts to end with sc)
- Round 5-12: Repeat Rounds 3-4 alternately until mesh reaches same length as the cord but slightly narrower than the full runner width so cords can be seamed over it. Count diamonds to match cord intersection spacing.
- The mesh is intentionally looser, providing negative space under the knot. Adjust chain multiple to produce the same number of diamond openings that align with cord crossing points. Block panel flat before pinning cords.
Cord Placement & Pinning (Assembly Prep)
- Lay the mesh panel flat on a blocking mat. Position one cord along the central axis; this cord will weave over and under according to the Celtic pattern. Using pins, mark intersection points where the cord will cross itself and where the second cord will cross it. Place the second cord mirrored to create symmetrical knot loops. Typical top-to-bottom arrangement uses six broad knot loops along the runner length; adjust according to your cord length.
- Round 1: Pin cords at the terminal ends to match mesh ends, leaving approx. 1/4" margin over the mesh edge for a neat join. Use stitch markers to mark every 2-3 inches to maintain equal spacing and symmetry.
- It helps to sketch or photograph placement before stitching. Use lots of pins and baste-stitch initially with contrasting yarn to hold the shape, then tack neatly with matching yarn at the final stage.
Securing Cord Crossings (Hand Sewing)
- Round 1: Thread yarn needle with a double strand of main yarn. At the first crossing where cord A passes over cord B, insert needle under the back of the top cord and pick up 1-2 stitches from the bottom cord without piercing the outer surface—this will anchor but keep the cord raised. Using even, small stitches, tack the two cords together at each crossing point. Repeat at every crossover, keeping stitches hidden inside the seam. Each cross typically uses 3-5 mattress stitches to hold securely.
- Only tack at the minimal number of points required to hold the shape. Over-sewing flatten the braided impression. Baste first if you want to test the look before the final invisible stitches.
- Round 2: When tacking, alternate directions (sew from under, then from the top) to keep tension even across the runner and prevent twisting the cords. Fasten off ends and weave away threads into the inside of the cord tube where possible.
Joining Cord to Mesh (Whipstitching and Slip Stitches)
- Round 1: With RS up, align the cord edges over the mesh diamonds so the outside edge of the cord sits approx. 3-4 mm from the mesh edge. Using a yarn needle and single strand of yarn, whipstitch the underside of the cord to the mesh through the inside of the tube seam to hide stitches. Place stitches every 10-12 mm for a secure but invisible join.
- Round 2: For extra security, work a row of slip stitches connecting cord base to mesh using a 3.5mm hook: insert hook through the mesh at the point where the cord sits, then through the underside seam of the cord and sl st. Work sl st evenly along both sides of each cord until secure. Fasten off and weave ends.
- Ensure the cords are not pulled flat when attaching; maintain the raised profile by holding the cord gently while stitching and allowing some loft between cord and mesh.
Center Infill Rounds (Fill gaps under the cord)
- Round 1: Where the cord arches leave large gaps in the mesh beneath, work small triangular infill motifs: join yarn at the inner mesh point with sl st, ch 1, sc 3 in same sp, ch 1, turn; sc in next two rows to create a small filled wedge. Repeat for each large opening. These are worked in sc and hdc to give a flatter background under the cords.
- Round 2: Blend infills into neighboring mesh by working sc evenly and sl st into edge stitches of the mesh to make the transition invisible. Weave ends securely inside the mesh panel.
- Keep the infill low-profile; excessive bulk will affect the runner laying flat. Use the same yarn and tight tension to match texture.
Border Preparation (Join Panels and Trim Edges)
- Round 1: With the cords secured and mesh gaps filled, trim any uneven edges of the mesh to a neat rectangle (or slightly tapered ends) so the scalloped border will sit evenly around the entire piece. Use blocking pins to square corners and press gently with steam to encourage flatness.
- Round 2: Using a 4.0mm hook, join yarn at any point along the long edge with a sl st. Ch 1, work 1 rnd sc evenly around the entire runner, placing 3 sc in each cord end corner to round slightly. Join to first sc with sl st. This base round evens the edge for the scalloped shells. (count will vary; ensure an even number to work shells into)
- Place your base sc stitches roughly every 6-8 mm depending on yarn thickness so that scallops fall evenly. Mark where each shell will be with a removable stitch marker before starting shell rounds.
Scalloped Shell Edge (Edging Rounds)
- Round 1: Ch 1, *skip 2 sc, 5 dc in next sc (shell made), skip 2 sc, sl st in next sc; rep from * around. Join with sl st to first sl st. Fasten off and weave ends. This creates a scallop every ~5 sc. If your base round count differs, adjust skip number so shells are evenly spaced.
- Round 2: Join contrasting or same yarn at tip of a shell if you want a layered scallop. Ch 1, into shell: (sc, hdc, 3 dc, hdc, sc). Sl st into sl st between shells. Rep around. Join and fasten off. Weave ends. This gives a fuller scallop outer edge.
- Use the 3.5mm hook for a tighter, neater outer scallop if desired. You can also add picot points at shell peaks for extra decoration: ch 3, sl st in 3rd ch before finishing each shell tip.
Final Finishing Rounds
- Round 1: Remove any remaining basting threads. Gently block the entire runner: pin to a blocking mat stretching slightly to even edges and shape scallops. Spray lightly with water and allow to dry fully. This opens the mesh diamonds and flattens seams.
- Round 2: Weave in all yarn tails into the inside of cords and mesh using a yarn needle. Trim close. Check all cord tacking points; add a few invisible reinforcing stitches if any area seems loose.
- If the runner needs a little extra stiffness to lay flat on a polished surface, consider a light application of fabric starch or a removable table runner liner underneath.
Optional Variation: Raised Triple Braid
- Round 1: Instead of two cords, make three narrower cords (folded strips of ch 12, sc in BLO for the same length, seam into tubes and finish as above). Lay them in a classic three-strand braided layout, securing crossings with the same invisible tacks before attaching to the mesh. This produces a fuller braided centerband with a different Celtic appearance.
- Adjust the mesh panel width and diamond spacing to fit three cords; you will need more mesh diamonds across the width or a wider runner base.
Detailed Stitch Count & Example Math (Sample Cord Length)
- Round 1: Example: If you chain 18 and sc 17 across, and you work 90 rows, you have 90 x 17 = 1530 sc in the strip before folding. After folding and seaming into a tube, your 1 rnd sc around the tube will be approximately 34-36 sc depending on seaming accuracy. The outer rounds (42-44) increase thickness by approximately 2 rounds x ~34 sc = +68 sc of surface coverage per cord for the rounded finish.
- Keep calculations handy and make notes for future changes. If you change width (chain count) keep the same number of rows to maintain runner length proportionally—width changes alter final perimeter for edging calculations.
Troubleshooting & Adjustment Rounds
- Round 1: If cords twist when seamed, either re-seam the fold so seam sits centered on the underside or add one extra sc round (Round 43) to balance tension. This often evens the twist automatically.
- Round 2: If scallops pull inward, adjust Edging Round 1 by reducing shell dc count to 4 dc or spacing shells slightly further apart to decrease pull.
- Small adjustments early prevent wasted time later. Test a 3×3" swatch for shell spacing if you are changing yarn weight or hook size.
Assembly Instructions
- Pin the two finished cords onto the blocked mesh panel following the Celtic knot sketch. Mark every crossing point and each end so both cords mirror each other evenly before sewing.
- Tack each crossing point with invisible mattress stitches: thread a yarn needle with double strand of matching yarn, pick up interior stitches beneath the cord tube, and make small stitches to hold the cords together without flattening the braid.
- Attach cords to the mesh by whipstitching through the underside seam of each cord into the mesh foundation stitches, placing stitches every 8-12 mm. Then work a stabilizing row of slip stitches from the RS if desired.
- Fill any large openings beneath cord arches with small triangular infill pieces worked in sc and hdc so the runner remains flat and the open diamonds look intentional.
- Once cords are secured, work a round of single crochet evenly around the entire perimeter to prepare for shell edging — use stitch markers to map shell positions and ensure scallops fall evenly.
- Work the scalloped shell edging in one or two rounds as directed, joining and fastening off. Block the whole runner again to shape shells and flatten seams for a finished professional look.
- Weave in all ends into the cord interior and mesh. Trim close and check the runner on the table; add small reinforcing stitches at cord ends or crosspoints if necessary.
- If desired, press lightly with steam and pin scallops open until dry; place a matching non-slip runner liner underneath if display surface is polished.
Common Mistakes & How to Fix Them
- Skipping stitch markers at the start of long rows will make your cord width drift over many repeats and ruin symmetry; use markers every 10-20 rows to check gauge.
- Working too loosely on the cord will cause it to flop and not hold the braided shape; keep a firm, consistent tension throughout each strip.
- Not pressing or blocking the flat pieces before joining can make seams bulky and misaligned; gently steam-block flat panels before assembly.
- Sewing the cords too tightly together when forming crossings will flatten the raised effect; baste first, then tack-stitch only where needed.
- Failing to count foundation chains precisely will throw off stitch multiples required for join and border; recount before starting the edging.
- Using a slippery yarn or an overly large hook makes the scalloped border look uneven; match hook to yarn and consider one size smaller for neater shells.
Important Notes
- Use stitch markers consistently at the beginning of each long row to avoid counting errors and maintain proper shaping.
- For the runner, work tightly enough on the cords that the seams hide well and stuffing (if using) is not needed; this is a flat project and does not use stuffing.
- Maintain consistent tension throughout the project; too tight creates stiff pieces and too loose creates floppy cords that won't hold the knot
- When sewing cords together, use a yarn needle and small invisible stitches to avoid flattening the raised braid effect
- Pin and baste heavily before final stitching to guarantee symmetry—this step makes the knot perfect
- If using 100% cotton yarn, allow for minimal stretch when blocking; cotton relaxes slightly after the first wash
- Keep a measuring tape and small notebook nearby to record the number of rows so the second cord matches exactly
Completing this Celtic Knot Emerald Table Runner is such a satisfying project—watching the separate cords transform into a single woven motif is magical. The deep emerald color gives each scallop and braid real elegance, and the finished piece dresses a table instantly. Pinning and stitching the knot is a relaxing, patient step with a delightful payoff. Enjoy the process and the lovely handmade accent you can display or gift! 🧶✨
Crochet Abbreviations
- ch
- chain
- sc
- single crochet
- hdc
- half double crochet
- dc
- double crochet
- sl st
- slip stitch
- sk
- skip
- st(s)
- stitch(es)
- BLO
- back loops only
- FLO
- front loops only
- rep
- repeat
- sp
- space
- sc2tog
- single crochet 2 together (decrease)
- tr
- treble crochet
- FSC
- foundation single crochet
- ( )
- work instructions in brackets as directed
- x
- times
You Ask, We Answer
What is the finished size of this table runner?
Based on worsted-weight cotton and the specified row counts, the finished runner measures approximately 32-36 inches long and 8-10 inches wide. Changing yarn weight or hook size will change final dimensions proportionally.
Can I use a different yarn weight?
Yes — but adjust hook size accordingly and expect a different finished size. A thicker yarn will make a chunkier runner and fewer rows will be required; thinner yarn will need more rows for the same length.
Do I need to stuff the cords?
No. The cords are made as narrow tubes by folding and seaming the strip, with extra sc rounds for thickness. They are structural without stuffing, which keeps the runner flat and stable.
How do I keep the braided cord raised after sewing?
Anchor the cords only at minimal crossing points with small invisible stitches and avoid tacking them continuously along the length. This maintains loft and the raised appearance.
Can I wash the finished runner?
If using machine-washable cotton, wash on a gentle cycle in a mesh bag and reshape while damp. For delicate finishes, hand-wash and block flat to dry. Avoid tumble drying on high heat to preserve shape.
How much yarn do I need?
Approximately 600-800 yards (240-300g) of worsted-weight cotton for the runner shown. Exact yarn needs depend on final length and yarn brand; buy a little extra to be safe.
Can I make a longer or narrower runner?
Yes. Increase or decrease the number of rows in the cords to change length, and adjust mesh panel width and border shell counts to match. Keep both cords the same length for symmetry.
What if my stitch count is off?
If counts drift, unravel back to the last correct point. Using stitch markers and tracking rows reduces the likelihood of count errors. For the base sc round before edging, recount to ensure an even number for shell spacing.