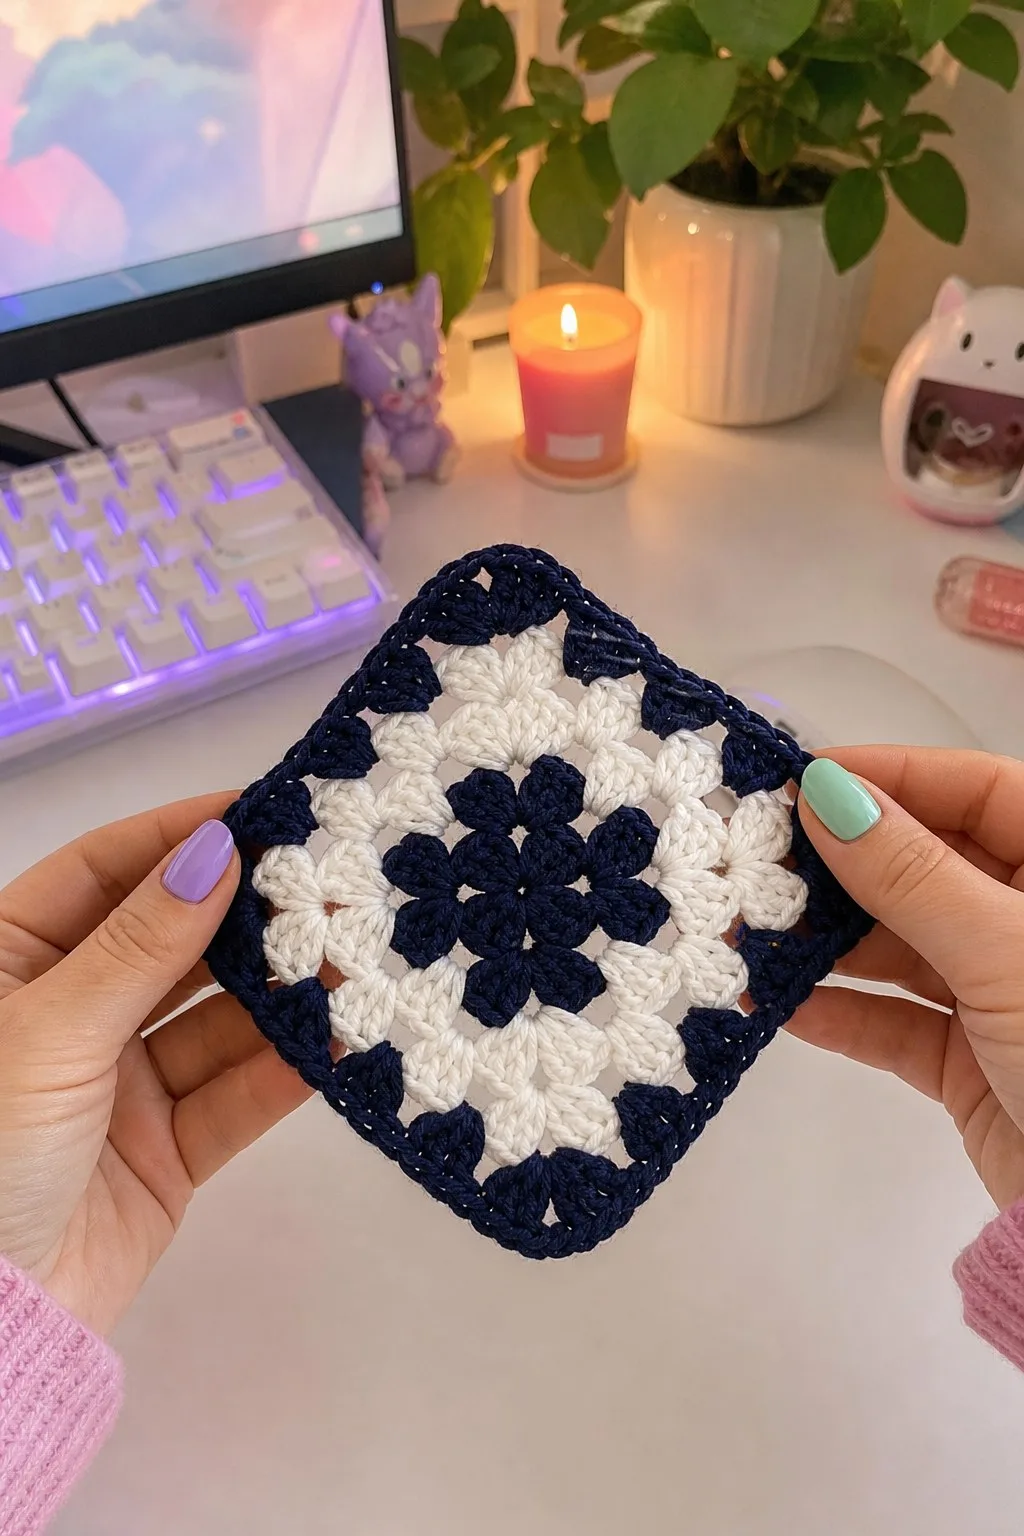
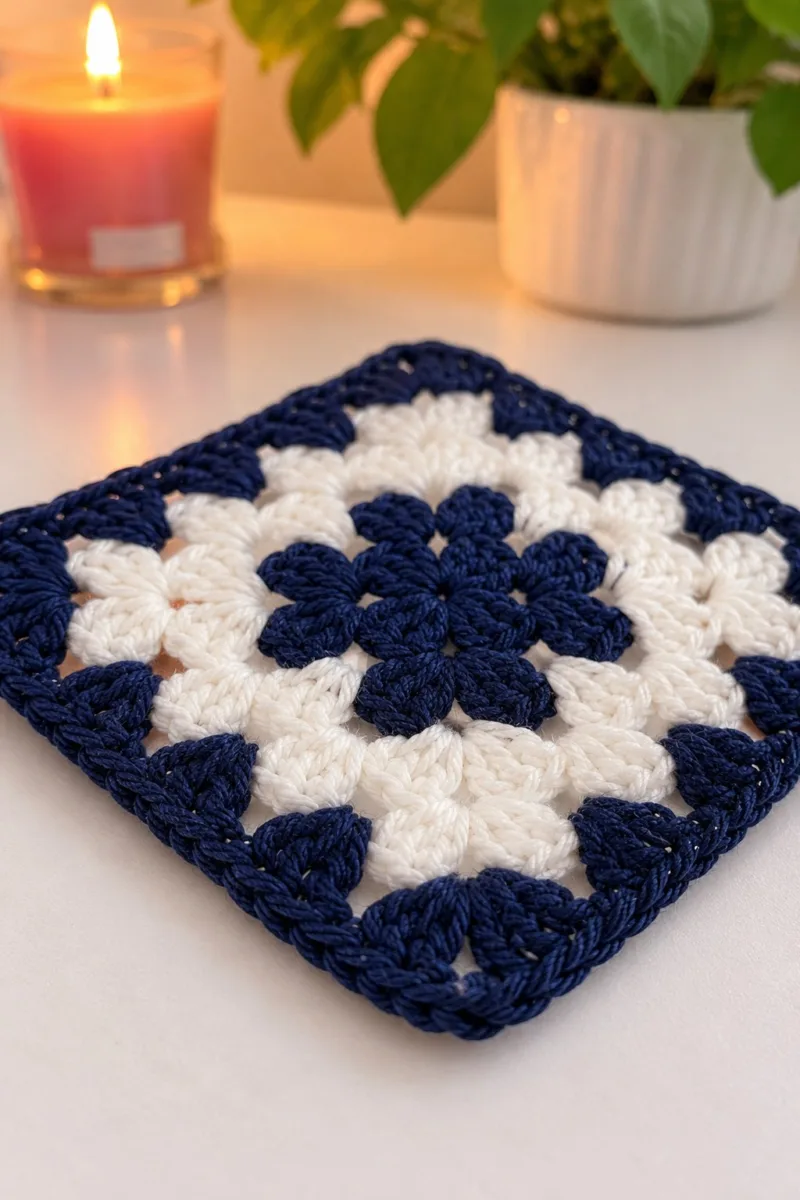
A timeless two-colour granny square worked in deep marine blue and clean white. This pattern recreates the layered floral granny motif shown in the photos — a small square perfect as a coaster, scrubbie, or building block for a blanket. Clear round-by-round instructions and multiple edging and joining options let you make a single square, a full afghan, or a decorative coaster set.
About This Classic Blue Marine White Granny Square Pattern
This two-colour blue and white granny square features a layered floral centre and crisp corners, just like the images. The centre is worked in marine blue, followed by contrasting rounds in white and navy for a classic, graphic look. The stitch texture shown is built from 3-dc clusters (classic granny clusters) and chain spaces, finished with a sturdy blue border. The finished single square measures roughly 12-14 cm (4.5-5.5 in) depending on yarn and tension, making it ideal as a scrubbie, coaster, or blanket block.
The pattern includes step-by-step rounds for the motif, extended rounds to enlarge the square, three different edging options, and join-as-you-go instructions for blankets. Flexible and forgiving, this design adapts to cotton scrubbies or a soft blanket depending on yarn choice.
Why You'll Love This Classic Blue Marine White Granny Square Pattern
I love this pattern because it balances classic granny textures with a modern two-tone palette — the navy and white make every stitch pop. I appreciate how adaptable it is: the same square makes a charming coaster or a tile in a full-sized blanket. The rounds are repetitive and soothing, perfect for relaxing crochet time.
- Cozy Accent – A warm touch for your space that transforms ordinary corners into inviting nooks filled with handmade charm.
Switch Things Up
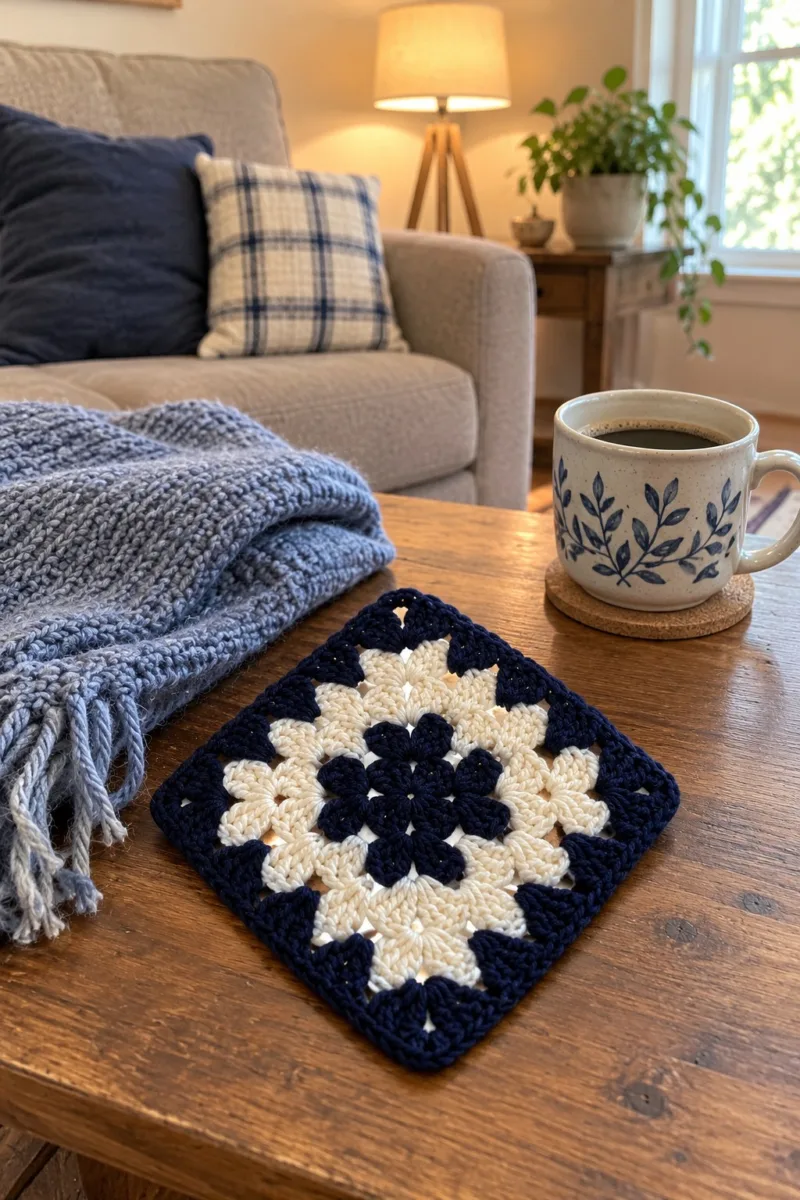
I absolutely love how flexible this granny square is — you can make it tiny for coasters or build a whole framed blanket by repeating the motif. I often switch the colour order so the centre pops in a different shade to change the visual weight.
I like experimenting with different border options; a simple sc edge gives a modern finish, while a scalloped border feels more romantic. Try varying yarn weight, or hold two strands together for thicker coasters and kitchen scrubbies.
For a quick change, I sometimes add a thin stripe of a third colour between the navy and white rounds to create a soft transition or to match a room accent. The construction is forgiving enough to let you personalize without reworking the whole square.
Materials Needed
Main Fabric
- Worsted weight cotton yarn (#4) or cotton-blend worsted: approximately 120g in marine/navy blue for a 6×6 tile blanket or 30g for single coaster
- Worsted weight cotton yarn (#4): approximately 120-150g in white (accent/main alternate) for multi-square blanket or 20-40g for a single square
- Optional thicker cotton scrubbie yarn (cotton cord or bulky cotton) — 50g in blue and 50g in white for a scrubby coaster version
- Small amounts (10-15g each) of contrast shades if adding decorative stitches or embroidered details (e.g., lighter blue, cream)
Tools Required
- 3.5mm (E) crochet hook (recommended for worsted cotton to get similar fabric density)
- 3.25mm (D) crochet hook (optional for tighter gauge or smaller scrubby)
- Yarn needle for weaving ends and seaming
- Scissors
- Stitch markers (at least 3) to mark rounds and corners
- Measuring tape or ruler to check gauge
- Blocking mat and pins (optional) for squaring up finished motifs
- Optional: Tapestry needle and matching thread if adding sewn-on labels
The Free Pattern
0% complete
Square Motif
- Gauge & Notes: Gauge is not critical for motif shapes, but for size reference: with worsted cotton and 3.5mm hook one finished square measures approximately 12-14 cm (4.5-5.5 in). Work tightly enough that clusters are defined with minimal gaps. Ch3 at beginning of a round counts as first dc unless noted otherwise.
- Round 1: With marine blue, mr, ch3 (counts as dc), 2 dc in mr, ch1, (3 dc in mr, ch1) x6, join with sl st to top of ch3. (8 clusters/24 dc, 8 ch-1 spaces)
- Keep cluster tops even by inserting hook under the same two loops for each dc. Maintain an even tension on your magic ring before closing to keep the centre neat.
- Round 2: Change to white. Sl st into the next ch-1 space, ch3, work (3 dc, ch1) into the same ch-1 space to form the first side unit, then *(3 dc, ch1) into each ch-1 space from previous round; after every 2 spaces work (3 dc, ch2, 3 dc) into the next ch-1 space to form a corner; rep from * around, join with sl st to top of ch3. (This creates 4 corners; approximate total clusters 16, total dc 48)
- For this round create four corner openings (ch2) spaced evenly—visualise the square by dividing the ring into four sides and place corners accordingly. If you prefer exact placement, mark every second ch-1 space with a removable marker before starting.
- Round 3: Ch3, *in next ch-1 space (3 dc, ch1); across each previous corner (3 dc, ch1) in the corner ch-2, but at the corner work (3 dc, ch2, 3 dc). Rep around, join. (approx clusters 24 / dc 72)
- Round 4: Change to marine blue. Sl st into next ch-1, ch3, (2 dc) in same sp to form cluster, ch1, (3 dc, ch1) in each ch-1 space along side; at corners work (3 dc, ch2, 3 dc). Join. (approx clusters 32 / dc 96)
- Colour join tip: finish last stitch of the previous round up to the final yarn-over, drop old colour and pick up new colour to complete the last pull-through so the join is neat. Carry the unused yarn behind work if making only a few rounds of the alternate colour; otherwise fasten off and weave in ends.
- Round 5: Ch3, work (3 dc) into each ch-1 space across the side sections; at corner spaces work (3 dc, ch2, 3 dc). Join. (approx clusters 40 / dc 120)
- Round 6: Change to white. Repeat Round 5 pattern: ch3 then 3-dc clusters in each chain space, corners as (3 dc, ch2, 3 dc). Join at end. (approx clusters 48 / dc 144)
- At this stage your motif should begin to square up. Block lightly if sides are slightly wavy or if tension creates small bumps; pin to a square and steam lightly (follow yarn care instructions).
- Round 7: Change to marine blue. In each side space (3 dc, ch1) across, place corner clusters (3 dc, ch2, 3 dc) in corner ch-2 s. Join. (approx clusters 56 / dc 168)
- Round 8: Ch3, then (3 dc) into each ch-1 or side space, corners worked as (3 dc, ch2, 3 dc). Join. (approx clusters 64 / dc 192)
- If you are making a scrubby/coaster use cotton cord or thicker cotton and consider working two or three repeats of Round 8 to achieve thickness. For blanket squares keep one repeat and move to edging rounds.
- Round 9: Change to white. Repeat cluster rounds: ch3, 3-dc clusters in each side space, corners as (3 dc, ch2, 3 dc). Join. (approx clusters 72 / dc 216)
- Round 10: With marine blue, sl st into the first ch-1 space, ch1, sc into same space to create a clean join; *ch3, skip the next ch-1 space, sc into the next ch-1 (this creates small picot-like windows along the side). At corners ch3, sc into corner ch-2. Rep around, join. (This round creates a decorative airy band; stitch count varies)
- Round 10 is optional if you want extra definition between the layered flower rounds and outer border. Use ch3 for a lacy effect or ch1 for a tighter look.
- Round 11: Change to white. Work one round of sc in each stitch and into each chain space around to create a denser band: sc in each st and ch-sp, placing 3 sc in each corner ch-2 (or sc, ch2, sc) to maintain squareness. Join. (count = around 216 sc approximately depending on previous choices)
- Round 12: Fasten off white and change to marine blue. Work a finishing round of sc in BLO around the square to create a small ridge; sc evenly across each side and place 3 sc in each corner. Join, weave in ends. (final neat border; count varies)
- At this point you have a complete small granny square motif with layered colour. The counts above are approximate because cluster-based work uses spaces rather than single-stitch counts. When making multiple squares aim for very similar rounds, tension and hook size to achieve consistent blocks.
Outer Rounds / Make It Larger (Rounds 13-36)
- Round 13: To enlarge, continue working the classic cluster pattern: with marine blue, sl st to next space, ch3, work 3-dc clusters in each side space; corners as (3 dc, ch2, 3 dc). Join. (clusters increase by ~8 each round)
- Round 14: Change to white. Repeat the cluster-side pattern exactly. Join. (this alternation produces the strong two-colour banding visible in photos)
- Round 15: Marine blue: Repeat previous cluster round, ensuring that corner ch-2 spaces remain square. Join.
- Every two rounds (one white, one navy) maintain the same number of side clusters; this preserves the visual flower petal motif in the centre while adding layers outside.
- Round 16: White: Work cluster round (3 dc clusters in side spaces, corners as ch2). Join.
- Round 17: Marine blue: Add one more cluster round identical to previous rounds. Join.
- Round 18: White: Continue cluster pattern. Join.
- Check that the sides remain straight. If you notice slight rounding, pin the square and steam-block gently to square up before continuing additional outer rounds.
- Round 19: Marine blue: After the cluster round, add an interleaving round (ch1, sc into each cluster top and sc into chain spaces) to firm the fabric. Join. (this stabilizes the side edges)
- Round 20: White: Work one more cluster round to continue motif growth, then join. (these alternating cluster and sc rounds create a textural banding effect)
- Round 21: Marine blue: Repeat cluster round. Join.
- Round 22: White: Work a dense round: sc in each st and each chain space to create a solid band. Join. (This is a good stopping point if you want a medium-sized tile)
- If making a blanket out of many squares keep outer rounds uniform across all squares — e.g., stop at Round 22 for all motifs to ensure consistent sizing when joining.
- Round 23: Marine blue: Continue with cluster round to enlarge further. Join.
- Round 24: White: Repeat cluster round. Join.
- Round 25: Marine blue: Add decorative chain windows: ch3, skip 1 cluster and sc in next cluster top, rep around placing ch3 windows evenly. Join. (creates light texture)
- Round 26: White: Solid sc round across all loops and spaces to firm the band. Join.
- Round 27: Marine blue: Work one more cluster expansion. Join.
- Round 28: White: Work a finishing sc round in FLO to create a subtle ridge on the face of the square. Join.
- By alternating expansion rounds and solid rounds you create a square that grows evenly while retaining a clean visual pattern. Continue until your square reaches desired size for coaster, cushion panel, or blanket tile.
- Round 29: Marine blue: Repeat cluster round. Join.
- Round 30: White: One dense sc round to stabilise. Join.
- Round 31: Marine blue: Add decorative picot corners: at each corner after (3 dc, ch2, 3 dc) work (ch3, sl st back into base) to form tiny pointed edges. Join. (decorative only)
- Round 32: White: Finish with a neat sc round across all loops and spaces, spacing evenly; 3 sc in each corner to maintain shape. Join and fasten off. Weave in ends. (final outer band)
- If leaving squares unjoined for a future blanket, label them by round count so that later you can match them for consistent final layout. Block and press squares flat for easiest joining.
Decorative Border Options (Round choices 33-68)
- Option A: Simple Single-Round Border (Round 33): With marine blue, join in any side space, ch1, sc evenly around working 3 sc in each corner ch-2; join and fasten off. (clean minimal border)
- Option B: Raised Ridge Border (Rounds 33-36): Round 33: Marine blue: sc in each st and ch-sp, join. Round 34: ch2, hdc in each st around, join. Round 35: change to white, sc in each st FLO around; join. Round 36: change to marine, sc in each st BLO for a ridge, finish and fasten off.
- Raised ridge uses FLO/BLO to create texture. If making a blanket, do the same border sequence on each square before joining to create a consistent seam width.
- Option C: Scalloped Decorative Edge (Rounds 33-40): Round 33: Marine blue: *skip 1 st, dc 5 into next st, skip 1 st, sl st into next st; rep around for scallops. Round 34: white: sc across scallops for definition. Round 35: marine: small picot at each scallop point; finish. (multiple rounds create a pronounced scallop)
- Option D: Double Banded Edge (Rounds 33-44): Round 33-34: Marine blue two rounds sc then hdc; Round 35-36: white two rounds sc then hdc; Round 37-38: marine two rounds of sc with corners maintained; Round 39-44: alternate narrow bands to create thick framed edge — finishing with marine. (This option builds a chunky frame like the blanket shown in background photos)
- Choose one edge option for all squares in a multi-square project to keep seam widths consistent. For a blanket, Option D approximates the framed squares shown behind the main sample when repeated and joined.
Join-As-You-Go & Blanket Assembly (Rounds 69-100)
- Yardage Planning: Estimate number of squares by desired blanket dimensions. For example, a 5×6 layout of squares each 12 cm yields approximately 60×72 cm throw. Multiply yarn amounts per square by number of squares and add 10-15% for joining and border.
- Join Option 1: Seamless Slip-Stitch Join (Round 69): Work all motifs to your chosen outer round (e.g., Round 22). Join squares to each other by placing two squares right sides together and working slip stitches through both loops along the side: insert hook through both loops of corner, sl st, then sl st in each stitch along the side. Fasten off and weave. Repeat across blanket rows.
- When slip-stitch joining the seam will be fairly invisible from the front if you match colours and maintain consistent tension. Use marine for a framed look between white panels or white for softer joins.
- Join Option 2: Join-As-You-Go (JAYG) Method (Rounds 70-78): Round 70: Work final round on the square but on the sides that will be joined work JAYG: when you reach a corner, instead of ch2 and continuing, align the next finished square and sl st into the appropriate stitch of the adjacent square, then ch2 and continue your round. Repeat to join three sides of each new square into the blanket grid; leave one side open for finishing seams. This method joins squares without sewing later.
- Round 71: Continue JAYG on next squares. Keep counts consistent: when joining across a side, match cluster points and join into the chain-spaces to preserve the motif alignment. Finish and weave ends after completing a row of squares.
- JAYG requires attention to stitch placement — align the squares carefully and pin them together before attempting to join. Practice on two test squares first to get comfortable with matching clusters and spaces.
- Join Option 3: Mattress Stitch or Whip Stitch (Rounds 79-82): For a flatter seam, use a yarn needle and matching yarn to mattress-stitch through sides. Arrange squares with right sides up and whip or mattress stitch through the ridge between clusters; this produces a nearly invisible seam on one side and a neat finish on the other.
- Round 83: After joining all squares, work a unifying single-colour round of sc around the entire blanket edge in marine blue to frame the design. Work 3 sc in each seam corner and work evenly along edges to avoid ripples. Join and fasten off.
- Round 84: Optional: Add a wide border by working multiple rounds of hdc, sc, or 3-dc clusters around the entire blanket — alternate white and navy bands until desired width is reached. Typically 6-12 rounds create a substantial frame.
- The blanket pictured uses repeated framed squares with strong navy borders. To mimic that look, keep the outermost 3-4 rounds in marine blue and use a consistent stitch each round for a neat stacked border effect.
- Round 85: Edge Finishing Option: Decorative Rope Border: With marine, ch2 then 2 sc in each st around for two rounds to build thickness; finish with slip stitches into the back loops for a rolled rope look. Fasten off and weave ends.
- Round 86: Block the full blanket lightly to square up and settle stitches. Use pins on a blocking mat and mist with steam if yarn care permits. Allow to dry completely before use.
- When joining a large number of squares, assemble the blanket on a flat surface and check alignment frequently. Move joined rows around to ensure you haven't introduced twist or skew into the grid.
Final Edging & Finishing (Rounds 101-120)
- Round 101: Once assembly is complete, with marine blue join anywhere on the edge; ch1, sc evenly around the entire blanket using the back loops only to create a framed ridge. Work 3 sc in each corner. Join.
- Round 102: Ch1, sc in each BLO st around for a narrow ridge. Join and fasten off. Weave in all ends into the border for a neat finish.
- Round 103: Optional: Add a cable-look round by working front post hdc and back post hdc alternately around for 3-4 rounds to create dimension. Change colour every 2 rounds for banding if desired.
- Round 104: Decorative corner tassels or pom-poms: make 4 small tassels in marine blue and attach to each corner using a tapestry needle. Knot securely on the inside of the blanket.
- Round 105: Sew in all tails: with a yarn needle weave each tail through at least 5 cm of stitches, following the colour line where possible so they are hidden. Trim flush.
- If using cotton yarn for washcloths or scrubbies, consider adding a label or hanging loop: work 10 ch at a designated corner and attach to the back with a couple sc to create a hanging loop.
- Round 106: Optional: Surface crochet a small running stitch border in contrast colour to emphasize the square frames. Use a tapestry needle and single crochet stem stitches evenly around edges.
- Round 107: Final pressing and blocking: re-pin the whole blanket or single square onto a blocking board and lightly steam (as per yarn instructions) to set the stitches and even out the borders.
- Round 108: Quality check: inspect all joins for gaps, add a few invisible stitches where needed to flatten any puckered seams. Trim stray fibres and fluff the finished piece.
- Round 109: Care instructions: Machine wash gentle cycle with cold water for cotton; tumble dry low or lay flat to dry to avoid shrinking and preserve shape.
- Round 110: Optional: If making coasters or scrubbies, consider sewing a loop tag or attaching a small fabric label on one corner for gifting.
- Your project is now complete. This robust and repeatable construction allows you to create a modular blanket or a single elegant accent square. The numbered rounds above provide the structure and many optional finishing details so you can tailor the final look.
Assembly Instructions
- If making a multi-square blanket, block each square to the same size before joining so edges align perfectly for seaming
- Attach squares using join-as-you-go by aligning two squares right sides together and slip-stitching through both loops along the side; match cluster tops and chain spaces carefully
- For slip-stitch or mattress stitch joins, pin squares into the final layout on a flat surface, then seam row-by-row to avoid shifting
- Sew any corners or tassels at the end: attach corner tassels using a yarn tail and knot securely inside the blanket so the knot is hidden
- After joining rows, work a unified border round in marine blue around the entire blanket to tidy edges and hide seams
- Securely weave in all ends using a tapestry needle, following the colour path of stitches to hide tails and avoid bulk
- If making coasters or scrubbies, fold and topstitch any hanging loop into a corner using a few secure whip stitches
- For extra durability on washcloths, reinforce joins with an additional sc round through both loops on the seam side
Common Mistakes & How to Fix Them
- Skipping stitch markers at round starts can cause misaligned corners and inconsistent spacing; always mark the beginning of rounds
- Not changing colour cleanly leaves tails and sloppy joins; carry yarn neatly and weave in ends between rounds
- Using a hook too large for cotton makes the square floppy; use recommended hook sizes for a firm finish
- Forgetting corner chain-2 spaces will distort the square shape; place the corner clusters evenly and count spaces
- Working clusters into the wrong space produces uneven sides; identify chain spaces and cluster tops before inserting hook
- Trying to stretch the square when joining causes distortion; block lightly instead and seam gently when joining motifs
Important Notes
- Use stitch markers consistently at the beginning of each round to avoid counting errors and maintain proper shaping
- Maintain consistent tension throughout the project; too tight creates stiff, small pieces, too loose creates floppy, holey fabric
- When sewing pieces together, use yarn slightly thinner than working yarn for neater, less visible seams
- Pin all pieces in position before final sewing to ensure proper placement and symmetry
- For amigurumi, work tightly enough that stuffing doesn't show through stitches
- Keep a row counter or notepad to track rounds, especially in long even-stitch sections
This classic navy and white granny square is a delightful combination of simple technique and striking contrast. Each square grows from a floral centre into a crisp framed tile that looks beautiful as a coaster or repeated across a blanket. The two-colour palette and layered clusters give a handmade piece a modern, tailored look. Enjoy stitching, framing, and sharing your cozy creation! 🧶💙
Crochet Abbreviations
- mr
- magic ring
- ch
- chain
- sc
- single crochet
- hdc
- half double crochet
- dc
- double crochet
- tr
- treble crochet
- cl
- cluster (3 dc cluster unless otherwise noted)
- 3-dc cl
- 3 double crochet cluster (work 3 dc into same space or top of designated stitch)
- inc
- increase (2 clusters or 2 sc into same st as directed)
- dec
- decrease (in cluster contexts use 2 clusters joined or designated decrease method)
- sl st
- slip stitch
- BLO
- back loops only
- FLO
- front loops only
- sp
- space
- st(s)
- stitch(es)
- ( )
- work instructions in brackets as directed
- rep
- repeat
- x
- times
You Ask, We Answer
What is the finished size of this square?
With worsted cotton and a 3.5mm hook this single square measures approximately 12-14 cm (4.5-5.5 in). Gauge will vary with yarn and hook size.
Can I use different yarn weights for this pattern?
Yes! Using thicker yarn and a larger hook will create a bigger, chunkier square; thinner yarn will create a smaller, more delicate square. Adjust border rounds for consistent sizing across motifs.
Do I need to change colours every round?
No — colour changes are optional. The pictured effect alternates navy and white to emphasize bands, but you can work multiple rounds in one colour then switch when you prefer a different look.
Can I make the squares washable?
Yes. Use washable cotton yarn and follow care instructions. Most cotton yarns can be machine washed on a gentle cycle and laid flat to dry; check the yarn label.
How do I join squares for a blanket?
You can join squares using slip-stitch seams, join-as-you-go (JAYG) while working the final round, or mattress stitch with a yarn needle. Each gives a different visible finish — choose based on desired look and durability.
How much yarn will I need for a full blanket?
A 5×6 layout of 30 squares (12-14 cm each) typically needs approximately 1200-1600 g total yarn for worsted cotton; calculate per-square yarn and multiply by the number of squares then add 10-15% for borders and joining.
What if my squares are not the same size?
Block each square to consistent dimensions and if necessary work extra rounds on smaller squares to match the larger ones. Keeping tension and hook size uniform across all squares helps prevent mismatched sizes.
Can I make this into a coaster or scrubby?
Absolutely. Use thicker cotton or multiple yarn strands held together and add extra rounds for thickness. You can also make a double-layer scrubby by making two squares and sewing them together around the edge.